Tools
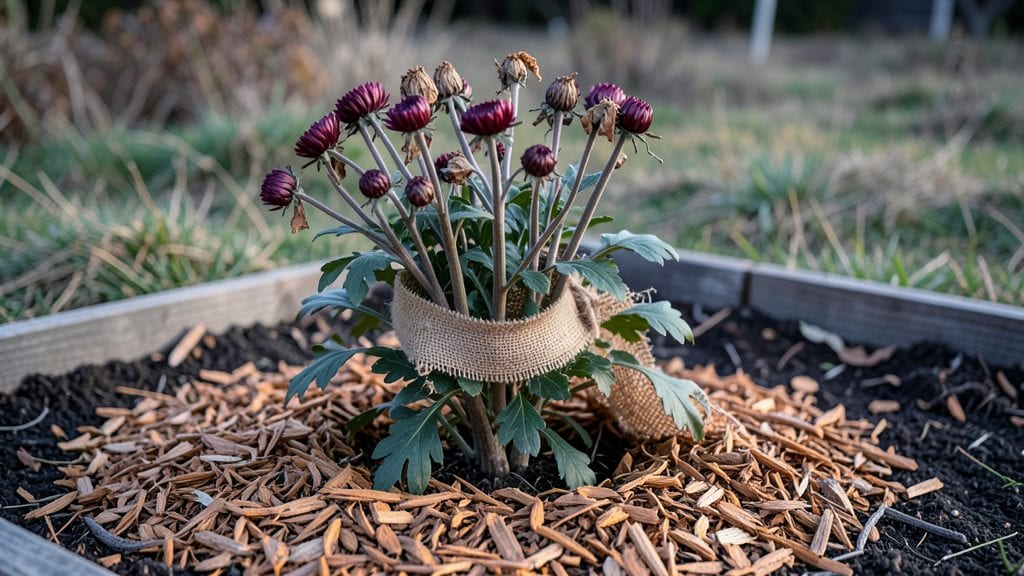
Overwintering garden mums means saving those vibrant blooms for another stunning show next year—something I learned after losing my first batch to a harsh winter. The key lies in timing and technique, not expensive supplies.
Most gardeners cut back too early or mulch too late, but the right approach keeps those hardy plants thriving through frost and snow.
Start in late fall, after the first hard freeze but before the ground freezes solid. Cut back faded blooms to about 2 inches above the ground, leaving the sturdy stems intact. This protects the crown from winter damage while allowing snow to insulate the roots naturally.
For extra protection in colder zones, add a thick layer of mulch—straw or shredded leaves work best—around the base after the ground freezes.
By spring, you’ll see fresh green growth emerging from the protected crown, signaling success. The mums will rebound faster and bloom even more prolifically than before, with fewer pests and stronger stems. Even in mild climates, this method ensures your plants return year after year without the need for replanting.
Regional adjustments matter: In Zone 5 or colder, add a burlap wrap around the mulch for extra insulation, while Zone 7 gardeners can rely on mulch alone. The goal is to mimic the natural winter dormancy these plants evolved for—simple, effective, and foolproof once you get the timing right.
📚 In This Guide
- What you need
- Instructions
- Tips and common mistakes
- Wrapping up and next steps
What you need
- ● Garden mums (Chrysanthemums) – Healthy, well-established plants (at least 12–18 inches tall) with strong stems and buds.
- ● Garden gloves – A pair of durable, cut-resistant gloves (e.g., leather or heavy-duty fabric) to protect your hands.
- ● Pruning shears or sharp bypass pruners – Clean, sharp tools (sterilize with rubbing alcohol) to trim back foliage.
- ● Organic mulch – 3–4 inches of straw, shredded leaves, or pine needles (avoid fresh wood chips—they can compact and suffocate roots).
- ● Burlap or frost cloth – A lightweight, breathable cover (4’x6’ or larger) to shield plants from harsh winds and frost.
- ● Stakes or small hoops – Flexible wire or wooden stakes (6–12 inches tall) to create a frame for frost cloth if needed.
- ● Watering can or hose with a gentle nozzle – For deep but infrequent watering (avoid soggy soil).
- ○ Garden twine or clips – To secure frost cloth in place (optional but helpful!).
- ● Slow-release fertilizer – A balanced 10-10-10 or low-nitrogen option (sprinkle lightly in early spring).
- ● Plant labels – To track varieties if you’re experimenting with different mums.
- ● Soil moisture meter – To check if roots need hydration (especially in dry winters).
- ● Compost or worm castings – A handful mixed into soil in spring to boost nutrients.
- ● Decorative rocks or edging – To keep mulch in place and add a polished look.
Step-by-Step guide for overwintering garden mums
Here’s how to protect your mums through winter and give them the best chance to bloom again next year.
Prepare Mums for Dormancy in Early Fall
Once your garden mums finish blooming in late summer or early fall, cut back the flower stems by about one-third using clean, sharp pruners. This prevents the plant from wasting energy producing seeds and redirects it toward root and stem growth instead. I like to do this around mid-September, just as the flowers begin to fade naturally.
After pruning, fertilize lightly with a balanced, slow-release fertilizer (like 10-10-10) to strengthen the roots before winter sets in. Water deeply afterward to help the fertilizer absorb into the soil. Avoid heavy feeding later in the season—it encourages tender new growth that won’t survive frost.
Mulch Heavily to Insulate Roots
Once temperatures drop below 40°F at night, cover the base of each mum plant with a 4-6 inch layer of mulch. I use shredded leaves or straw because they break down slowly and provide long-lasting insulation. Avoid fresh grass clippings—they can mat down and trap too much moisture, leading to rot.
Spread the mulch evenly over the root zone, leaving about 2 inches of space between the mulch and the plant stems. This prevents the mulch from touching the stems, which could cause moisture buildup and disease. Check the mulch monthly during winter to ensure it hasn’t settled or compacted—fluff it up if needed to maintain insulation.
Protect Plants from Harsh Winter Conditions
If your mums are in a particularly exposed or cold area, add an extra layer of protection by wrapping the plants in burlap or frost cloth after the first hard freeze. Secure the fabric loosely around the stems with twine or stakes, leaving the top open to allow some airflow. This keeps the plants from drying out while shielding them from wind and frost.
For container-grown mums, move them to a sheltered location like a garage or under an overhang before temperatures drop below 20°F. If you can’t move them, bury the pots in 6-12 inches of soil or mulch to insulate the roots. Water the containers lightly before covering to prevent drying out during winter.
Monitor and Adjust Through Winter
Check your mums occasionally during winter to ensure the mulch hasn’t shifted or become waterlogged. If snow accumulates, gently brush it off the stems to prevent damage, but leave it around the base for added insulation. Avoid disturbing the plants unless necessary—cold stress can weaken them.
In late winter or early spring, as temperatures begin to rise above 40°F, remove the frost cloth or burlap and trim back any dead or damaged stems. Wait until after the last frost date in your area before cutting back the remaining stems to encourage new growth. This timing ensures the plants aren’t shocked by late-season cold snaps.
Revive and Encourage New Growth in Spring
Once the danger of frost has passed, remove the mulch from around the base of the plants. This allows the soil to warm up and signals the mums to start growing again. Water lightly to rehydrate the roots, then apply a low-nitrogen fertilizer (like 5-10-10) to promote strong root development before new shoots appear.
You’ll see new growth within 2-3 weeks—watch for fresh green leaves emerging from the base of the plant. This is your cue that the mums are recovering. Continue watering deeply but avoid overwatering, as soggy soil can lead to rot. By mid-spring, your mums should be ready to thrive and bloom again next season.
Tips & tricks for perfect overwintering garden mums
These practical insights will help you maximize your garden mums' survival through winter and ensure vibrant blooms next season.
Timing is Everything: The mid-September pruning in Step 1 is critical—don't wait until the flowers are completely dead. Cutting back when they begin to fade naturally (about one-third of the stems) gives the plant enough time to redirect energy to roots before winter. I've seen mums that were pruned too late struggle to recover, so mark your calendar now!
Mulch Selection Matters: In Step 2, when applying that 4-6 inch layer of mulch, prioritize shredded leaves or straw over other options. These materials break down slowly, providing consistent insulation. I learned this the hard way after using pine needles that compacted too quickly, leaving roots exposed to cold snaps. Also, keep that 2-inch gap between mulch and stems—it prevents moisture buildup that can cause rot.
Winter Protection Strategy: For container mums in Step 3, consider adding a layer of bubble wrap around the pots before burying them. This extra insulation can make all the difference when temperatures drop below 20°F. I've had containers survive -10°F nights with this extra protection, while unprotected ones showed frost damage. Just remember to remove the bubble wrap in spring before new growth appears.
Spring Revival Timing: That 2-3 week window for new growth in Step 5 is your best indicator of success. If you don't see fresh leaves emerging within this timeframe, check for signs of rot or pest damage. I've found that plants that show growth within 2 weeks typically have stronger root systems and bloom more vigorously the following year.
Pro Tips for Overwintering Garden Mums
- These practical insights will help you maximize your garden mums' survival through winter and ensure vibrant blooms n...
- Timing is Everything: The mid-September pruning in Step 1 is critical—don't wait until the flowers are completely dea...
- Mulch Selection Matters: In Step 2, when applying that 4-6 inch layer of mulch, prioritize shredded leaves or straw o...
Frequently asked questions
Got questions about keeping your garden mums thriving through winter?
Here are some of the most common concerns—plus straightforward answers to help you overwinter like a pro!
When is the best time to start overwintering garden mums?
Start preparing your mums for winter after the first hard frost (typically late fall, when temperatures drop below 25°F). Cut back faded blooms and foliage to 2–3 inches above the ground, then mulch heavily. If you’re digging up and storing them, do so before the ground freezes—usually in early to mid-November, depending on your climate.
Can I leave garden mums in the ground over winter, or do I need to dig them up?
It depends! In USDA Zones 7 and warmer, mums often survive winter in the ground if you cut back foliage, mulch heavily (4–6 inches), and protect them with burlap or frost cloth. In colder zones (6 or below), dig up tubers, trim roots, and store them in a cool, dry place (like a garage) until spring.
How do I protect mums from heavy snow or ice damage?
Snow isn’t usually harmful, but ice buildup or compacted snow can smother plants. Gently brush off excess snow with a broom. For added protection, wrap the crowns in burlap or straw and secure with twine. Avoid heavy mulch piles that could trap moisture—aim for 2–3 inches of straw or leaves instead.
What should I do if my mums look dead in spring?
Don’t panic! Mums often appear dormant in early spring but are alive beneath the soil. Wait until late April or early May (when nighttime temps stay above 40°F) to check for signs of regrowth. If you see green shoots or buds, trim back dead foliage and fertilize lightly. If nothing emerges after 2–3 weeks, the plant may not have survived—but give it time!
Are there any low-maintenance alternatives to traditional garden mums for cold climates?
Yes! Try hardy perennials like coneflowers, black-eyed Susans, or Russian sage—they thrive in cold winters with minimal care. For mums specifically, opt for ‘Autumn Joy’ or ‘Puppy Series’ varieties, bred for better cold tolerance. If overwintering feels like too much work, consider annual mums (plant new ones each spring) for reliable color without the hassle.
Wrapping up and next steps
Overwintering garden mums is all about giving your plants the love and care they deserve—so they can thrive and reward you with vibrant blooms year after year! 🌸 With the right prep, protection, and a little patience, you’ll be amazed at how resilient these beauties can be.
Now that you’re armed with the know-how, it’s time to roll up your sleeves and put your plan into action.
Ready to see your mums bounce back stronger than ever? Start by choosing a sunny spot and watch them flourish in no time! 🌿