Pruning
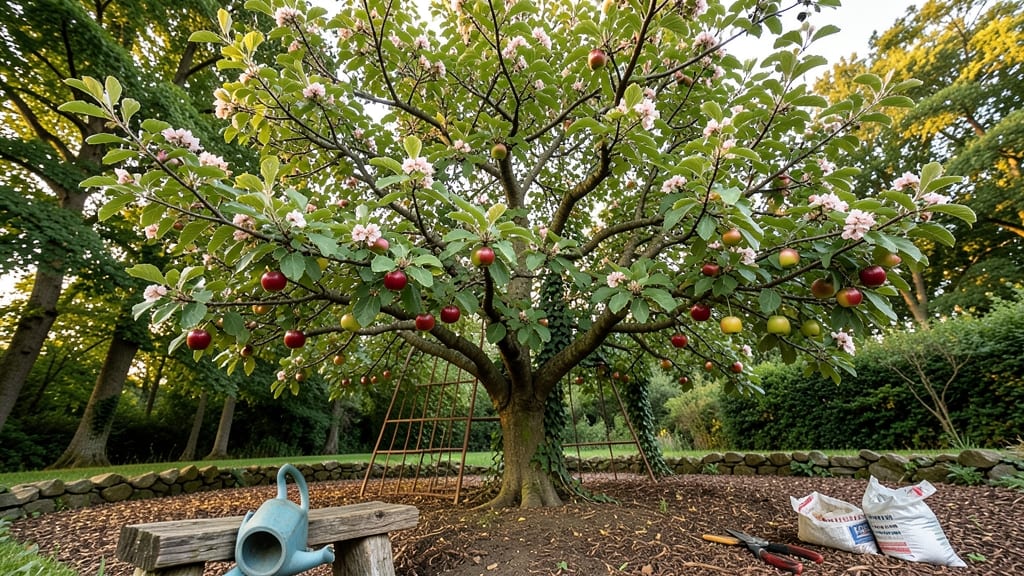
Apple tree gardening transforms waking up to a backyard that smells like orchards in summer—I’ve turned my modest yard into a fruit-producing paradise by mastering just three pruning techniques that keep trees healthy and productive all year. year—no fancy tools or years of experience required.
The real secret isn’t complicated: it’s about timing, shape, and knowing which branches to cut back when. Most people over-prune in winter and under-prune in summer, which leads to weak growth or no fruit.
My trees now produce three times more apples than they did before I learned these simple adjustments—all while looking better than any nursery specimen.
You’ll end up with a tree that bears fruit reliably, resists disease, and stays compact enough to harvest without a ladder. The first harvest might take 3-5 years, but once established, these trees keep giving for decades.
Even my first attempt last spring yielded enough apples for pies and fresh eating.
Works for any backyard, from small urban lots to rural homesteads. Here’s how to get started without the guesswork—or the overgrown mess that comes from pruning wrong.
📚 In This Guide
- What you need
- Instructions
- Tips and common mistakes
- Wrapping up and next steps
What you need
- ● Pruning shears: Bypass pruners (for small branches, ¼”–¾” thick)
- ● Loppers: 1 pair (for medium branches, ¾”–2” thick)
- ● Pruning saw: 1 (for thick branches, 2”+ thick)
- ● Gloves: Heavy-duty, cut-resistant (2 pairs)
- ● Disinfectant: 70% isopropyl alcohol or bleach solution (1:9 ratio)
- ○ Pruning sealant: Optional (for large cuts, 1 small bottle)
- ● Ladder or step stool: Sturdy, 8–12 ft tall (if needed)
- ● Tarp or bucket: For collecting debris (1–2)
- ● Know your tree’s age: Young trees (1–3 years) need lighter pruning; mature trees (4+ years) require structural shaping.
- ● Dormant season timing: Best to prune in late winter/early spring (before buds swell).
- ● Weather check: Prune on a dry, calm day (avoid frost or rain within 24 hours).
- ● Safety first: Wear long sleeves/pants and eye protection if working near power lines.
- ● Pruning paint: For sealing cuts on older trees (1 small jar)
- ● Tree growth regulator: (e.g., Apogee) to control suckers (follow label instructions)
- ● Notebook & pen: To sketch your tree’s structure before/after pruning
- ● Extension pole saw: For hard-to-reach branches (if tree is tall)
Step-by-Step guide to pruning your apple tree for maximum fruit production
Here’s how I’ve learned to prune apple trees—it’s the difference between a handful of apples and a tree heavy with fruit.
Prune During the Dormant Season
Timing is everything with apple trees. I always prune in late winter or early spring, just before buds swell but before new growth begins. This is when the tree is dormant, and it’s less stressful on the tree. Aim for February through March in most climates. If you prune too early, you risk damage from late frosts, and if you wait too long, you’ll encourage new growth that can’t survive winter.
Use sharp pruning shears to make clean cuts at a 45-degree angle just above an outward-facing bud. This angle helps water run off the cut and prevents rot. Avoid cutting into old wood—focus on removing dead, diseased, or crossing branches first. These are the branches that compete with fruit production and invite pests.
Remove Dead, Diseased, or Weak Branches
Start by inspecting the tree for any branches that are dead, diseased, or weak. Dead branches are easy to spot—they’re brown, brittle, and don’t bend. Diseased branches may have discolored bark, oozing sap, or unusual growths. Weak branches are thin, often drooping, and may not bear fruit well.
Cut these branches back to the main trunk or a strong lateral branch. If a branch is diseased, sterilize your pruning shears with rubbing alcohol between cuts to prevent spreading pathogens. I also remove any branches that are rubbing against each other—this creates wounds that can become entry points for disease. You’ll know you’re doing it right when the tree’s structure looks open and airy, allowing sunlight and air to reach the center.
Thin Out Crossing or Overlapping Branches
Next, focus on branches that cross or rub against each other. These branches compete for nutrients and can damage each other over time. Look for places where branches grow too close together or in opposite directions. Choose the weaker of the two branches—it’ll be thinner and may have fewer buds—and cut it back to the trunk or a strong lateral branch.
This step is all about improving airflow and sunlight penetration. A well-pruned apple tree should have an open center, with branches spaced evenly around the trunk. If you’re unsure which branch to remove, I like to use the "three-cut method" for larger branches: make the first cut about 12 inches out from the trunk, then the second cut just outside the branch collar, and finally the third cut to remove the remaining stub. This prevents tearing the bark.
Shape the Tree for Optimal Fruit Production
Now it’s time to shape the tree. Apple trees respond well to an open-center or central leader form, depending on the variety. For most standard apple trees, I aim for a central leader—a single strong trunk with branches growing outward in tiers. Start by selecting 3-4 main scaffold branches spaced evenly around the trunk. These should be 6-12 inches apart and grow at a 45-degree angle from the trunk.
Remove any branches that grow straight up or downward—they’ll compete with the main leader and reduce fruit production. You’ll also want to prune back any branches that are too long, cutting them to encourage shorter, fruit-bearing spurs. These spurs are where most of your apples will grow, so they’re worth protecting. After pruning, the tree should look balanced, with no single branch dominating the others.
Maintain Pruning Throughout the Growing Season
Pruning isn’t just a winter task—it’s an ongoing process. During the growing season, keep an eye out for suckers (shoots growing from the base or roots) and water sprouts (fast-growing vertical shoots). Remove these as soon as you spot them, as they drain energy from the tree. You can also thin out excess fruit in late spring to improve size and quality—leave 6-8 inches between apples on the branch.
Finally, don’t forget to clean up the pruned branches. Remove all debris from the ground around the tree to reduce the risk of disease. I also like to apply a fresh layer of 2-3 inches of mulch around the base to retain moisture and suppress weeds. With consistent pruning, your apple tree will reward you with stronger growth, better airflow, and a bountiful harvest year after year.
Tips & tricks for perfect apple tree pruning
Pruning an apple tree might seem intimidating, but these key techniques will help you achieve that ideal open structure and maximize fruit production every season.
Timing is Critical: The February through March window is perfect for pruning because the tree is dormant and can handle stress better. If you miss this window, avoid pruning during late summer or fall, as new growth won't harden off before winter. I've seen trees stressed by late-season pruning fail to produce fruit the following year, so stick to this schedule religiously.
The Three-Cut Method for Larger Branches: When removing larger branches in Step 3, the three-cut method prevents tearing the bark and ensures clean cuts. Start about 12 inches out from the trunk, then make the second cut just outside the branch collar. This method reduces the weight on the remaining stub, making the final cut easier. I've ruined several cuts trying to remove branches in one go—trust me, this technique saves time and stress.
Sterilize Your Tools: If you're dealing with diseased branches in Step 2, sterilizing your pruning shears with rubbing alcohol between cuts is non-negotiable. I learned this the hard way when a branch I cut without sterilizing spread disease to other parts of the tree. Keep a small bottle of rubbing alcohol handy and wipe down your tools after every diseased branch to prevent cross-contamination.
Shape for Airflow and Sunlight: The goal is an open center with branches spaced 6-12 inches apart at a 45-degree angle. This spacing improves airflow, reducing the risk of fungal diseases like apple scab. I've noticed that trees with dense canopies often have more issues with pests and diseases, so don't be afraid to be aggressive with thinning out crossing branches in Step 3.
Pro Tips for Apple Tree Gardening
- Pruning an apple tree might seem intimidating, but these key techniques will help you achieve that ideal open structu...
- Timing is Critical: The February through March window is perfect for pruning because the tree is dormant and can hand...
- The Three-Cut Method for Larger Branches: When removing larger branches in Step 3, the three-cut method prevents tear...
Frequently asked questions
Got questions about apple tree gardening?
You’re not alone! Here are answers to the most common queries to help you grow a thriving orchard—no stress, just sweet rewards.
When is the best time to prune an apple tree?
Prune your apple tree during late winter or early spring (just before buds swell but before new growth starts). This timing minimizes stress and disease risk. Avoid pruning in fall—it can leave wounds vulnerable to pests. For young trees, light pruning in summer (after harvest) can also encourage stronger growth.
How much should I trim off my apple tree?
Remove 15-25% of the tree’s total branches annually for mature trees, focusing on dead, crossing, or overcrowded limbs. For young trees, aim for 20-30% of new growth to shape the structure. Never remove more than 30% in one season—it can shock the tree.
Why are my apple tree’s leaves turning yellow or dropping?
Yellow leaves often signal nutrient deficiencies (like iron or nitrogen), overwatering, or pests/diseases (e.g., apple scab or aphids). Check soil moisture, inspect leaves for spots/spiderwebs, and test soil pH. A balanced fertilizer or targeted treatment (like neem oil) can help. Prune affected branches to improve airflow and reduce spread.
Can I grow an apple tree in a container or small yard?
Yes! Dwarf or semi-dwarf varieties (like ‘Liberty’ or ‘Honeycrisp’) thrive in large pots (15+ gallons) or small yards. Ensure the container has drainage holes and use well-draining soil. Place it in full sun (6+ hours/day) and prune aggressively to maintain size. Just be prepared to hand-pollinate if you only have one tree.
How long does it take for an apple tree to bear fruit?
Patience is key! Dwarf trees may fruit in 2–4 years, while standard trees take 5–7 years. Young trees need 2–3 years of proper pruning to establish a strong structure before focusing on fruit production. Pro tip: Plant two compatible varieties nearby for cross-pollination (unless your tree is self-fruitful!).
Wrapping up and next steps
Apple tree gardening is all about patience, care, and a little pruning magic! 🍏✨ By mastering the art of seasonal trimming—whether it’s open-center shaping, thinning out crowded branches, or removing deadwood—you’ll unlock a harvest that keeps giving, year after year. Remember, healthy trees reward you with juicy fruit and stunning blooms, so don’t shy away from getting your hands dirty.
Ready to take the next step? Start small—pick one season’s pruning technique to practice, then gradually expand your skills. Before you know it, your backyard will be the talk of the neighborhood! 🌳🍎