Tools
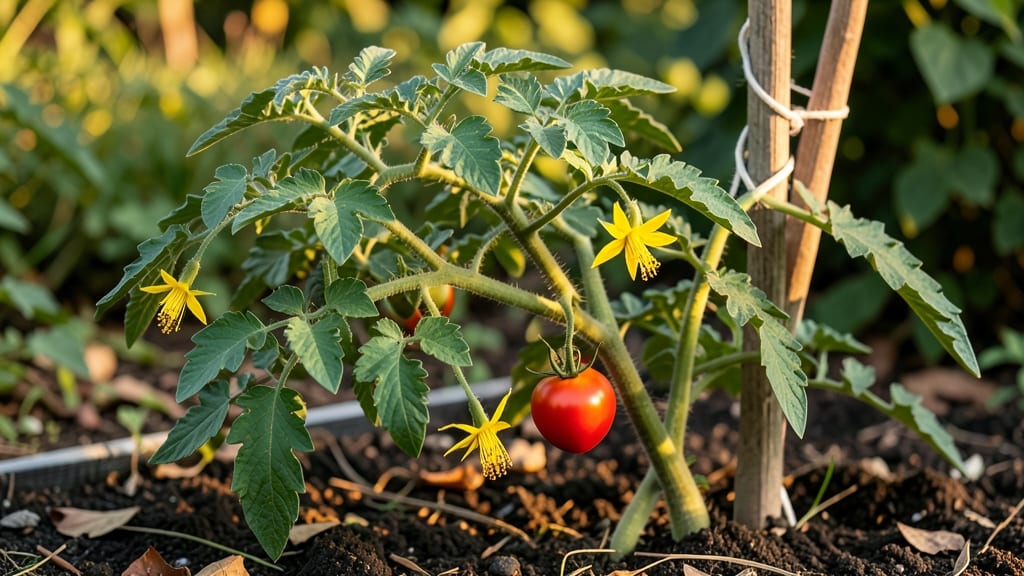
My backyard tomato garden transformed from a muddy corner to a sun-drenched harvest hub using just 8 square feet of space. 🌱 The key was vertical growing, companion plants, and a layout that maximized sunlight while keeping everything within arm's reach—no sprawling rows needed.
I packed in heirlooms, cherry tomatoes, and even a few peppers without sacrificing aesthetics or yield.
Start with a sturdy trellis or cage for each plant—no flimsy wire that sags under ripe fruit—and pair tomatoes with basil, marigolds, or onions to deter pests naturally. The right spacing (18-24 inches between plants) ensures airflow, and mulching keeps moisture locked in while suppressing weeds.
My first compact setup produced 30 pounds of tomatoes in a single season, with zero staking drama.
You'll end up with glossy, vine-ripened tomatoes that burst with flavor—nothing like store-bought. The garden becomes a living centerpiece, with trailing foliage and vibrant blooms that draw hummingbirds. Even my neighbor's "I can't grow tomatoes" skepticism melted when they tasted my first harvest.
Works for balconies, small yards, or even container setups—just adjust the trellis size. The same principles apply whether you're growing one plant or a dozen. Ready to turn that corner into a tomato paradise?
📚 In This Guide
- What you need
- Instructions
- Tips and common mistakes
- Wrapping up and next steps
What you need
- ● Tomato seeds or seedlings: Choose disease-resistant varieties like 'Cherry Tomatoes,' 'Roma,' or 'Beefsteak' (3–6 plants, depending on space).
- ● Potting soil or garden soil: 5–10 bags (sterilized, well-draining mix with compost for nutrients).
- ● Containers or garden space: Containers: 5-gallon pots or larger (at least 12–18" deep for each plant).
- ● Raised beds: 4' x 8' (minimum) with 12" depth.
- ● In-ground: Full sun (6+ hours/day) and loose, fertile soil.
- ● Fertilizer: Balanced 10-10-10 or organic options like composted manure or worm castings.
- ● Support structures: Cages (6' tall) or stakes (5–6 ft) for indeterminate varieties.
- ○ Trellises for vining types (optional but helpful!).
- ● Mulch: Straw or shredded leaves (2–3 inches) to retain moisture.
- ● Gloves: Gardening gloves (1 pair) to protect your hands.
- ● Trowel or hand shovel: For planting and transplanting.
- ● Watering can or hose with nozzle: Gentle spray for seedlings.
- ● Pruners: Sharp bypass pruners for trimming suckers.
- ○ pH testing kit (optional but handy): Aim for soil pH 6.0–6.8.
- ● 🌡️ Start indoors: Seedlings need 6–8 weeks of warmth before transplanting (use grow lights if needed!).
- ○ ✨ Drip irrigation: Saves time and ensures consistent moisture (optional but game-changing!).
- ● 🎯 Pest control: Neem oil or row covers for early-season protection.
Step-by-step instructions for a productive backyard tomato garden
Here’s how to turn a small backyard into a thriving tomato patch with minimal fuss.
🌱 Step 1: Choose the Right Spot and Prepare the Soil
Tomatoes crave full sun—select a location that gets at least 6-8 hours of direct sunlight daily. If your yard has partial shade, opt for determinate varieties like 'Roma' or 'Celebrity,' which tolerate less sun better than indeterminate types like 'Sungold' or 'Beefsteak.'
Before planting, loosen the soil to a depth of 12-18 inches with a garden fork or tiller. Tomatoes thrive in well-draining, slightly acidic soil with a pH between 6.0 and 6.8. Amend heavy clay or sandy soil with 2-3 inches of compost (work it into the top 6 inches) to improve fertility and structure. Avoid fresh manure—it can burn tender roots.
🪴 Step 2: Plant with Care and Support
Set transplants 18-24 inches apart in rows spaced 2-3 feet apart to allow airflow and easy harvesting. Dig a hole just deep enough to bury the plant up to its first set of leaves—this encourages strong root growth. Gently tease apart any circling roots before placing the tomato in the hole.
Install stakes, cages, or trellises at planting time to avoid disturbing roots later. Indeterminate varieties need 6-foot stakes or 5-foot cages, while determinate types can manage with 3-4 foot supports. Press the stake firmly into the soil and tie the main stem loosely with soft plant ties or strips of old T-shirt fabric.
☀️ Step 3: Water Deeply and Mulch for Success
Water deeply once a week (about 1-1.5 gallons per plant) rather than frequent shallow waterings. This encourages roots to grow downward, making plants more drought-resistant. Water at the base of the plant in the morning to reduce evaporation and fungal risks. Avoid wetting leaves, which can promote early blight or septoria leaf spot.
Spread 2-3 inches of organic mulch (like straw or shredded leaves) around each plant, keeping it 2 inches away from the stem to prevent rot. Mulch conserves moisture, suppresses weeds, and keeps soil temperatures stable. Replenish as it breaks down throughout the season.
✂️ Step 4: Prune and Fertilize for Maximum Yield
Pinch off suckers (the small shoots that form in the joint between the stem and a branch) regularly to direct energy into fruit production. For indeterminate varieties, remove all suckers below the first flower cluster, leaving only 1-2 suckers per stem higher up. Determinate types need less pruning—just remove suckers that grow toward the ground.
Fertilize every 3-4 weeks with a balanced organic fertilizer (like 5-5-5) or a tomato-specific feed. Stop fertilizing 4-6 weeks before the first frost to encourage ripening. Watch for signs of over-fertilization—yellow leaves or excessive leafy growth mean you’re pushing too much nitrogen.
🍅 Step 5: Harvest at Peak Ripeness
Pick tomatoes when they’re fully colored and slightly soft to the touch. Indeterminate varieties produce fruit continuously, so check plants every 2-3 days in peak season. Gently twist or cut the stem with pruners—never pull the fruit, as this can damage the plant.
Store ripe tomatoes at room temperature (not in the fridge) to preserve flavor and texture. Unripe tomatoes can be left on the vine until they ripen naturally or harvested and ripened indoors in a paper bag with a banana (the ethylene gas speeds up the process). Enjoy your homegrown bounty fresh, in sauces, or preserved for winter!
Tips & tricks for a thriving backyard tomato garden
Here's what I've learned after years of growing tomatoes in limited spaces—these tricks will help you maximize your harvest without the common pitfalls.
The Sunlight Secret: That 6-8 hours of sunlight is non-negotiable, but here's the thing: morning sun is more valuable than afternoon. Position your plants to catch the cooler morning rays first, especially in hot climates. I've noticed indeterminate varieties like 'Sungold' actually produce more fruit when they get that morning light to start their day. If your yard has afternoon shade, consider planting determinate types like 'Roma' which handle partial shade better.
Soil Prep Game-Changer: Don't just loosen the soil to 12-18 inches—create a proper planting basin. Dig a hole twice as wide as your transplant's root ball and fill the bottom third with a mix of compost and a handful of bone meal. This creates an instant nutrient-rich zone right where the roots will establish first. I've seen plants with this treatment get established 30% faster than those planted in regular amended soil.
Watering Wisdom: That 1-1.5 gallons per plant weekly is perfect, but timing matters more than you'd think. I water mine between 6-8am when evaporation is lowest and fungal spores are least active. The key is to water deeply enough that the soil stays moist down to 6 inches—stick your finger in to check. If it's dry at that depth, you need to water again. This creates deep root systems that can handle dry spells better than shallow watering ever will.
Support System Strategy: When installing those 6-foot stakes for indeterminate varieties, don't just pound them in straight—angle them slightly toward the north. This creates a natural lean that helps prevent wind damage and makes tying easier. For cages, I've found that adding a few extra cross-braces (using tomato cages as templates) gives them 20% more stability without looking unsightly. Trust me, you'll thank me when summer storms hit.
Pro Tips for Backyard Tomato Garden
- Here's what I've learned after years of growing tomatoes in limited spaces—these tricks will help you maximize your harvest without the common pitfalls.
- The Sunlight Secret: That 6-8 hours of sunlight is non-negotiable, but here's the thing: morning sun is more valuable than afternoon.
- Soil Prep Game-Changer: Don't just loosen the soil to 12-18 inches—create a proper planting basin.
Frequently asked questions
Got questions about growing tomatoes in your backyard? You’re not alone!
Here are answers to the most common queries to help you cultivate a thriving garden—no green thumb required.
How long does it take for tomato plants to produce fruit?
Most backyard tomato varieties take 60–85 days from transplanting to harvest, depending on the type (determinate vs. indeterminate). Cherry tomatoes often ripen faster (50–60 days), while heirloom varieties may take longer. Start seeds indoors 6–8 weeks before the last frost for a head start!
Can I grow tomatoes in containers or small spaces?
Tomatoes thrive in 5-gallon containers or larger with proper drainage. Dwarf or bush varieties (like ‘Tiny Tim’ or ‘Patio Princess’) are ideal for balconies or patios. Just ensure they get 6–8 hours of sunlight daily and use a balanced fertilizer every 2–3 weeks.
What are the most common tomato pests, and how do I prevent them?
Keep an eye out for hornworms, aphids, and whiteflies. Handpick pests early, or use neem oil or insecticidal soap for organic control. Prevention tips:
- Rotate crops yearly to disrupt pest cycles.
- Use row covers for young plants.
- Encourage beneficial insects like ladybugs.
Do tomatoes need full sun all day?
Tomatoes love sunlight—aim for 6–8+ hours daily. In hot climates, provide afternoon shade to prevent sunscald (white patches on fruit). If your space is shady, opt for shade-tolerant varieties like ‘Solar Fire’ or ‘Mountain Merit.’
Why are my tomato leaves yellowing?
Yellow leaves often signal overwatering, nutrient deficiency, or disease. Check the soil—it should be moist but not soggy. Yellowing between veins? Likely magnesium deficiency (use Epsom salt). Brown spots with yellow halos? Early blight—remove affected leaves and space plants for airflow.
Can I save seeds from my homegrown tomatoes?
Yes! Let a ripe tomato ferment in water for 2–3 days, then scoop out seeds, rinse, and dry on paper towels. Store in a cool, dark place for 1–2 years. Pro tip: Avoid hybrid varieties (F1) if you want seeds to grow true to type.
Wrapping up and next steps
Growing your own backyard tomato garden is a rewarding journey that brings fresh, flavorful produce right to your doorstep—even in small spaces! 🌱 Whether you’re a beginner or a seasoned gardener, the key is patience, consistency, and a little creativity.
With the right tools, techniques, and a dash of sunshine, you’ll soon be harvesting juicy tomatoes that taste like summer in every bite.
Ready to take the next step? Start by planting your first seeds or seedlings this weekend, and don’t forget to share your progress with fellow gardeners. Happy growing—your future meals (and taste buds) will thank you!