Tools
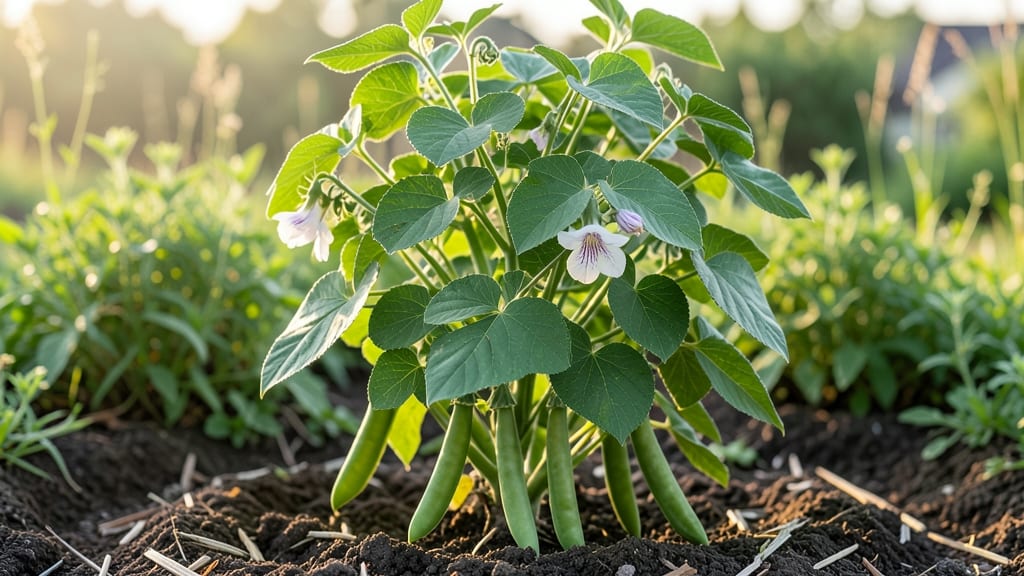
Burpee Garden Beans grow faster and sweeter than anything from the store—when you plant them right. 🌱 I learned the hard way that treating pole and bush beans the same way leads to tangled vines, stunted growth, and a harvest that never quite lives up to the promise.
The secret lies in matching each variety to its ideal growing conditions, from soil prep to sunlight.
Pole beans need sturdy trellises or poles to climb, while bush beans thrive in neat, compact rows. Both varieties demand well-draining soil rich in compost, but pole beans reward you with longer harvests if you give them vertical space.
Start seeds indoors 4-6 weeks before your last frost, or sow directly when soil reaches 60°F—just like Burpee recommends on their seed packets.
By midsummer, you'll be picking tender pods straight from the vine, their crisp texture and fresh flavor beating any grocery store option. Pole beans produce throughout the season, while bush beans give a single heavy harvest—plan your meals around that difference.
The key is consistent moisture without waterlogging, and watching for common pests like Mexican bean beetles.
Whether you're working with a small balcony or a backyard plot, these beans adapt beautifully. The biggest mistake I see? Skipping the trellis for pole beans—it changes everything. Let's get those seeds in the ground and turn your garden into a bean bonanza.
📚 In This Guide
- What you need
- Instructions
- Tips and common mistakes
- Wrapping up and next steps
What you need
- ● Seeds: Burpee Garden Bean seeds (choose between pole beans, like 'Kentucky Wonder,' or bush beans, like 'Blue Lake'). Start with 50–100 seeds for a small garden or 200+ seeds for larger harvests.
- ● Growing Medium: Outdoor: Well-draining soil mix (pH 6.0–7.0). Amend with compost (1–2 inches mixed into the top 6–12 inches of soil).
- ● Containers: 5–10 gallon pots with drainage holes (for bush beans) or large fabric grow bags (for pole beans).
- ● Fertilizer: Balanced, low-nitrogen fertilizer (e.g., 5-10-10) or compost tea to avoid leafy growth over beans.
- ● Garden Tools: Hand trowel
- ● Pruners (for pole beans)
- ○ Garden gloves (optional but helpful!)
- ● Support Structures (Pole Beans Only): Trellis or stakes: 6–8 foot tall (bamboo, metal, or wooden). Space 3–4 feet apart for climbing.
- ● String or twine (for securing vines).
- ● Watering: Drip irrigation or soaker hoses (recommended) or a watering can with a fine rose attachment.
- ● Sunlight: Full sun (6–8+ hours daily)—beans are sun-worshippers! 🌞
- ● Warmth: Wait until soil temps reach 60°F+ (use a soil thermometer if unsure).
- ● Spacing: Bush beans: 4–6 inches apart in rows 18–24 inches apart.
- ● Pole beans: 4–6 inches apart along trellises or stakes.
- ● Mulch: Straw or grass clippings to retain moisture and suppress weeds.
- ● Row Covers: Lightweight fabric to protect young plants from pests or frost.
- ● Bean Cage: Pre-made 5–6 foot tall cages for pole beans (saves time!).
- ● Liquid Seaweed Fertilizer: Boosts growth and disease resistance.
Step-by-Step instructions for planting Burpee garden beans
Here’s the straightforward approach I use to grow both pole and bush varieties—no guesswork, just reliable results.
🌱 Step 1: Prepare the Soil and Planting Site
Beans thrive in loose, well-draining soil with a pH between 6.0 and 7.0. Work in a 2-inch layer of compost into the top 6 inches of soil to improve fertility and drainage. Avoid fresh manure—it can burn tender roots and attract pests. If your soil is heavy clay, mix in 1 part sand to 3 parts soil to create a lighter texture.
Choose a location with full sun—at least 6-8 hours of direct sunlight daily. Bush beans tolerate slightly less sun, but pole beans need the maximum exposure to produce their best yields. Clear the area of weeds and rocks, then rake the soil smooth. This ensures good root contact and prevents competition for nutrients.
🌱 Step 2: Plant Seeds at the Right Depth and Spacing
For bush beans, plant seeds 1 inch deep and 3-4 inches apart in rows spaced 18-24 inches apart. For pole beans, sow seeds 1 inch deep but space them 4-6 inches apart along a trellis or support structure. Pole beans need vertical space—they can grow 6-10 feet tall if given proper support.
I like to plant 2-3 seeds per hole and thin to the strongest seedling once they sprout. This gives you a backup if germination is spotty. Water the soil lightly after planting to help settle the seeds. Avoid pressing them too deep—beans need light to germinate quickly, usually within 7-14 days depending on your climate.
☀️ Step 3: Provide Support and Consistent Watering
If growing pole beans, install a trellis, stakes, or strong fence before planting. I use 5-foot tall bamboo stakes tied together with twine for a simple, sturdy support. As the vines grow, gently weave them through the trellis to encourage upward growth. This keeps the beans off the ground, reducing disease risk and making harvests easier.
Water 1 inch per week, keeping the soil evenly moist but not soggy. Beans are drought-sensitive, so mulch around the base with 2-3 inches of straw or grass clippings to retain moisture and suppress weeds. Avoid wetting the leaves when watering—this helps prevent fungal diseases like rust.
✂️ Step 4: Monitor for Pests and Harvest at Peak Ripeness
Watch for bean beetles, aphids, or Japanese beetles, which can damage leaves and pods. If you spot pests, spray with neem oil or introduce ladybugs for natural control. Pinch off any yellowing leaves to redirect the plant’s energy to pod production. For bush beans, harvest when pods are 4-6 inches long and firm. For pole beans, pick when pods are 5-7 inches long and snap easily when bent.
Harvest regularly—this encourages more production. I pick every 2-3 days during peak season. If left too long, pods become tough and stringy. Store fresh beans in the fridge for up to 5 days or freeze them for later use. With consistent care, you’ll get a harvest for 6-8 weeks from bush beans and 8-10 weeks from pole beans.
Tips & tricks for perfect Burpee garden bean planting
Here's what I've learned after years of growing both pole and bush beans—these tricks make all the difference between a modest harvest and a garden full of beans.
The Soil Factor: Don't skip the soil test! While beans tolerate a pH range of 6.0-7.0, aiming for the upper 6.0s gives you the best results. If your soil tests acidic, mix in a handful of lime per square foot before adding compost. I've seen beans grow twice as well in soil adjusted to 6.8 pH compared to 6.0.
Planting Strategy: In Step 2, when planting your 2-3 seeds per hole, make a small depression with your finger rather than pressing seeds in with your thumb. This ensures consistent 1-inch depth without compacting the soil around the seeds. Pro tip: Use a pencil to mark your planting rows—it's more precise than eyeballing and prevents overcrowding.
Sunlight Secret: For pole beans, those crucial 6-8 hours of sun need to be direct morning sunlight. If your garden gets afternoon shade, position your trellis to catch the morning rays first. I've noticed pole beans growing toward the morning sun, so orient your trellis east-west to maximize exposure during peak sunlight hours.
Harvest Timing: When checking your bush beans for that 4-6 inch length, give the pods a gentle squeeze—they should feel firm but not hard. For pole beans, the 5-7 inch pods should snap cleanly when bent at a 90-degree angle. I harvest mine in the morning when pods are crispest, and I've found that picking every 2-3 days extends the harvest window by 1-2 weeks compared to less frequent harvesting.
Pro Tips for Burpee Garden Bean
- Here's what I've learned after years of growing both pole and bush beans—these tricks make all the difference between a modest harvest and a garden full of beans.
- The Soil Factor: Don't skip the soil test!
- Planting Strategy: In Step 2, when planting your 2-3 seeds per hole, make a small depression with your finger rather than pressing seeds in with your thumb.
Frequently asked questions
Got questions about growing Burpee Garden Beans? Whether you're a first-time gardener or a seasoned green thumb, these answers will help you grow a thriving crop—no guesswork required!
What’s the best time to plant Burpee Garden Beans?
Plant these beans after the last frost when soil temps hit at least 60°F (15°C). For warm climates, aim for early spring; cooler areas can try late spring to early summer. Burpee Garden Beans are sensitive to cold, so rushing them risks poor germination.
Do Burpee Garden Beans need trellises, or can I grow them as bush beans?
Burpee offers both pole and bush varieties! Pole beans (like 'Kentucky Wonder') climb trellises, saving space and producing longer. Bush beans (like 'Blue Lake') grow low—great for containers or small gardens. Check the seed packet for specifics!
How often should I water Burpee Garden Beans?
Keep soil consistently moist but not soggy—about 1-1.5 inches of water per week. Water at the base (not leaves) to prevent fungal diseases. Drought stress? Beans may drop flowers or pods. Mulch helps retain moisture!
What pests or diseases should I watch for with Burpee Garden Beans?
Common threats include bean beetles, aphids, and powdery mildew. Handpick pests early, use row covers, or spray neem oil. For mildew, improve airflow and avoid overhead watering. Rotate crops yearly to prevent soil-borne issues.
How long until Burpee Garden Beans are ready to harvest?
Bush beans mature in 50-60 days; pole beans take 60-70 days. Harvest when pods are firm, crisp, and 4-6 inches long (for best flavor). Check plants every 2-3 days—overripe beans toughen and stop producing!
Wrapping up and next steps
Growing Burpee Garden Beans—whether pole or bush varieties—is a rewarding journey that yields delicious, homegrown harvests with minimal fuss! 🌱 Whether you’re a beginner or a seasoned gardener, the key lies in choosing the right planting method, providing consistent care, and embracing patience.
With the right setup and a little love, you’ll soon be enjoying fresh, crisp beans straight from your garden.
Ready to level up your garden game? Start by sketching out your planting plan, gathering your supplies, and marking your calendar for the next planting season. Happy growing—your taste buds (and dinner plate) will thank you! 🌟