Landscaping
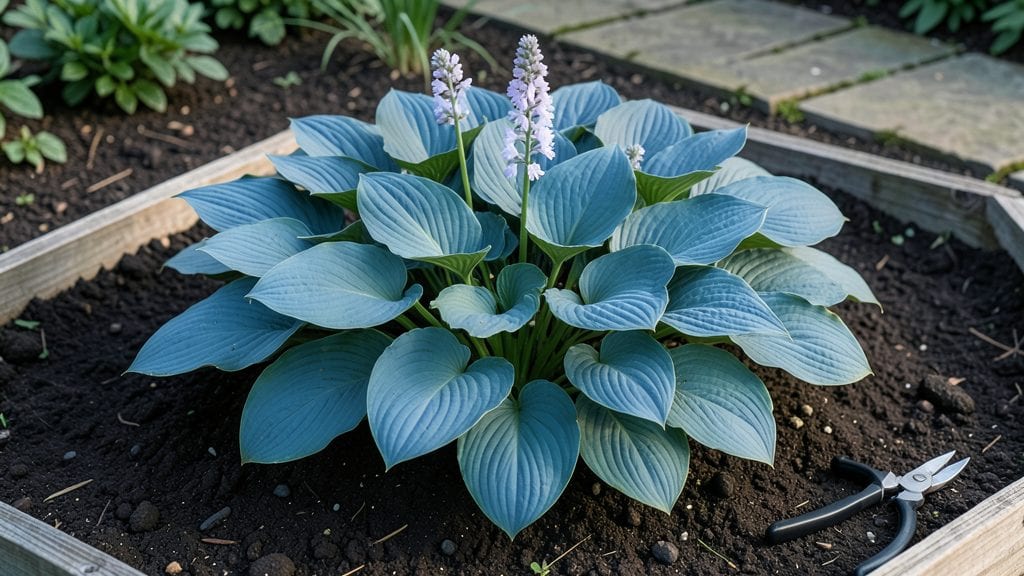
A circle garden layout transforms ordinary spaces into living art—where every plant, path, and petal aligns in perfect harmony. 🌿 I designed mine after realizing my rectangular beds felt static; the circular shape instantly added movement and drama to my backyard.
The key isn’t just the shape, but how it draws the eye toward a focal point—whether that’s a fountain, sculpture, or a single standout tree.
The beauty of circular designs lies in their flexibility: you can create an herb spiral for kitchen use, a vibrant flower circle for pollinators, or even a vegetable ring for efficient harvests.
I started with a 10-foot diameter because it fit my patio perfectly, but smaller circles (6 feet) work for balconies or entryways. The materials—gravel paths, mulch beds, or brick edging—let you match the style to your home’s aesthetic while keeping maintenance simple.
What you’ll love most is how these gardens reduce wasted space—every inch contributes to growth or design. My lavender and rosemary spiral now thrives in the center, surrounded by sun-loving annuals that spill over the edges.
The circular shape also makes irrigation easier: a soaker hose loops neatly around the perimeter, and pruning becomes a rhythmic, satisfying task. Even my black thumb can’t mess this up.
Here’s the best part: circular gardens adapt to any theme or season. Swap out summer blooms for fall mums or winter pansies, or turn the center into a seasonal display. The symmetry makes them feel intentional, while the curves invite you to linger. Ready to design your own living masterpiece?
📚 In This Guide
- What you need
- Instructions
- Tips and common mistakes
- Wrapping up and next steps
What you need
- ● Garden bed fabric or landscape fabric (10–20 sq. ft., depending on circle size)
- ● Mulch (2–3 cubic feet of cedar or pine mulch for weed suppression)
- ● Garden soil or compost mix (1–2 cubic feet per plant, depending on depth)
- ● Edging material (brick, stone, or metal edging, 10–15 linear feet)
- ● Garden plants (3–5 plants, depending on circle diameter—e.g., shrubs, perennials, or ornamental grasses)
- ● Measuring tape (25-foot tape for precision)
- ● Garden hose with spray nozzle (for watering and layout planning)
- ● Shovel or spade (for digging and soil prep)
- ● Garden gloves (1–2 pairs for comfort)
- ● Stakes and twine (for marking circle layout)
- ● Decorative stones or pebbles (for a polished look)
- ● Garden lights or solar-powered stakes (for evening ambiance)
- ● Trellis or arbor (if incorporating climbing plants)
- ● Bench or seating (to enhance the cozy vibe)
- ● Water feature (small fountain or bowl) (for a serene touch)
Step-by-Step instructions for designing a stunning circle garden layout
Here's how to craft a balanced, eye-catching circular garden that becomes the focal point of your outdoor space.
🌿 Step 1: Determine Your Circle's Size and Centerpiece
Measure your space and mark the circle's diameter using a garden hose or spray paint—6-8 feet works beautifully for most outdoor havens. The center should anchor your design, so choose a focal point: a small tree, decorative stone, or even a birdbath. I like to use a 12-inch diameter stone as my centerpiece because it's sturdy and adds visual weight.
Drive a stake at the center and tie one end of your hose or string to it. Walk the perimeter, keeping the string taut, and mark the circle's edge with stakes every 18-24 inches. This spacing ensures you'll have room for plants and pathways. Double-check your diameter by measuring across the circle—precision now prevents frustration later.
☀️ Step 2: Plan Your Plant Layers for Symmetrical Balance
Circle gardens thrive on layered planting, so divide your circle into three concentric rings: the center, mid-ring, and outer edge. I allocate the center to a 3-foot diameter for my focal point, the mid-ring for medium-height plants like salvia or lavender, and the outer edge for taller specimens like black-eyed Susans or coneflowers.
For a 4-plant layout, place each plant type at the four cardinal directions (north, south, east, west). This creates instant symmetry while allowing flexibility for variations. Sketch your design on paper first—this helps visualize how colors and textures will interact. I always group plants with similar water needs together to simplify maintenance.
🪴 Step 3: Prepare the Soil and Plant Your Circle
Remove any grass or weeds within your marked circle, then loosen the soil to a depth of 12 inches using a garden fork. Mix in 2-3 inches of compost to enrich the soil—this ensures your plants establish strong roots. For the center ring, I add a 1-inch layer of decorative gravel around my focal point to create a clean transition.
Dig holes for each plant that are twice as wide and deep as their root balls. Place each plant gently, backfilling with soil and pressing lightly to eliminate air pockets. Water deeply immediately after planting to settle the roots. I like to use a watering wand for precision—it delivers moisture directly to the root zone without disturbing the soil surface.
✂️ Step 4: Add Mulch and Final Touches for Long-Term Beauty
Spread 2-3 inches of mulch over the entire circle, keeping it 2 inches away from plant stems to prevent rot. I prefer shredded bark mulch because it breaks down slowly and improves soil structure over time. Leave the center area uncovered to maintain visual contrast with the planted rings.
Add final decorative elements like garden stakes or small flags to mark plant varieties if desired. For extra cohesion, I tie burlap or twine around the outer edge to create a subtle border. Step back and admire your work—your circle garden should now read as a deliberate, harmonious composition from every angle.
⏰ Step 5: Maintain Symmetry Through Seasonal Care
Water your circle garden consistently, focusing on the outer edge first since it often dries out faster. I check soil moisture by inserting my finger 1 inch deep—if it feels dry, it's time to water. Fertilize lightly every 6-8 weeks during growing season, using a slow-release formula to avoid overfeeding.
Deadhead spent blooms regularly to encourage continuous flowering and prune leggy growth to maintain your design's intended shape. I schedule a monthly "circle check" to trim overgrown plants and replace any that fail to thrive. This ongoing attention keeps your garden looking intentional and vibrant year after year.
Tips & tricks for perfect circle garden layouts
Creating a stunning circle garden isn't just about planting—it's about intentional design that makes every view feel like a curated masterpiece. Here are the secrets I've learned to elevate your outdoor space with professional-level symmetry.
Precision in Step 1 is Non-Negotiable: The 6-8 foot diameter recommendation isn't arbitrary—it creates the perfect balance between focal point visibility and plantable space. I've seen beautiful designs fail because the circle was too small (making the centerpiece feel cramped) or too large (losing visual impact). Use a garden hose to mark your circle first—it's more flexible than spray paint and you can adjust before committing. For the 18-24 inch spacing between stakes, think of it as creating "plant zones" that allow room for both foliage and future growth without crowding.
Color Theory Matters More Than You Think: In Step 2, when planning your concentric rings, consider the color wheel. Place complementary colors (like purple salvia with yellow black-eyed Susans) across from each other at the cardinal directions. This creates instant visual harmony. I like to sketch my color scheme first using paint swatches—it's surprisingly accurate for predicting how flowers will interact. For texture contrast, pair smooth-leaved plants (like hostas) with feathery ones (like lamb's ear) in adjacent positions.
Soil Prep Secrets in Step 3: The 12-inch soil loosening depth might seem excessive, but it's crucial for root establishment—especially in the outer edge where plants often struggle with moisture retention. I add a handful of perlite to the compost mix when planting drought-tolerant varieties in the outer ring. For the decorative gravel in the center ring, use rounded river stones rather than sharp-edged gravel—they look more refined and won't damage plant roots when watering.
Mulch Like a Pro in Step 4: The 2-3 inch mulch depth recommendation is perfect for moisture retention, but here's the trick: apply it in two layers. First, spread 1 inch of coarse mulch (like pine bark) directly on the soil, then top with 1-2 inches of finer mulch (like shredded leaves). This creates better insulation and prevents the mulch from blowing away. When tying burlap around the outer edge, use natural twine—not wire—that won't rust or damage plants as they grow.
Pro Tips for Circle Garden Layout
- Creating a stunning circle garden isn't just about planting—it's about intentional design that makes every view feel like a curated masterpiece.
- Precision in Step 1 is Non-Negotiable: The 6-8 foot diameter recommendation isn't arbitrary—it creates the perfect balance between focal point visibility and plantable space.
- Color Theory Matters More Than You Think: In Step 2, when planning your concentric rings, consider the color wheel.
Frequently asked questions
Got questions about creating a stunning circle garden layout? You’re not alone! Here are some of the most common queries—and their practical answers—to help you design with confidence.
What’s the best size for a circle garden?
A circle garden typically ranges from 3 to 8 feet in diameter, depending on your space and purpose. Smaller circles (3–4 ft) work well for herb or flower borders, while larger ones (6–8 ft) can accommodate shrubs or even small seating areas. Pro tip: Measure your yard first—circle layouts thrive in open, unobstructed areas!
When is the ideal time to plant a circle garden?
The best times are early spring (after the last frost) or early fall (6–8 weeks before your first frost). This gives plants time to establish roots before extreme weather. For perennials, spring planting is ideal, while annuals can be tucked in throughout the growing season for continuous color.
Can I use a circle garden for vegetables or just flowers?
Circle gardens aren’t just for flowers—vegetables, herbs, and even small fruit bushes (like strawberries) thrive in them. Try a keyhole design (a circle with a central compost pit) for efficient growing. Just ensure your plants have enough sunlight and space for their mature size.
How do I fix an uneven or wobbly circle layout?
Use a garden hose or string tied to stakes to mark your circle before digging. For uneven edges, gradually adjust by adding or removing soil in small sections. A laser level can help for precision, especially if you’re using pavers or edging. Patience is key—small tweaks make a big difference!
What are some low-maintenance alternatives to a full circle garden?
If a full circle feels overwhelming, try:
- Semi-circle layouts (great for corners or along fences).
- Spiral designs (easier to install and visually dynamic).
- Raised circle beds (reduces weeding and soil prep).
- Ground covers (like creeping thyme) for a "soft" circle effect.
These options still deliver symmetry with less upkeep!
Wrapping up and next steps
A circle garden layout isn’t just about aesthetics—it’s a harmonious blend of symmetry, functionality, and nature’s beauty. Whether you’re framing a patio, a fountain, or simply adding visual intrigue to your yard, this design offers endless creative possibilities while keeping maintenance simple. 🌿
Now that you’re inspired, take the next step: sketch your vision, gather your materials, and start transforming your outdoor space into a serene, symmetrical oasis. Every bloom planted is a step closer to your dream garden—so roll up your sleeves and let your creativity grow!