Landscaping
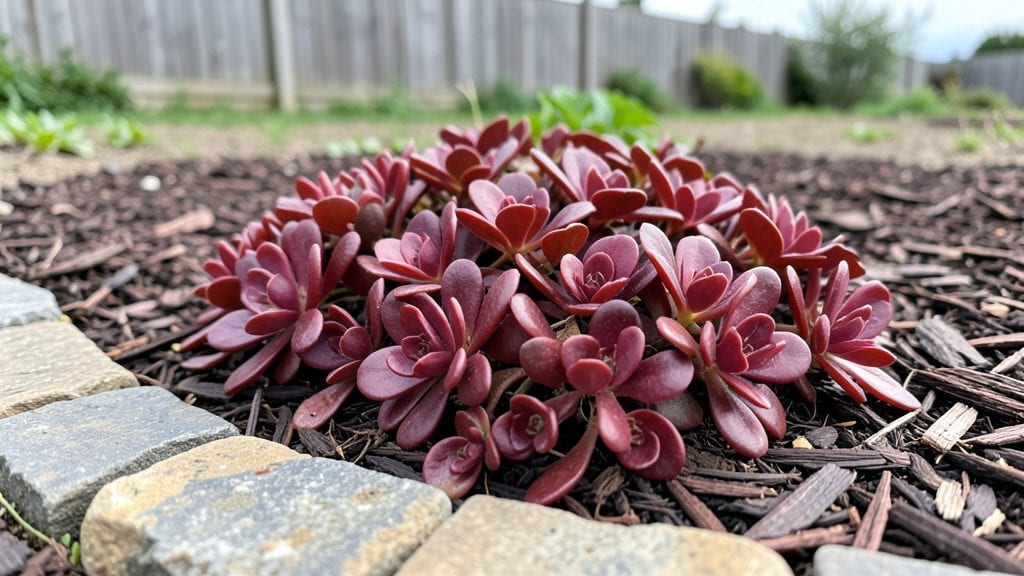
A cobblestone edging garden transforms bare soil into a polished, inviting border that lasts for decades. 🌿 I’ve used these rustic stone paths to define flower beds in my own yard, and the difference between a messy garden and a curated landscape is striking.
The key lies in selecting stones that complement your home’s style—whether you go for smooth river rocks or rough-hewn fieldstone—while keeping the layout simple enough for DIY installation.
You’ll need basic tools like a shovel, level, and mallet, plus a sturdy base of landscape fabric and sand. The stones themselves can range from affordable flagstone scraps to higher-end bluestone, depending on your budget and aesthetic.
For a cottage garden vibe, mix in wildflowers; for a modern look, keep the edges crisp with boxwood or lavender. The best part? This edging stays put for years, unlike plastic alternatives that fade or crack.
Once installed, your garden will feel like a curated retreat, with every plant perfectly framed by that timeless stone line. The texture adds depth to any landscape, from a small urban patio to a sprawling backyard.
Plus, the stones double as seating or stepping stones if you arrange them thoughtfully. Here’s how to make it happen without breaking the bank or hiring a pro.
This project works for any garden style—whether you’re going for a cozy cottage feel, sleek modern lines, or a serene Japanese-inspired border. The versatility is what makes it a top choice for gardeners who want structure without sacrificing charm. Let’s get those stones laid!
📚 In This Guide
- What you need
- Instructions
- Tips and common mistakes
- Wrapping up and next steps
What you need
- ● Cobblestones: 50–100 lbs (depending on garden size; 2–3" diameter stones work best). Tip: Buy extra (10–15%) for cuts or replacements!
- ● Landscape fabric: 1 roll (to prevent weeds and stabilize soil).
- ● Gravel (base layer): Crushed stone or pea gravel (¾"–1" size), ~2–3 bags (for a 4' x 20' edging).
- ● Sand (leveling layer): 1–2 bags (for even stone placement).
- ○ Landscape adhesive or concrete (optional for securing): 1 small tub (if stones need extra stability).
- ● Shovel and spade: For digging trenches (6" deep x 4" wide).
- ● Wheelbarrow: To haul gravel, sand, and stones.
- ● Rubber mallet: For tapping stones into place.
- ● Level and string line: To ensure a straight, even edging.
- ● Safety gear: Gloves, knee pads, and goggles (protection first! 🛡️).
- ● Edging restraints (metal or plastic) to keep stones in place.
- ● Polyurethane or stone sealer (for a polished, weather-resistant finish).
- ● Flexible landscape tape (to mark trenches before digging).
- ● Rubberized edging caps (for a clean, finished look).
Step-by-Step instructions for installing cobblestone edging
Here’s how to create a polished, durable border that frames your garden like a pro.
🪴 Step 1: Mark and Excavate the Edging Path
Use a garden hose or spray paint to outline your desired border shape—cobblestones work best in curves or straight lines with gentle turns. Measure and mark 6 inches wide along the entire length, allowing 2-3 inches of depth for stone placement and base material. This width accommodates standard cobblestones while leaving room for a solid foundation.
Dig along the marked line with a shovel, removing 4-6 inches of soil to create a trench. Keep the sides vertical and smooth—uneven edges will make stone placement uneven later. I like to check depth every few feet with a level to ensure consistency. If you hit roots or rocks, adjust the trench slightly but avoid disturbing surrounding plants.
💧 Step 2: Build a Compacted Gravel Base
Line the trench with landscape fabric to prevent weeds from creeping up through the stones. Add a 2-inch layer of coarse gravel (like #57 stone) over the fabric, then tamp it down firmly with a hand tamper or plate compactor. This base ensures proper drainage and prevents shifting over time.
For extra stability, especially in high-traffic areas, add a second 1-inch layer of gravel and compact again. The goal is a firm, even surface—if you press down and leave footprints, it’s not compacted enough. This step is critical; skipping it leads to stones sinking or shifting after rain.
🪨 Step 3: Lay the Cobblestones Evenly
Start at one corner and place the first cobblestone flush with the trench edge, using a rubber mallet to tap it gently into place. Leave ¼-inch gaps between stones for sand or polymer sand later. For curves, cut stones with a masonry saw or angle grinder—wear a mask, as the dust is abrasive. I like to lay stones in a staggered pattern for a natural, interlocking look.
Check for level frequently with a 2-foot level or straightedge. If a stone sits too high, tap it down; if it’s too low, add a thin layer of sand beneath it. Avoid walking on the stones until they’re fully set—your weight can shift them before the final sanding step. For a seamless finish, alternate stone sizes slightly to break up uniformity.
⏰ Step 4: Secure Gaps and Finish the Edging
Once all stones are in place, sweep coarse masonry sand into the gaps with a push broom. For a permanent solution, use polymer sand, which hardens when wet and prevents weed growth. Moisten the sand lightly with a spray bottle, then let it cure for 24 hours before walking on the edging.
For extra durability, consider edging the outer side of the stones with landscape edging material or a thin strip of concrete. This keeps the border neat and prevents soil from spilling over. Water the area lightly after installation to settle everything—you’ll see the stones settle slightly, which is normal. After a week, your edging will look like it’s been there for decades.
Tips & tricks for perfect cobblestone edging
Here's what I've learned after installing edging in gardens of all shapes—these tricks save time, prevent costly mistakes, and ensure your cobblestone border lasts for years.
Digging Precision: In Step 1, when marking your 6-inch-wide trench, use a straight board or level to draw your lines instead of freehanding. I've found that even slight deviations can make stone placement uneven later. For curves, wrap a garden hose around your desired shape, then mark along its edge—this creates a perfectly smooth curve every time.
Base Stability Secret: The double gravel layer in Step 2 is non-negotiable for high-traffic areas. I've seen edging fail spectacularly when homeowners skipped this step—stones sink into soft soil over time. Pro tip: Rent a plate compactor if you don't own one; hand tampers only work for small projects. The goal is a base so firm it doesn't leave footprints when you press down.
Stone Layout Strategy: For Step 3, lay your first row of stones with the longest edge against the trench wall. This creates a natural anchor point for the rest of your pattern. I like to arrange stones in a herringbone pattern for extra stability—just cut stones at 45-degree angles where needed. Always check level after every 3-4 stones to catch any height variations early.
Polymer Sand Cure Time: That 24-hour cure time in Step 4 is crucial—don't rush it! I've seen people walk on polymer sand too soon, which creates dusty gaps. After moistening, cover the area with a tarp overnight to maintain humidity. For extra durability, apply a second thin layer of polymer sand after the first has fully cured, then moisten again.
Pro Tips for Cobblestone Edging Garden
- Here's what I've learned after installing edging in gardens of all shapes—these tricks save time, prevent costly mistakes, and ensure your cobblestone border lasts for years.
- Digging Precision: In Step 1, when marking your 6-inch-wide trench, use a straight board or level to draw your lines instead of freehanding.
- Base Stability Secret: The double gravel layer in Step 2 is non-negotiable for high-traffic areas.
Frequently asked questions
Got questions about cobblestone edging?
You’re not alone! Here are answers to the most common queries to help you create a stunning, durable garden border with ease.
What’s the best time of year to install cobblestone edging?
Spring or fall are ideal! Spring lets the soil settle before summer heat, while fall avoids winter freeze-thaw cycles. Avoid muddy spring rains or icy winter ground—both can delay curing and stability.
Do I need a base for cobblestone edging, or can I lay it directly on soil?
Always use a base! A 2–4 inch layer of compacted gravel (like crushed stone) prevents shifting and weeds. Skip the base, and your edging may sink, crack, or become uneven over time.
Can I use cobblestones for edging in a sloped garden?
For slopes, bury the stones deeper (3–4 inches) or use a retaining wall system for steeper grades. Add landscape fabric under the base to reduce erosion and keep soil in place.
What’s a budget-friendly alternative to traditional cobblestone edging?
Consider pavers (like concrete or brick) or fieldstone—both mimic cobblestones at lower costs. For a DIY twist, try recycled bricks or natural river rocks (secured with adhesive or mortar).
How do I fix uneven or sinking cobblestones after installation?
Dig around the sinking stone, add more base gravel, and tamp it down. For cracks between stones, sweep in polymeric sand (not regular sand) to lock them in place. If a stone is severely shifted, remove and re-level it.
Will cobblestone edging attract pests like ants or rodents?
Not usually! Cobblestones are too smooth for burrowing pests, but check for gaps where critters might nest. Seal edges with landscape fabric or a thin layer of sand to deter invaders.
Wrapping up and next steps
Transforming your garden with cobblestone edging isn’t just about aesthetics—it’s about creating a timeless, functional space that elevates your outdoor oasis. Whether you’re framing flower beds, pathways, or lawns, these natural stone borders add charm while requiring minimal upkeep. 🌿
Ready to take the next step? Start small—even a single border can make a big impact! Gather your materials, sketch a simple design, and dive in. Your garden’s newfound elegance is just a few stones away. Happy landscaping! 🛠️✨