Landscaping
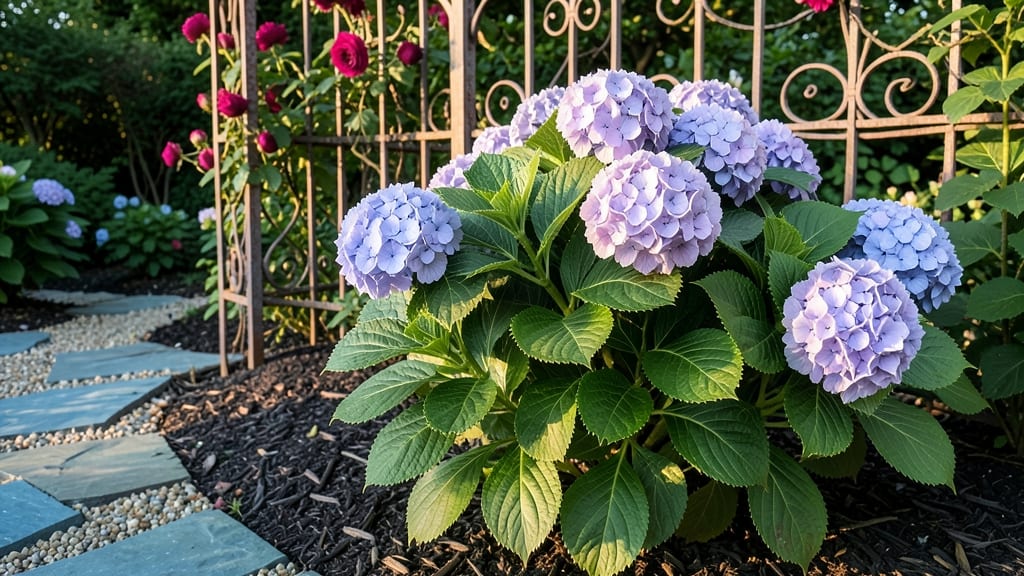
Creating an elegant garden design means blending nature's chaos with intentional structure—like framing a painting where every leaf and stone plays its part. 🌿 I learned this the hard way after planting a riot of colors that looked more like a wildflower meadow than a curated space.
The secret isn’t just picking pretty plants; it’s about layering textures, repeating shapes, and letting hardscaping guide the eye.
Start with a clear theme—whether it’s the soft romance of cottage gardens, the clean lines of modern minimalism, or the sun-drenched warmth of Mediterranean style. For small spaces, focus on vertical elements like trellises or tall ornamental grasses to add drama without sprawl.
Even budget-friendly options can shine: a simple gravel path, a few well-placed statues, or a pergola draped with climbing roses instantly elevate the look.
Your garden will feel like a timeless retreat when you balance seasonal interest—think velvety hydrangeas in summer, fiery fall foliage, and evergreens for winter structure. The key is repetition: use the same pot shape, color, or plant type in clusters of three to create rhythm.
Even a modest yard can feel grand when every detail ties back to a cohesive vision.
Here’s the thing—elegance isn’t about perfection, but about harmony. A single misplaced plant or uneven path can disrupt the flow, so measure twice and edit ruthlessly. The most elegant gardens feel effortless, as if nature itself was guided by an artist’s hand. Let’s build yours step by step.
📚 In This Guide
- What you need
- Instructions
- Tips and common mistakes
- Wrapping up and next steps
What you need
- ● Soil & Amendments: High-quality topsoil (10–20 cubic yards, depending on garden size)
- ● Compost (2–3 bags or bulk delivery for nutrient-rich beds)
- ● Sand or gravel (5–10 bags, for drainage in pathways or raised beds)
- ● Plants & Greenery: Structural shrubs (e.g., boxwood, holly, or dwarf conifers—5–10 plants)
- ● Ornamental grasses (3–5 varieties for texture and movement)
- ● Perennials (e.g., lavender, hydrangeas, or peonies—10+ plants for color)
- ● Evergreens (for year-round structure, 3–6 plants)
- ● Hardscaping: Gravel or decomposed granite (1–2 tons for pathways)
- ● Flagstone or pavers (50–100 sq. ft., depending on design)
- ● Trellises or pergolas (1–2 units for vertical elegance)
- ● Must-Haves: Shovel and spade (for digging and transplanting)
- ● Pruners (bypass pruners for clean cuts)
- ● Wheelbarrow (for hauling soil and materials)
- ● Level and measuring tape (for precision layouts)
- ○ Optional (But Helpful): Edging tool (for crisp garden borders)
- ● String line and stakes (for marking designs)
- ● Hose with adjustable nozzle (for watering and cleaning)
- ● Kneeling pad (for comfort during planting)
- ● Site Prep: Clear debris and measure the space (sketch a rough layout first!)
- ● Test soil pH (adjust with lime or sulfur if needed)
- ● Design Considerations: Choose a color palette (e.g., whites/greens for serene elegance or jewel tones for drama).
- ● Plan for scalable growth—place fast-growing plants toward the back.
- ● Weather & Timing: Start in spring or early fall for optimal planting conditions.
- ● Mulch after planting to retain moisture (2–3 inches of shredded bark).
Instructions for crafting an elegant garden with structured greenery
Here's my approach to blending natural beauty with refined structure—where every plant feels intentional.
🌿 Step 1: Define Your Garden's Architectural Framework
Start by sketching a simple layout with 4 key structural elements—think of these as your garden's bones. I like to use a mix of evergreens for year-round form and deciduous shrubs for seasonal interest. Position a tall specimen like a 6-foot arborvitae as your focal point, then add a mid-height boxwood hedge for definition. This creates depth immediately.
Next, mark walking paths with 2-inch-wide stepping stones spaced 18 inches apart—just enough to prevent soil compaction. The stones should curve naturally, guiding movement while preserving the garden's organic feel. Avoid straight lines unless you're going for a formal look; subtle curves feel more inviting.
☀️ Step 2: Layer Plants by Height and Seasonal Interest
Work from the back of the garden forward, placing tallest plants first. I typically use 8-foot ornamental grasses along fences or walls, then 4-foot hydrangeas behind perennials, and 18-inch ornamental kale near the front for winter texture. This creates visual layers that draw the eye deeper into the space.
For seasonal flow, group plants with staggered bloom times. For example, pair spring-blooming azaleas with summer black-eyed Susans and fall Japanese anemones—this ensures your garden always has something in bloom. I like to add 1-2 evergreen ground covers like creeping thyme between larger plants to tie everything together.
✂️ Step 3: Refine with Pruning and Strategic Cutting
Shape your structural plants first—trim boxwoods into smooth, rounded forms with clean lines, and prune evergreens to maintain their natural silhouette. I use sharp, bypass pruners for clean cuts and avoid shearing unless you're creating a formal hedge. For deciduous shrubs, prune immediately after flowering to encourage next year's blooms.
Add height variation with ornamental grasses—leave some upright while gently bending others to create movement. I often tuck 1-2 small topiaries near seating areas to add a touch of classic elegance. These should be pruned weekly during the growing season to maintain their shape, which takes just 10 minutes per plant.
🪴 Step 4: Incorporate Hardscape Elements for Balance
Place 3-4 decorative pots strategically—one near the entrance, one beside seating, and one as a contrasting element against a wall. I use a mix of materials: terracotta for Mediterranean vibes, ceramic for modern gardens, and wrought iron for classic charm. Fill them with plants that complement your color palette but add unexpected texture.
Add a single sculptural element, like a weathered metal trellis or a stone obelisk, to anchor the design. This should feel intentional, not forced—think of it as the garden's "exclamation point." I often place mine where three plant groupings meet, creating a natural focal point that draws the eye.
💧 Step 5: Maintain with Seasonal Adjustments
Every 3 months, reassess your garden's structure. Remove spent blooms immediately to prevent seed heads from cluttering the design, but leave some winter interest with seed pods or evergreen foliage. I also rotate seasonal containers—swapping summer annuals for fall mums or winter pansies keeps the look fresh without major work.
Water deeply once weekly during dry spells, focusing on the root zones of structural plants. A 5-gallon watering can is perfect for this—it delivers enough moisture without over-saturating. Mulch annually with 2-3 inches of shredded bark to preserve moisture and suppress weeds, which saves hours of maintenance each season.
Tips & tricks for perfect garden structure
Creating a garden with timeless structure takes thoughtful planning—here's how to elevate your design with these key insights.
The Plant Placement Rule: When positioning your 6-foot arborvitae as the focal point, place it slightly off-center to create visual interest. This prevents the garden from feeling too symmetrical and adds a natural, organic flow. I also recommend positioning it near a seating area so guests can appreciate its height while enjoying the space. The boxwood hedge should flank it at about one-third its height for perfect proportion.
Pathway Design Secret: For those 18-inch spaced stepping stones, use a flexible hose to create gentle curves before laying them out. This ensures your paths flow naturally rather than looking forced. I find that adding 2-inch-wide stones along the edges of paths creates subtle definition without overwhelming the space. Pro tip: Use a mix of stone colors to add visual interest while maintaining cohesion.
Pruning Precision: When maintaining your 10-minute weekly topiary pruning, use a string or level to check symmetry before making cuts. This ensures clean lines that look intentional. For ornamental grasses, I recommend leaving some stalks upright while gently bending others to create natural movement—this takes just 5 minutes and adds dynamic texture. Always prune in the morning when plants are hydrated for cleaner cuts.
Seasonal Layering: To maximize seasonal interest, I create a "bloom calendar" pairing spring azaleas with summer black-eyed Susans and fall Japanese anemones. This ensures continuous color while maintaining structure. For winter interest, leave seed pods on perennials and add evergreen ground covers like creeping thyme to tie everything together visually.
Pro Tips for Elegant Garden Design
- Creating a garden with timeless structure takes thoughtful planning—here's how to elevate your design with these key insights.
- The Plant Placement Rule: When positioning your 6-foot arborvitae as the focal point, place it slightly off-center to create visual interest.
- Pathway Design Secret: For those 18-inch spaced stepping stones, use a flexible hose to create gentle curves before laying them out.
Frequently asked questions
Got questions about transforming your space into an elegant garden oasis?
Here are answers to the most common queries—because even the most refined designs start with smart planning!
What’s the best time of year to start an elegant garden design?
The ideal time depends on your climate! In temperate zones, spring or early fall is perfect—soil is workable, and plants establish roots before extreme weather. Warmer climates? Year-round planning works, but avoid peak summer heat. Pro tip: Schedule hardscaping (paths, walls) in mild months to prevent erosion or cracking.
How much does a high-end garden design cost?
Costs vary widely: A DIY project with plants and basic materials may run $500–$3,000, while a professional designer + premium materials (e.g., stone, custom lighting) can exceed $10,000+. Breakdown:
- Plants: $50–$500 each (e.g., ornamental grasses vs. rare trees)
- Hardscaping: $15–$100/sq. ft. (gravel vs. flagstone)
- Labor: $50–$200/hour for landscapers
Can I create an elegant garden on a small balcony or patio?
Think vertical and minimalist:
- Use tiered planters for layered greenery (e.g., ferns + succulents).
- Opt for sculptural pots in neutral tones (matte black, terracotta).
- Add string lights or a small fountain for ambiance.
What’s the biggest mistake people make in elegant garden design?
Overcomplicating it! Common pitfalls:
- Too many plant varieties → Visual chaos. Stick to 3–5 complementary textures/colors.
- Ignoring scale → Giant shrubs next to tiny paths look awkward. Measure everything!
- Skipping maintenance plans → Elegance fades fast with dead leaves or overgrown vines.
How do I protect my elegant garden from harsh weather?
Prevent damage with these strategies:
- Wind: Plant windbreaks (e.g., evergreens) or use flexible plants (e.g., willow, ornamental grasses).
- Frost: Mulch heavily and choose cold-hardy species (e.g., lavender, sedum).
- Heavy rain: Improve drainage with French drains or raised beds.
Wrapping up and next steps
Creating an elegant garden design is all about blending nature’s beauty with thoughtful structure—where every plant, path, and detail feels intentional and refined. Whether you’re refining a small courtyard or a sprawling landscape, the key lies in balance, texture, and timeless appeal.
Now that you’re armed with materials, techniques, and answers to common questions, it’s time to let your vision take root!
Ready to transform your outdoor space? Start small: sketch a rough layout, gather a few key materials, and take inspiration from the designs that resonate most with you. Your garden’s elegance begins with a single, confident step. 🌿✨