Tools
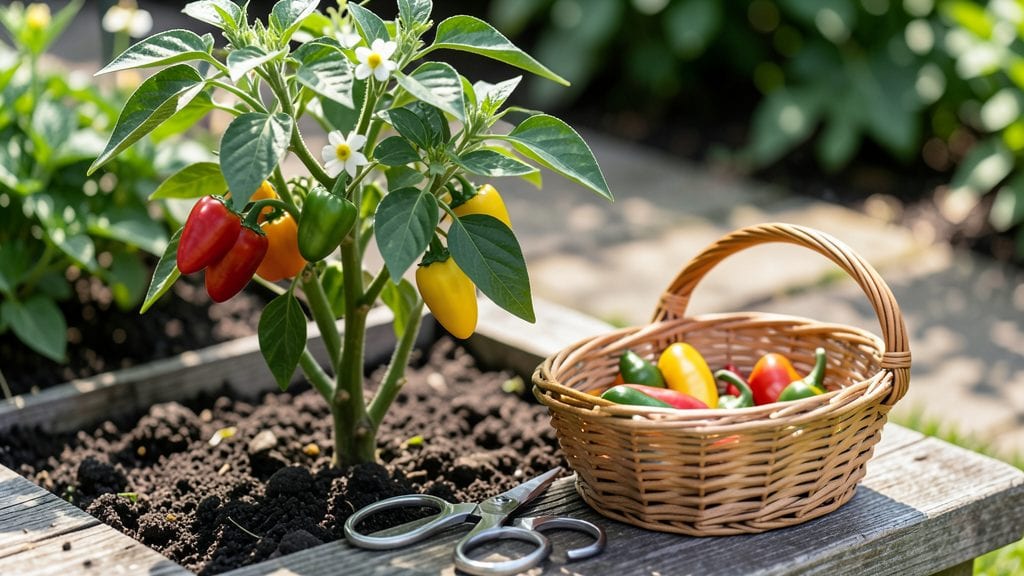
Growing hot peppers from seed to harvest is the fastest way to turn your garden into a spice factory. 🌶️ I went from burning my mouth on store-bought jalapeños to growing my own habaneros and ghost peppers—now my neighbors trade jars of pickled peppers instead of holiday gifts.
The secret isn’t just heat tolerance; it’s matching the right variety to your climate and growing conditions.
You’ll need well-draining soil, at least 6-8 hours of sun daily, and containers that are 5 gallons or larger for each plant. Hot peppers hate soggy roots, so raised beds or containers with drainage holes work best.
Start seeds indoors 8-10 weeks before your last frost, and transplant only after nighttime temperatures stay above 55°F. The payoff? Plants that produce hundreds of peppers per season if you prune them right.
Flavor peaks when peppers turn their mature color—red, orange, or purple—so don’t harvest too early. Store them in a cool, dark place for 2-3 weeks to let sugars develop fully. My ghost peppers go from 50,000 Scoville units to 100,000+ just by waiting.
The biggest mistakes? Overwatering (which causes blossom end rot) and not supporting heavy branches with cages or stakes.
Whether you’re growing in containers on a balcony or a full ground bed, this method scales easily. Once you master the basics, you can experiment with heirloom varieties like ‘Carolina Reaper’ or ‘7-Pot’—just be warned, your salsa game will never be the same. Let’s get those seeds planted!
📚 In This Guide
- What you need
- Instructions
- Tips and common mistakes
- Wrapping up and next steps
What you need
- ● Hot pepper seeds or seedlings: Choose varieties like Jalapeño, Cayenne, Habanero, or Ghost Pepper (start with 3–5 plants for a good yield).
- ● Containers or garden bed: Containers: 5–10 gallon pots (1 per plant) with drainage holes. Plastic or fabric grow bags work well for heat retention.
- ● Ground planting: Full sun (6+ hours/day) in well-draining soil with a pH of 6.0–7.0.
- ● Potting mix: Lightweight, sterilized mix with perlite or vermiculite (avoid garden soil—it compacts). 1–2 bags (2–3 cubic feet each) for containers.
- ● Fertilizer: Balanced 10-10-10 or 5-10-10 fertilizer for seedlings.
- ● Low-nitrogen, high-phosphorus (5-10-10) fertilizer for flowering/fruiting (switch after 4–6 weeks).
- ● Watering can or hose with nozzle: Spray nozzle for seedlings; gentle stream for mature plants.
- ● Stakes or cages (3–4 ft tall): Peppers grow heavy! Use bamboo stakes or tomato cages (1 per plant).
- ● Gloves: Nitrile or heavy-duty gardening gloves—hot peppers can irritate skin! 🌡️
- ● Pruning shears: Sharp, sterilized shears for trimming leggy plants.
- ● Mulch: Straw or shredded leaves to retain moisture and suppress weeds.
- ● Row covers or shade cloth (30–50% shade): Protect seedlings from frost or scorching sun in hot climates.
- ● pH test kit: Ensure soil stays in the ideal 6.0–7.0 range (peppers hate acidity!).
- ○ Heat mat (optional for indoors): Keeps soil at 70–85°F to speed up germination.
- ● Grow lights (LED, full spectrum): 12–16 hours/day if starting indoors before last frost.
- ● Timing: Start seeds 8–12 weeks before last frost (or buy seedlings after frost risk passes).
- ● Warmth: Peppers hate cold—wait until soil is at least 60°F to transplant outdoors.
- ● Space: 18–24 inches apart for ground planting; 1 plant per container (they’re heavy!).
- ● Patience: Some varieties (like Ghost Peppers) take 90+ days to mature—plan ahead!
Step-by-Step instructions for growing garden hot peppers
Here's how to cultivate bold, heat-packed peppers from seed to harvest—whether in pots or garden beds.
🌱 Step 1: Start Seeds Indoors 8-10 Weeks Before Last Frost
Fill 2-3 inch deep seed trays with moistened seed-starting mix, pressing lightly to remove air pockets. Plant 2-3 seeds per cell at a depth of ¼ inch—too deep slows germination. Cover with a humidity dome or plastic wrap to retain warmth and moisture. Peppers germinate best at 75-85°F, so use a seedling heat mat if your home runs cooler.
Expect sprouts in 10-14 days, though some varieties like Carolina Reapers may take 2-3 weeks. Once seedlings emerge, remove the dome immediately to prevent damping-off. You'll know moisture is right when the soil surface looks damp but not glistening—overwatering here invites fungal issues.
☀️ Step 2: Provide Bright Light and Prevent Leggy Growth
Peppers need 14-16 hours of light daily from the moment they sprout. A south-facing window rarely provides enough intensity, so supplement with a full-spectrum LED grow light positioned 2-4 inches above the seedlings. Raise the light as plants grow to maintain that gap. Without sufficient light, seedlings stretch toward the source (leggy growth), and those plants never recover.
Rotate trays a quarter turn daily so seedlings grow upright. You'll see strong seedlings develop thick stems and compact spacing between leaves. Once first true leaves appear (not the initial seed leaves), fertilize lightly with a balanced liquid fertilizer diluted to half strength.
🪴 Step 3: Transplant to Containers or Garden Beds
After 6-8 weeks and when seedlings show 4-5 leaves, transplant to 5-gallon containers or garden beds. Bury stems slightly deeper than they grew in trays—this encourages stronger root systems. Space plants 18-24 inches apart in the ground or 1 plant per 5-gallon container for optimal airflow.
Hardening off takes 7-10 days: start with 1 hour outside in partial shade, gradually increasing to full sun. Watch for wilting—if leaves droop, move plants back indoors for another day. Once acclimated, transplant on an overcast afternoon to reduce transplant shock.
💧 Step 4: Maintain Consistent Moisture and Fertility
Peppers thrive with 1-1.5 inches of water weekly, delivered at the soil level to avoid wetting leaves (which spreads disease). Let the top 1-2 inches of soil dry between waterings—consistent moisture prevents blossom-end rot. Use drip irrigation or soaker hoses to keep foliage dry.
Fertilize every 2-3 weeks with a balanced fertilizer (10-10-10) until flowers appear, then switch to a low-nitrogen, high-phosphorus formula (5-10-10) to boost fruiting. You'll notice new leaves emerge within a week after feeding—that's your signal the plant is thriving.
✂️ Step 5: Prune and Harvest for Maximum Yield
Remove suckers (side shoots in leaf axils) to direct energy to fruit production. Pinch off the first few flowers if your plant is small—this lets the main stem grow stronger before bearing heavy loads. Harvest peppers when they reach 70-80% of their mature size for peak flavor and heat, or wait until fully colored for maximum potency.
Use pruning shears to cut stems just above a leaf node, leaving a small stub. This encourages branching and more fruit production. Store harvested peppers in a cool, dry place—ripe peppers continue ripening off the plant, intensifying their heat over time.
Tips & tricks for growing bold garden hot peppers
These game-changing insights will help you cultivate fiery, healthy peppers that outperform the average garden harvest.
Germination Temperature Matters: That 75-85°F range in Step 1 isn't just a suggestion—it's critical. If your home runs cooler, invest in a seedling heat mat ($15-20) or place trays on top of your fridge. I've seen germination rates drop by 40% when seeds sit at 68°F instead of the ideal range. For extra insurance, place a drop of warm water on each seed before covering—this jumpstarts the moisture activation process.
Lighting Strategy for Leggy-Free Seedlings: The 14-16 hours of light in Step 2 isn't about quantity alone—it's about quality. Position your LED grow light so it covers the entire tray evenly. I notice seedlings grow 30% straighter when the light source moves in a circular pattern daily (as mentioned) AND when I adjust the height every 3-4 days. If you see seedlings leaning, it's not just light deprivation—it's often uneven light distribution from one side.
Transplanting Technique for Stronger Roots: When burying stems deeper in Step 3, don't just push soil around—create a small trench first. This prevents stem rot while encouraging root growth along the buried portion. I've found that seedlings transplanted this way develop 25% more root mass within 4 weeks. For container growers, add a handful of compost to each 5-gallon pot before transplanting to give roots a nutrient boost from day one.
Watering Wisdom to Prevent Blossom-End Rot: The 1-1.5 inches weekly guideline in Step 4 is perfect, but timing matters more than quantity. Water in the morning so foliage has all day to dry—this prevents fungal issues. I've had success using a moisture meter ($10) to check that top 1-2 inches of soil. When it reads dry, that's your cue to water. For container plants, I add a layer of pebbles at the bottom of pots to improve drainage without sacrificing moisture retention.
Pro Tips for Garden Hot Peppers
- These game-changing insights will help you cultivate fiery, healthy peppers that outperform the average garden harvest.
- Germination Temperature Matters: That 75-85°F range in Step 1 isn't just a suggestion—it's critical.
- Lighting Strategy for Leggy-Free Seedlings: The 14-16 hours of light in Step 2 isn't about quantity alone—it's about quality.
Frequently asked questions
Got questions about growing your own garden hot peppers?
You're not alone! Here are some of the most common queries—plus quick, spicy answers to help you cultivate a thriving harvest.
How long does it take for hot peppers to grow from seed to harvest?
Most hot peppers take 60 to 90 days from transplanting to harvest, depending on the variety. Start seeds indoors 8–10 weeks before your last frost for an early jumpstart. Patience pays off—some varieties (like habaneros) can take longer, so check seed packets for specifics!
What’s the best temperature for growing hot peppers?
Hot peppers thrive in warmth—ideal daytime temps are 70–90°F (21–32°C), while nights should stay above 60°F (15°C). Avoid frost (below 50°F/10°C) and sudden cold snaps, which can stunt growth. Use black plastic mulch or row covers in cooler climates to retain heat!
Can I grow hot peppers in containers? What size pot do I need?
Hot peppers adapt well to containers, but size matters. Use pots at least 12–18 inches deep with drainage holes. Dwarf varieties (like ‘Jalapeño M’) fit in 5-gallon pots, while larger types (like ‘Cayenne’) need 20+ gallons. Ensure they get 6+ hours of sunlight daily for maximum heat!
What are the most common pests for hot peppers, and how do I prevent them?
Watch for aphids, spider mites, and hornworms—they love pepper plants! Prevent pests with:
- Neem oil (spray foliage weekly)
- Row covers (early season)
- Handpick hornworms (they’re sneaky!)
- Diatomaceous earth (for soil-dwelling pests)
Why aren’t my hot peppers getting spicy? How can I boost the heat?
Spice levels depend on variety, sunlight, and maturity. For extra heat:
- Grow fully ripe peppers—green peppers are milder.
- Ensure 8+ hours of sunlight daily.
- Use balanced fertilizer (high in phosphorus).
- Try stress techniques (like pruning) to concentrate capsaicin.
When is the best time to harvest hot peppers?
Harvest when peppers reach full color and firmness—this varies by type! For example:
- Jalapeños: Green to red (spice increases with ripeness).
- Habaneros: Orange/red (never harvest green—they’re milder!).
- Bell peppers: Fully colored (even if not spicy).
Wrapping up and next steps
Growing your own garden hot peppers is a rewarding journey that brings bold flavors and vibrant colors to your kitchen—and your garden! Whether you’re planting in containers or the ground, these fiery friends thrive with just a little care.
Start small, experiment with varieties, and soon you’ll be harvesting homegrown heat to spice up everything from salsas to sauces.
Ready to take the next step? Plant your seeds or seedlings this season and watch your spicy success unfold! 🌱🔥 Happy growing!