Planting
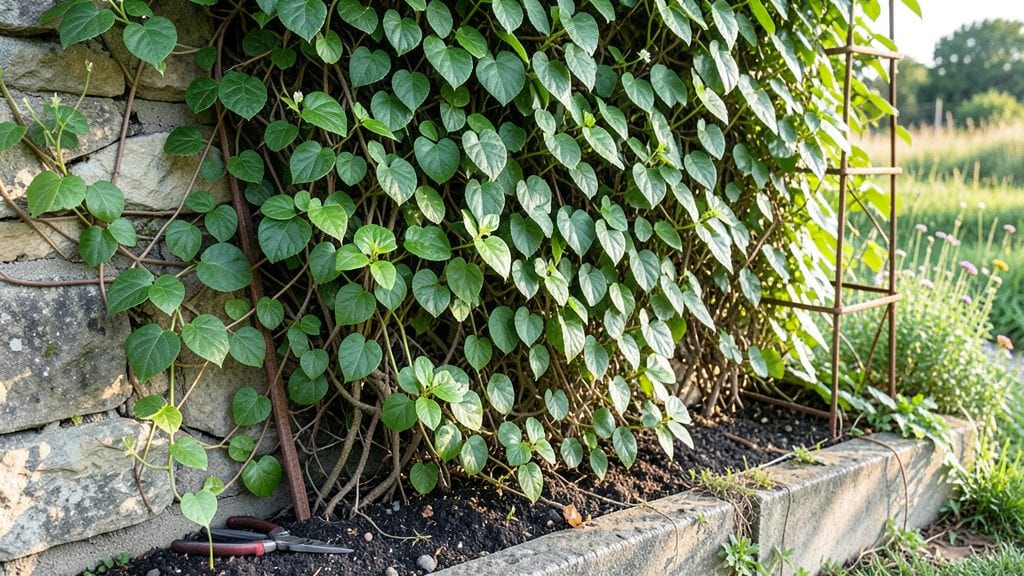
A garden plant wall turns blank walls into lush green backdrops that steal the show. 🌿 I remember transforming my tiny balcony into a fragrant herb wall—now my neighbors ask how I fit so much greenery in such a small space.
The magic isn't just in the plants but in how they climb, cascade, and transform dead space into a living tapestry.
You don’t need a green thumb or a massive budget—just the right structure and plant choices. Modular systems snap together like puzzle pieces, trellises lean against fences, and even hydroponic pockets work for urban setups.
Succulents thrive in dry corners, while flowering vines like morning glories or jasmine add drama with minimal effort.
Picture this: a wall bursting with vibrant blooms in summer, fragrant herbs for cooking, or evergreen foliage that stays stunning year-round. The best part? You’ll reclaim floor space for seating, gardening, or just moving around without tripping over pots.
Let’s make your wall a vertical oasis that works as hard as it looks.
Whether you’re working with a sun-drenched patio or a shady corner, we’ll cover the foolproof basics—from lightweight materials to low-maintenance plants—that keep your wall thriving with almost no fuss. Ready to grow upward?
📚 In This Guide
- What you need
- Instructions
- Tips and common mistakes
- Wrapping up and next steps
What you need
- ● Vertical Garden Structure: Wooden frames (pre-cut or DIY, e.g., 2x4s or cedar planks) – depends on wall size
- ● OR pre-made trellis panels (e.g., metal, plastic, or fabric) – check dimensions for your space
- ● Growing Medium: Coir or peat moss (1–2 bags, 2–3 cubic feet per panel)
- ● Perlite or vermiculite (1 bag, for drainage)
- ● Compost or organic fertilizer (1 bag, 5–10 lbs)
- ● Plants: Climbing plants (e.g., ivy, jasmine, clematis, or fast-growing vines like morning glories) – 3–5 plants per 4’x4’ panel
- ● Small potted plants (e.g., ferns, succulents, or herbs) – 1–2 per pocket (if using modular planters)
- ● Hardware & Fasteners: Stainless steel or galvanized screws/nails (1 lb box)
- ● L-brackets or wall anchors (4–6, for securing frames)
- ● Waterproof sealant (e.g., exterior-grade paint or wood preservative)
- ○ Watering System (Optional but Helpful): Drip irrigation kit (with emitters for vertical setups)
- ● OR a watering can with a long spout
- ● Decorative lighting (solar-powered LED strips for ambiance)
- ● Modular planter pockets (for easy plant swaps)
- ● Self-watering reservoirs (e.g., fabric grow bags with wicking systems)
- ● Weather-resistant paint or stain (for a polished look)
- ● Moss or air plants (for a lush, low-maintenance touch)
Step-by-Step instructions for building a garden plant wall
Here's how to create a thriving vertical garden that transforms any space into a lush, functional green wall.
🪴 Step 1: Choose and Prepare Your Wall Structure
Select a sturdy wall or freestanding frame designed to support vertical plant growth. For wood frames, use 2x4s spaced 12 inches apart horizontally to create pockets for plants. Pre-drill holes for screws to avoid splitting the wood—this ensures stability for vines that can reach 10-15 pounds per square foot when mature.
If using a pre-made modular system, follow the manufacturer's weight limits. I always add L-brackets at the base for extra reinforcement, especially if the wall exceeds 4 feet tall. Level the structure carefully—uneven bases cause plants to lean or dry out unevenly on one side.
🌱 Step 2: Install Irrigation and Drainage Systems
Line the back of each pocket with landscape fabric to prevent soil from spilling through gaps. For built-in irrigation, install drip lines at the bottom of each pocket, spaced 6 inches apart. Connect these to a timer-controlled system for 10-15 minutes of watering daily—overwatering is the fastest way to kill vertical gardens.
Drill ¼-inch drainage holes in the bottom of each pocket if your structure isn't pre-drilled. Without proper drainage, roots suffocate and plants develop root rot within 7-10 days. Test your setup by running water through the system—puddles at the base mean you need more holes or better fabric.
☀️ Step 3: Select and Plant Climbing Species
Choose fast-growing, lightweight vines like morning glories, clematis, or nasturtiums for quick coverage. Plant 2-3 seedlings per pocket, spacing them 4-6 inches apart to encourage air circulation. Dig holes twice as deep as the root ball and backfill with moistened potting mix—never garden soil, which compacts and strangles roots.
Train vines immediately by gently weaving them through trellis grids or tying them to twine supports at 12-inch intervals. This prevents tangled growth and ensures even coverage. Watch for new leaf growth in 2-3 weeks—this confirms roots have established.
💧 Step 4: Maintain Light, Water, and Fertility
Position your wall in full sun to partial shade, depending on the species. Most climbers need 6+ hours of direct light daily. If indoors, supplement with LED grow lights placed 12 inches away for 14 hours/day. Leggy growth means your light source is too far—adjust immediately to avoid weak stems.
Fertilize every 4-6 weeks with a balanced liquid fertilizer (10-10-10 ratio). I mix it at half-strength to prevent salt buildup in the soil. Mulch the top of each pocket with ½ inch of shredded bark to retain moisture and suppress weeds—critical in vertical setups where access is limited.
✂️ Step 5: Prune and Train for Long-Term Health
Prune spent flowers regularly to encourage more blooms and prevent seed pods from weighing down vines. Use clean, sharp pruners to cut just above a leaf node at a 45-degree angle. This redirecting growth keeps plants bushy and productive.
In late fall, cut back woody vines by ⅓ to promote new growth in spring. For tender perennials, protect the base with mulch before the first frost. Your wall will reward you with year-round greenery if you maintain this cycle—no neglected corners allowed!
Tips & tricks for perfect garden plant walls
A few strategic moves will help you avoid the most common pitfalls and create a thriving vertical garden that lasts for years.
Structure Stability: In Step 1, when building your wood frame, use galvanized screws instead of nails—they resist rust and hold better under the weight of mature vines. For freestanding walls over 4 feet tall, anchor them to the ground or wall with heavy-duty brackets to prevent toppling during wind or when vines are fully grown. I've seen walls collapse after just one storm because they weren't properly secured.
Drainage and Irrigation: The 10-15 minute daily watering guideline assumes your drainage system is working perfectly. Test your setup by running water through each pocket before planting—if water pools at the bottom after 30 seconds, add more ¼-inch drainage holes. For extra insurance, consider adding a layer of perlite to the bottom of each pocket before filling with soil. This prevents root rot and keeps moisture levels consistent.
Plant Selection: When choosing your 2-3 seedlings per pocket in Step 3, prioritize plants with complementary growth habits. Pair fast climbers like morning glories (which grow 6-10 inches per week) with slower, bushier varieties like nasturtiums. This creates a balanced look and prevents any single vine from dominating the space. Also, avoid planting heavy feeders like clematis next to light feeders—they'll compete for nutrients.
Light Management: The 6+ hours of direct light requirement can be tricky indoors. If your space only gets 4-5 hours of natural light, supplement with LED grow lights on a timer. Place them 12 inches away and run them for 14 hours daily, but give the plants a 10-hour dark period to rest. Too much artificial light without darkness causes plants to become leggy and weak. I've seen vertical gardens collapse under the weight of over-fertilized, light-starved vines!
Pro Tips for Garden Plant Wall
- A few strategic moves will help you avoid the most common pitfalls and create a thriving vertical garden that lasts for years.
- Structure Stability: In Step 1, when building your wood frame, use galvanized screws instead of nails—they resist rust and hold better under the weight of mature vines.
- Drainage and Irrigation: The 10-15 minute daily watering guideline assumes your drainage system is working perfectly.
Frequently asked questions
Got questions about creating your dream garden plant wall?
You’re not alone! Here are some of the most common queries—and their answers—to help you get started with confidence.
What’s the best time of year to install a garden plant wall?
For most climbers, spring or early fall is ideal—soil is workable, and plants have time to establish roots before extreme heat or cold. Avoid winter in frost-prone areas, as frozen soil can damage roots. If planting perennials, give them at least 4-6 weeks before the first frost for best results.
How often should I water a vertical garden wall?
Watering needs depend on your climate and plants, but daily misting or light watering (especially in hot weather) keeps roots moist without oversaturating. Check the soil—if the top inch feels dry, it’s time to water. Drip irrigation systems work wonders for even coverage and efficiency.
Why are my plants wilting or dying on the wall?
Wilting often signals overwatering, poor drainage, or root stress. Ensure your wall has drainage holes and a breathable growing medium (like coconut coir or lightweight potting mix). If leaves turn yellow, it may be root rot—let the soil dry slightly between waterings. Check for pests (like aphids) too!
Can I use a garden plant wall for non-climbing plants?
While vines and climbers are classic choices, succulents, herbs, and shallow-rooted perennials thrive in vertical planters too. Just use a deeper growing medium (4+ inches) for root-heavy plants like ferns or small shrubs. Modular pockets offer flexibility for mixing plant types!
What’s a budget-friendly way to build a DIY plant wall?
Skip expensive pre-made systems! Use reclaimed wood pallets, cinder blocks, or PVC pipes as frames, and fill with recycled containers (like yogurt cups or plastic bottles). For a natural look, train plants over a trellis made from branches. Start small—even a single shelf can transform a corner!
Do I need special soil for a vertical garden?
Yes! Vertical gardens need lightweight, fast-draining soil to prevent waterlogging. Mix 50% potting soil with 30% perlite or vermiculite and 20% compost. Avoid garden soil—it’s too heavy and compacts easily. Hydroponic mixes work too for soilless systems!
Wrapping up and next steps
A garden plant wall isn’t just a stylish space-saver—it’s a thriving vertical haven that transforms even the smallest yards into lush, green escapes. Whether you’re a seasoned gardener or a beginner, this project offers endless creativity while maximizing your outdoor space. 🌿
Ready to turn your vision into reality? Start small—pick a few of your favorite climbers, gather your materials, and let your plant wall grow into a stunning focal point. Your green oasis awaits!
- 🌱 Next step: Sketch a simple design or browse plant varieties to inspire your layout.
- 🛠️ Pro tip: Begin with lightweight, fast-growing plants for quick results.