Landscaping
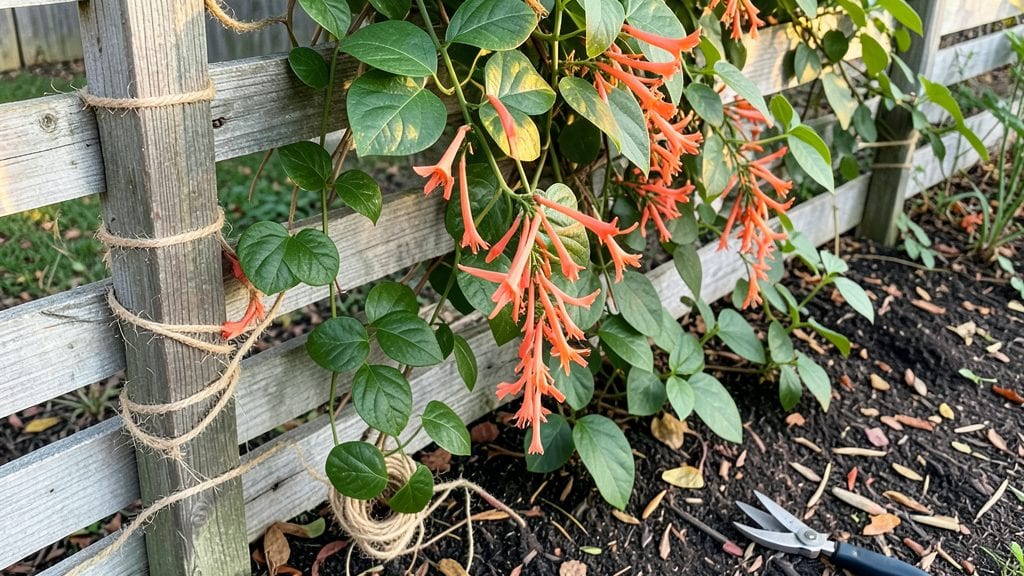
A homemade garden fence transforms bare yard edges into rustic privacy barriers that feel like an extension of your garden. 🌿 I built mine last spring using reclaimed cedar planks and a few basic tools—no expensive materials or complicated designs. The best part?
It cost a fraction of store-bought fencing and blends seamlessly with the landscape, not like those plastic panels that scream "big-box store." The magic happens in the details: how the wood is arranged, whether you leave gaps for climbing vines, or add decorative posts for that handcrafted look.
You don’t need to be a carpenter—just follow a few simple steps for sturdy posts and secure connections. My fence took two weekends to complete, and the difference in privacy and curb appeal was instant.
What you end up with is a living space that feels enclosed yet airy, where sunlight filters through the wood and rain sounds like a natural soundtrack. The wood ages beautifully over time, developing that silver-gray patina that makes it look even more intentional.
Plus, it’s easy to repair or expand as your garden grows. Works for any yard size, from cozy urban backyards to sprawling country plots. Here’s how to make it happen without breaking the bank or your back.
📚 In This Guide
- What you need
- Instructions
- Tips and common mistakes
- Wrapping up and next steps
What you need
- ● Wooden posts: 4x4 pressure-treated lumber (8–12 ft tall, depending on height goals). Pro tip: 💡 Use 6–8 posts for a 10-ft section.
- ● Fence pickets/panels: 1x4 or 1x6 untreated cedar or pine boards (6–8 ft long). Quantity: ~20–30 boards for a 10-ft section.
- ● Concrete: Quick-setting mix (5–10 bags, ~60 lbs each) for post anchors.
- ● Galvanized hardware: 3-inch exterior screws (100+)
- ● 2-inch deck screws (50+)
- ● Heavy-duty corner braces (4–6)
- ● Measuring tape, speed square, and pencil
- ● Circular saw or miter saw (for cutting wood)
- ● Drill/driver with screw bits
- ● Post hole digger (manual or auger)
- ● Level (4-ft) and hammer
- ● Safety gear: gloves, goggles, ear protection
- ● Wood stain/sealant (for weatherproofing)
- ● Post caps (decorative or functional)
- ● Landscape fabric (to prevent weeds)
- ● Pre-cut fence panels (if DIY isn’t your style!)
Step-by-Step instructions for building a rustic wooden garden fence
Here's how to create a sturdy, natural-looking fence that adds charm and privacy to your garden.
🪴 Step 1: Gather Materials and Prepare Your Layout
Start by measuring the area where you'll install the fence. Mark the exact location with wooden stakes and string—this ensures straight lines and prevents crooked panels. For a 4-foot-tall fence, you'll need 2x4 posts spaced 6 feet apart along the perimeter. Check local building codes for height restrictions before you begin.
Clear the ground of rocks, roots, and debris. Dig 12-inch-deep holes for each post using a post hole digger or auger. The holes should be just wide enough to fit the post snugly. I always tap the post into place with a rubber mallet to ensure it sits level before backfilling with gravel and soil.
🌱 Step 2: Set Posts and Secure the Framework
Mix concrete according to package instructions and pour it into each hole, burying the post 8 inches deep. Let the concrete cure for 24 hours before proceeding—this ensures the posts won’t shift when you attach the fence panels. Use a level to check vertical alignment and adjust as needed.
Once the posts are set, cut 2x4 horizontal rails to fit between the posts. Attach them 12 inches from the top and bottom of each post using 3-inch deck screws. These rails create a sturdy frame for your fence panels. Pre-drill holes to prevent wood splitting, especially if you're using untreated lumber.
✂️ Step 3: Build and Install Fence Panels
Cut 1x4 or 1x6 boards to your desired panel height—typically 3 feet for a full 4-foot fence (accounting for the top and bottom rails). Stagger the seams for a cleaner look and nail the boards horizontally to the rails using 2-inch galvanized nails or screws. Leave a ¼-inch gap between boards to allow for natural expansion and contraction.
Lift each panel into place and secure it to the rails with 2-inch screws from the inside. For extra stability, add a diagonal brace between the top and bottom rails on the backside of each post. This prevents panels from bowing outward over time, especially in windy conditions.
☀️ Step 4: Finish and Maintain for Longevity
Apply a wood preservative or stain to protect the fence from moisture, insects, and UV damage. I recommend brushing on the first coat and letting it dry for 24 hours before adding a second coat for full protection. Avoid painting unless you want a more modern look—stains enhance the natural wood grain.
Check the fence annually for loose nails, warped boards, or signs of rot. Tighten screws, replace damaged sections, and reapply sealant every 2-3 years to keep it looking fresh. If you notice gaps between boards, use a chisel to widen them slightly—this improves airflow and reduces moisture buildup.
Tips & tricks for perfect rustic wooden garden fence
A few key strategies will help you build a fence that lasts for years and looks as charming as it is sturdy.
Precision in Layout: Before digging any holes, use a string line to mark your fence line and post locations. This simple step prevents crooked panels that can ruin the whole look. I always double-check my measurements with a tape measure at both ends—even a 1/4-inch difference can create noticeable gaps or overlaps. In Step 1, when you're marking with wooden stakes, drive them just deep enough to stay put but not so deep they're hard to remove later if adjustments are needed.
Concrete Curing Strategy: The 24-hour concrete curing time in Step 2 is non-negotiable for stability, but you can speed up the process slightly by keeping the posts damp with a spray bottle during those hours. This prevents premature drying cracks. I also recommend using a small piece of scrap wood to create a slight lip around the top of each hole before pouring concrete—this helps prevent soil from washing back in after rain.
Board Selection Tip: For Step 3, choose your 1x4 or 1x6 boards carefully—look for straight grain and minimal knots. Warped boards will create uneven gaps and make your fence look shoddy. If you're using untreated lumber, I recommend pressure-treated wood for better moisture resistance, especially if your garden gets wet. For a more rustic look, cedar or redwood boards naturally resist rot without treatment.
Diagonal Brace Secret: That diagonal brace in Step 3 is your fence's secret weapon against wind damage. I always cut these braces from scrap 2x4 material to minimize waste. Install them at a 45-degree angle and secure with two 3-inch screws—this creates a triangle that distributes pressure evenly. For extra strength in windy areas, consider adding a second brace on the front side of each post.
Pro Tips for Homemade Garden Fence
- A few key strategies will help you build a fence that lasts for years and looks as charming as it is sturdy.
- Precision in Layout: Before digging any holes, use a string line to mark your fence line and post locations. This sim...
- Concrete Curing Strategy: The 24-hour concrete curing time in Step 2 is non-negotiable for stability, but you can spe...
Frequently asked questions
Got questions about building your own garden fence?
You’re not alone! Here are some of the most common queries—and their practical solutions—to help you craft the perfect rustic privacy barrier.
What’s the best wood for a durable, long-lasting homemade fence?
For a balance of affordability and durability, cedar, redwood, or pressure-treated pine are top picks. Cedar resists rot and insects naturally, while redwood offers a stunning natural finish. Pressure-treated pine is budget-friendly but may need sealing. Avoid untreated pine or oak—these rot faster in damp climates.
How long does it take to build a homemade garden fence?
Timing depends on fence size and skill level, but here’s a general breakdown:
- Small fence (10–15 ft): 4–8 hours (weekend project!)
- Medium fence (20–30 ft): 1–2 days (with helpers)
- Large fence (50+ ft): 2–3 days (or split over weekends)
Do I need permits for a DIY garden fence?
It depends on your location! Check local building codes—most areas require permits for fences over 6 feet tall or near property lines. A quick call to your city’s building department or a visit to their website will clarify rules. When in doubt, err on the side of caution to avoid fines.
Can I make a garden fence without spending much money?
Skip expensive materials by:
- Using reclaimed wood (check local salvage yards or Craigslist).
- Opting for horizontal slat designs (cheaper than pickets).
- DIY-ing post caps with concrete and leftover bricks.
- Painting or staining with leftover outdoor paint.
How do I prevent my wood fence from rotting or getting termites?
Start with pressure-treated wood or seal untreated wood with a waterproof stain (like linseed oil or exterior sealant). Space posts 6–8 feet apart for airflow, and avoid burying wood directly in soil—use gravel or concrete footings instead. For extra protection, apply a termite repellent (borax or diatomaceous earth) to posts before assembly.
Wrapping up and next steps
Building your own homemade garden fence is a rewarding project that blends creativity, sustainability, and functionality—all while adding rustic charm to your outdoor space. Whether you’re using reclaimed wood, cedar, or pine, the key is taking your time, measuring carefully, and embracing the natural beauty of wood.
With the right tools and a little elbow grease, you’ll create a sturdy, eye-catching boundary that feels uniquely yours.
Now that you’re inspired, roll up those sleeves and get started! 🌲 For extra flair, consider adding climbing plants or decorative accents once your fence is up. Happy building—and enjoy your new private retreat! 🌿