Landscaping
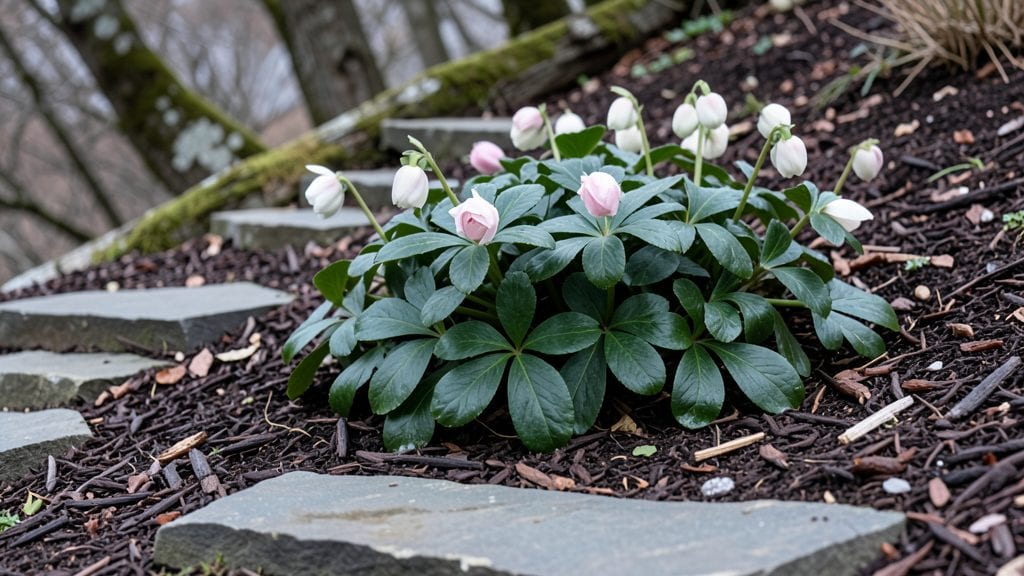
Landscaping a sloping garden with terracing turned my muddy backyard into a stunning, walkable oasis in just one season. The key isn’t just the walls or steps but how they work with gravity to hold water where plants need it most.
I’ll show you how to design terraces that stop erosion while creating levels for seating, planting, or even a fire pit.
You’ll need basic materials like gravel, retaining blocks, and landscape fabric, but no heavy machinery—just a shovel, wheelbarrow, and 3-4 hours for a small section. The biggest game-changer? Planting deep-rooted groundcovers like creeping thyme between terraces to keep soil in place naturally.
My first terrace cost under $200 for materials, and it’s held up for three summers now.
Imagine stepping through a garden where every level feels intentional—water stays put for thirsty plants, paths don’t turn to mud, and you can actually sit and enjoy the view.
With the right design, your slope becomes a feature, not a problem. The secret is starting small: one terrace at a time, testing what works before expanding.
Works for everything from steep hillsides to gentle backyard inclines, and adapts to any style—modern, cottage, or wildflower meadow. Let’s make that slope work for you instead of against you.
📚 In This Guide
- What you need
- Instructions
- Tips and common mistakes
- Wrapping up and next steps
What you need
- ● Gravel or Crushed Stone: 1–2 cubic yards (for drainage layers and base filling). Opt for ½-inch to 1-inch size for stability.
- ● Retaining Wall Blocks: 20–50 units (depending on slope length). Choose interlocking, concrete, or natural stone blocks (e.g., Allsteel or Keystone brands).
- ● Landscape Fabric: 1 roll (10 ft. x 50 ft.). Use non-woven, UV-stabilized fabric to prevent weed growth.
- ● Topsoil: 1–3 cubic yards (for planting beds). Aim for high-quality, amended soil with compost.
- ● Mulch: 2–4 bags (for erosion control and moisture retention). Wood chips or shredded bark work well.
- ● Drainage Pipe (Perforated): 50–100 ft. (4-inch diameter). Use corrugated or smooth PVC with gravel wrap.
- ● Landscape Edging: 50–100 ft. (plastic, metal, or stone). Helps define terraces and prevent soil erosion.
- ● Shovel & Spade (for digging and leveling)
- ● Wheelbarrow (for hauling materials)
- ● Level & String Line (to ensure terraces are even)
- ● Plate Compactor (for stabilizing gravel bases)
- ● Safety Gear: Gloves, goggles, and knee pads
- ○ Optional (but helpful): Laser level for precision
- ● Vibratory plate compactor rental
- ● Post-hole digger for securing retaining walls
- ● Slope Assessment: Measure the grade (rise over run) to plan terrace heights (typically 1–3 ft. per tier).
- ● Permits: Check local regulations—some areas require permits for retaining walls over 4 ft. tall.
- ● Drainage Plan: Ensure proper slope away from your home to avoid water pooling.
- ● Weather Check: Avoid working in extreme heat or rain for best results.
Step-by-Step instructions for creating a sloping garden with terracing
Here's how to transform a steep slope into a functional, water-smart garden space.
Assess the Slope and Mark Terracing Levels
Start by walking the entire slope to identify natural breaks or erosion points—these will guide your terrace placement. Use a 4-foot level to determine the slope's steepness, marking horizontal lines with spray paint every 2-3 feet vertically. This creates consistent benchmarks for each terrace. I like to use a measuring tape to verify each mark is level before moving on.
For a 4-terrace system, space them 3-4 feet apart horizontally to allow room for plants and easy maintenance. If the slope is very steep, reduce this spacing to 2 feet for stability. Avoid placing terraces directly against existing trees or structures—their roots or foundations may interfere with drainage.
Excavate and Build Retaining Walls
Using a shovel and wheelbarrow, dig a trench along each marked line, removing soil to create a 12-inch deep base for the retaining wall. For 4 terraces, you’ll need 4 walls, each 3-4 feet long (adjust based on your slope). I recommend using cinder blocks or retention bricks for durability—they interlock and resist erosion better than loose stones.
Build each wall 12-18 inches tall, ensuring it’s slightly wider at the base (18 inches) than at the top (12 inches) for stability. Leave a 3-inch gap between blocks for drainage, filling it with gravel. Test the wall’s level with your 4-foot level before moving to the next section. If the slope is extreme, reinforce the back of the wall with landscape fabric to prevent soil from seeping through.
Create Drainage Pathways and Fill Terraces
Before adding soil, install drainage pipes (4-inch diameter) at the lowest point of each terrace, angled slightly downward to direct water away from the walls. Cover the pipes with landscape fabric to keep soil out. Now, fill each terrace with a 3-inch layer of gravel for drainage, topped with 6 inches of topsoil. For 4 terraces, you’ll need roughly 2 cubic yards of topsoil total.
Rake the soil smooth and slightly mound it in the center of each terrace to encourage water to flow toward the drainage pipes. Avoid compacting the soil—lightly tamp it with your shovel handle just enough to settle it. If your slope is prone to heavy rain, consider adding a swale (a shallow, curved trench) at the top of each terrace to slow water flow naturally.
Plant and Stabilize the Terraces
Choose deep-rooted plants like shrubs, grasses, or ground covers for the edges of each terrace—they’ll help hold the soil in place. For 4 terraces, plant 3-4 shrubs per terrace along the retaining wall, spacing them 2 feet apart. I recommend drought-tolerant varieties like lavender, rosemary, or creeping thyme to reduce maintenance.
Fill the remaining space with perennials or annuals suited to your climate. Water deeply after planting to settle the roots, then mulch with 2 inches of wood chips to retain moisture and suppress weeds. For the first 2 weeks, check soil moisture daily—sloping gardens dry out faster. Once established, these plants will stabilize the terraces and prevent erosion.
Install Walkways and Final Touches
Create gravel or stepping-stone paths between terraces to make the garden walkable and reduce soil compaction. For 4 terraces, lay down 12-inch wide paths using 3 inches of compacted gravel or stepping stones set in sand. Avoid wide paths—they can destabilize the terraces over time. Add low-voltage landscape lighting along the paths for safety and ambiance.
Finally, add edging materials like metal or plastic edging to keep soil and plants contained. This is especially important on slopes where water can erode the edges. Step back and admire your work—your terraced garden will now retain water, prevent erosion, and provide a beautiful, functional space for years to come.
Tips & tricks for perfect sloping garden terracing
Transforming a steep slope into functional terraces takes precision—here are the key strategies to ensure your project stays stable and beautiful for years.
Leveling is Everything: In Step 1, when marking your 2-3 foot vertical lines, use your 4-foot level to check each mark twice—once horizontally and once vertically. I've seen terraces fail because of uneven levels, especially on slopes. Pro tip: Place a small piece of scrap wood or a leveling tool under one end of your level to create a more precise reference point. This ensures your retaining walls stay perfectly plumb and your terraces drain properly.
Retaining Wall Stability: For Step 2, when building your 12-18 inch tall walls, remember that wider is stronger. The 18-inch base you create gives you a stable foundation, but don't skimp on the gravel backfill. I've learned the hard way that compacting the gravel behind the blocks prevents shifting. Use a hand tamper or even a sledgehammer to settle the gravel firmly before adding soil. This simple step prevents walls from bowing outward over time.
Drainage Design Matters: In Step 3, when installing your 4-inch drainage pipes, angle them downward at least 1/4 inch per foot to ensure proper water flow. I recommend placing the pipes at the absolute lowest point of each terrace—don't guess where that might be. Also, consider adding a layer of coarse gravel around the pipes before covering with landscape fabric. This creates a secondary drainage path if the pipes ever become clogged. The 3-inch gravel layer you add next will further prevent water from pooling against your retaining walls.
Plant Selection Strategy: For Step 4, when choosing your deep-rooted plants, prioritize those with fibrous root systems like lavender or creeping thyme. These plants naturally interlock with the soil and help prevent erosion. I've found that spacing your shrubs 2 feet apart along the retaining wall creates an effective living barrier. For the remaining space, choose perennials with shallow but widespread roots—they'll help hold the soil while allowing water to penetrate. The 2 inches of wood chips you add as mulch will also help conserve moisture in these often-dry terraced areas.
Pro Tips for Landscape Sloping Garden
- Transforming a steep slope into functional terraces takes precision—here are the key strategies to ensure your project stays stable and beautiful for years.
- Leveling is Everything: In Step 1, when marking your 2-3 foot vertical lines, use your 4-foot level to check each mark twice—once horizontally and once vertically.
- Retaining Wall Stability: For Step 2, when building your 12-18 inch tall walls, remember that wider is stronger.
Frequently asked questions
Got questions about transforming your sloping garden into a functional, beautiful space? Here are some common concerns—and their solutions—to help you get started with confidence!
What’s the best time of year to start a sloping garden project?
The ideal time is early spring or fall when the soil is workable but not frozen or overly dry. Spring lets you establish plants before summer heat, while fall gives roots time to settle before winter. Avoid winter (unless in mild climates) or peak summer to prevent erosion or stress on plants.
How do I prevent erosion on a steep slope?
Start with retention walls or terracing to break the slope into manageable levels. Use gravel or mulch between terraces to absorb water, and plant deep-rooted grasses or ground covers (like creeping thyme or sedum) to stabilize the soil. A swale (a shallow trench) can also redirect water naturally.
Are there walkable alternatives to traditional terraces?
Yes! Consider stepping stones, gravel paths, or decks for gentle slopes. For steeper areas, staircases with built-in seating or retractable stairs add functionality. Use non-slip materials (like textured concrete or rubberized pavers) to ensure safety, especially in wet conditions.
What’s the cheapest way to terrace a sloping garden?
DIY with natural materials: Use logs, rocks, or even stacked tires (lined with landscape fabric) to create low-cost terraces. For soil retention, plant fast-growing vines or shrubs (like ivy or wisteria) along the edges. Skip expensive hardscaping—focus on organic shaping and mulch to save money while keeping the look rustic and charming.
How do I fix water pooling in my terraced garden?
Check for gaps in terraces or clogged drains—redirect water with French drains or permeable pavers. Ensure terraces have a slight slope (1-2%) away from your home to avoid runoff. Add drainage pipes at the lowest terrace edge to channel excess water into a rain barrel or dry well.
Can I terrace a slope without heavy machinery?
For small slopes, use shovels, wheelbarrows, and manual labor to move soil. Sheet piling (wooden or plastic boards) can create temporary walls for support. Rent a skid steer or mini excavator (if available) for larger projects, but many DIYers tackle slopes under 5 feet with just muscle and patience.
Wrapping up and next steps
A sloping garden doesn’t have to be a challenge—it can be a stunning, functional space that works with nature!
By embracing terracing, you’ve unlocked the secrets to better water retention, easier walkability, and a low-maintenance oasis. 🌿 Whether you’re tackling a gentle grade or a steep incline, the right design and materials will transform your outdoor space into a sustainable, inviting retreat.
Ready to take the next step? Start small: sketch your slope, gather inspiration, and reach out to local landscapers or suppliers for expert advice. Your dream garden is just a shovel’s throw away—let’s make it happen! 🚀