Shrubs
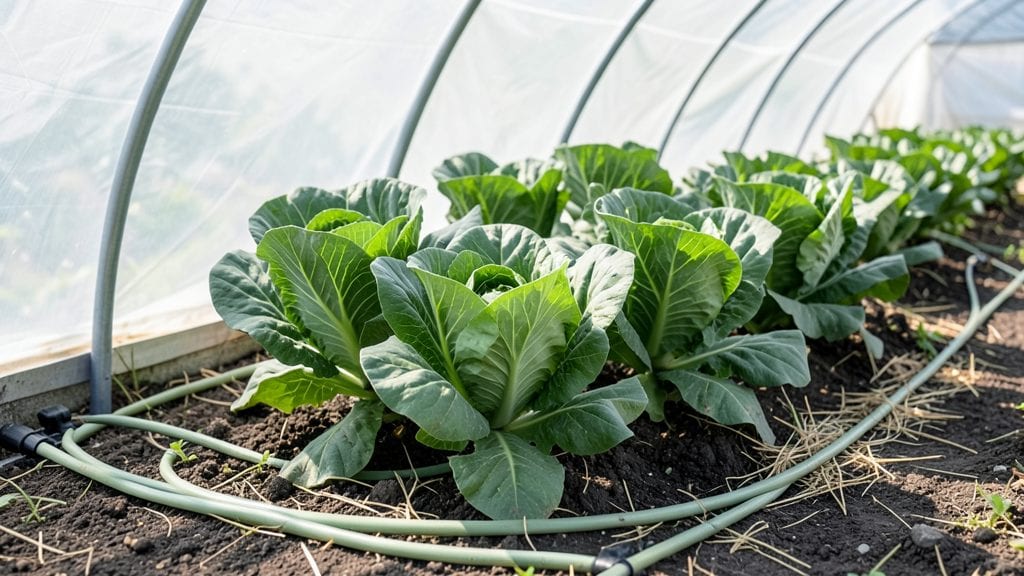
Low tunnel gardening saved my spring lettuce from a late frost last year—no fancy equipment, just a simple frame and lightweight fabric.
The difference between a thriving salad garden and a sad, wilted mess comes down to this one technique that extends your growing season without the cost of a greenhouse.
You’ll need basic supplies: PVC pipes or wire hoops for the frame, frost cloth or shade cloth, and some staples or clips to secure it all. Setup takes less than an hour, and you can adjust the height based on your crops—taller for tomatoes, shorter for greens.
The real magic happens when temperatures dip, keeping plants warm enough to keep growing while protecting them from pests.
Imagine harvesting crisp spinach in March or extending your fall tomatoes into November. With a low tunnel, you’ll get that extra time without the upkeep of a full greenhouse. The fabric lets in light while trapping warmth, and proper ventilation keeps humidity in check—no more moldy leaves or overheated plants.
Works for any garden size, from a small backyard plot to a community garden. Whether you’re protecting seedlings from early frost or giving tender crops a head start in cool weather, this method is the easiest way to cheat Mother Nature just enough to get an earlier harvest.
Let’s get those tunnels built!
📚 In This Guide
- What you need
- Instructions
- Tips and common mistakes
- Wrapping up and next steps
What you need
- ● Low Tunnel Hoops: 10–12 galvanized or PVC hoops (4–6 ft long, ½–1 inch diameter), spaced 3–4 ft apart.
- ● Covering: 1 roll of UV-stabilized agricultural fabric (30–50% shade cloth for warmth) or clear plastic sheeting (4–6 mil thickness).
- ● Stakes or Anchor Weights: 20–30 heavy-duty stakes (18–24 inches) or sandbags (5–10 lbs each) to secure the cover.
- ● Duct Tape or Binder Clips: 1–2 rolls to seal edges and prevent drafts.
- ● Garden Soil: Well-draining, nutrient-rich soil (amend with compost if needed).
- ● Seeds or Transplants: Cold-hardy crops like lettuce, spinach, or kale (or tender plants like tomatoes if using a temporary setup).
- ● Measuring Tape: For precise hoop spacing.
- ● Scissors or Utility Knife: To trim fabric/plastic to size.
- ● Gloves: For handling soil and stakes comfortably.
- ● Watering Can or Hose: With a gentle spray nozzle to avoid damaging covers.
- ○ Ventilation Kit (Optional): Roll-up sides or zippered vents to regulate temperature.
- ● 🌡️ Fabric vs. Plastic: Fabric breathes better for long-term use, while plastic traps more heat for early spring/fall.
- ● ✨ Portability: Use lightweight PVC hoops if you need to move your tunnel seasonally.
- ● 🎯 Ventilation: Leave ends open on mild days to prevent overheating.
Instructions for building and using a low tunnel garden
Here’s how to create a simple, effective low tunnel that extends your growing season without complicated setups.
Choose and Prepare Your Site
Select a 4-foot-wide, 8-foot-long garden bed in a location that gets at least 6 hours of sunlight daily. Low tunnels work best on raised beds or mounded soil to improve drainage. Clear the area of weeds and rocks, then loosen the top 6 inches of soil with a garden fork to encourage root growth. This step ensures your plants won’t struggle with compacted soil once the tunnel is in place.
If your soil is heavy clay, mix in 2 inches of compost from your materials list to improve aeration. Work it in gently—you don’t want to disrupt the soil structure too much. The goal is to create a loose, crumbly texture that holds moisture but doesn’t stay soggy. This prep work pays off when cooler weather arrives, as roots can access nutrients and water more easily.
Assemble the Tunnel Frame
Lay out the 4-foot-wide hoop house frame (or construct one using PVC pipes if you’re building from scratch). Space the hoops 2 feet apart along the 8-foot length of your bed. Bend the pipes slightly to create a gentle arch—this helps snow or rain slide off instead of pooling. Secure each hoop firmly in the ground by burying the bottom 4-6 inches or using stakes to anchor them.
Connect the hoops with flexible garden fabric or wire to create a stable structure. If you’re using clear plastic sheeting, drape it loosely over the frame first to check for gaps or uneven sections. Tighten the fabric or sheeting as needed, but leave a little slack at the edges to allow for expansion when temperatures rise. This ensures your tunnel stays snug without tearing during wind or rain.
Cover and Secure the Tunnel
Drape the clear plastic sheeting or garden fabric over the frame, starting at one end and smoothing it out to avoid wrinkles. Secure the edges with soil, bricks, or heavy rocks to keep it from blowing away. If using plastic, leave the ends slightly open for ventilation on warm days—this prevents overheating, which can scorch plants. For fabric, you can fully enclose it but prop open one side during mild weather.
Check the coverage daily for the first week, adjusting as needed. If rain is forecasted, ensure the plastic is taut enough to shed water without pooling. On sunny days, the tunnel can trap heat quickly, so monitor the inside temperature with your hand—if it feels too warm, lift the plastic slightly for airflow. This balance is key to protecting your plants without smothering them.
Plant and Maintain Your Low Tunnel Garden
Plant cold-hardy crops like spinach, kale, or lettuce directly under the tunnel after assembling it. Space seedlings 6-12 inches apart, depending on the variety, and water them deeply before covering. For 4-foot-wide beds, you can fit 4 rows of plants with this spacing. Avoid planting heat-loving crops like tomatoes or peppers—they’ll bolt or wilt in the cooler, protected environment.
Water your plants every 2-3 days, checking the soil 1 inch below the surface with your finger. Low tunnels retain moisture well, but overwatering can lead to fungal issues. If condensation builds up on the plastic, lift it briefly to air out the space. Remove any yellowing or diseased leaves immediately to keep the tunnel environment healthy. With proper care, your low tunnel can protect plants through early spring or late fall, extending your harvest by 4-6 weeks on either end of the season.
Tips & tricks for perfect low tunnel gardening
Building a low tunnel is simpler than you think, but these small details make all the difference between a temporary setup and a season-extending success.
Site Preparation Pays Off: In Step 1, when loosening that top 6 inches of soil, take your time—don't rush this part. The goal is to create a loose, crumbly texture that mimics well-drained soil. If you're working with heavy clay, that 2 inches of compost isn't just an option; it's essential. I've seen tunnels fail when roots couldn't penetrate compacted soil, no matter how well the rest was constructed. This prep work ensures your plants have the best possible start.
The Frame Stability Secret: When assembling your frame in Step 2, pay special attention to how you secure those hoops. Burying them 4-6 inches deep or using sturdy stakes prevents them from shifting during wind or rain. I learned this the hard way when a storm collapsed my first tunnel because the hoops weren't properly anchored. Also, that slight arch in the pipes isn't just for looks—it helps snow and rain slide right off instead of accumulating on the plants below.
Ventilation is Non-Negotiable: The instructions mention leaving ends open for ventilation, but here's what nobody tells you: On warm days, you might need to lift the plastic completely for 10-15 minutes to prevent overheating. I've seen plants wilt dramatically when tunnels trap too much heat. Check the inside temperature with your hand—if it feels warmer than you'd like for your plants, it's time to ventilate. This simple check can save your entire crop from heat stress.
Plant Spacing Matters More Than You Think: In Step 4, when spacing those seedlings 6-12 inches apart, remember this: Air circulation is just as important as sunlight. Crowded plants create a humid microclimate that invites fungal diseases. For a 4-foot-wide bed, those 4 rows work perfectly—but if you're growing taller varieties like kale, consider spacing them wider (up to 18 inches) to give them room to grow without competing for air and light.
Pro Tips for Low Tunnel Gardening
- Building a low tunnel is simpler than you think, but these small details make all the difference between a temporary ...
- Site Preparation Pays Off: In Step 1, when loosening that top 6 inches of soil, take your time—don't rush this part. ...
- The Frame Stability Secret: When assembling your frame in Step 2, pay special attention to how you secure those hoops...
Frequently asked questions
Got questions about maximizing your low tunnel setup? Here are some of the most common ones—and their practical answers!
What’s the best time of year to set up a low tunnel?
Low tunnels shine in early spring (to extend the season) or late fall (to protect crops from frost). For year-round use, install them in late summer to shield plants from early cold snaps. Remove them in summer if temps exceed 85°F (29°C) to avoid overheating—ventilation is key!
Can I use low tunnels for vegetables other than greens?
Low tunnels work wonders for leafy greens, herbs, strawberries, and even small fruiting plants like tomatoes or peppers (if supported). Avoid heavy vining crops like cucumbers or squash—they’ll need more space. For root veggies (carrots, beets), opt for removable tunnels to prevent soil compaction.
How do I keep pests out without chemicals?
Start with fine mesh fabric (like Agribon) over the tunnel. Add reflective mulch (aluminum tape) to deter insects, and introduce beneficial predators like ladybugs or nematodes. Regularly inspect plants for early signs of trouble—catching pests early is easier than treating an infestation!
What if my low tunnel overheats in summer?
Overheating is common! Ventilation is non-negotiable—roll up sides or add zippered vents. Remove the tunnel entirely on scorching days (above 85°F/29°C) or use shade cloth (30-50% coverage). Plant heat-tolerant crops like Swiss chard or malabar spinach if you’re extending the season into summer.
Are there cheaper alternatives to plastic low tunnels?
Yes! Try hoop houses with row covers (floating fabric over hoops) or DIY tunnels with PVC pipes and old bedsheets. For permanent setups, cold frames (solid-topped boxes) work well for root crops. Just ensure any alternative allows airflow—stagnant air = unhappy plants!
Wrapping up and next steps
Low tunnel gardening is your secret weapon for extending your growing season with minimal effort—no fancy greenhouses or expensive tools required! 🌱 Whether you're a beginner or a seasoned gardener, these simple structures protect your plants from frost, pests, and harsh weather while boosting yields.
Start small, experiment with crops, and watch your garden thrive even in cooler months.
Ready to take the next step? Pick one crop to try this week—like spinach or lettuce—and build your first low tunnel today! 🌿 Your future self (and your taste buds) will thank you.