Orchid Care
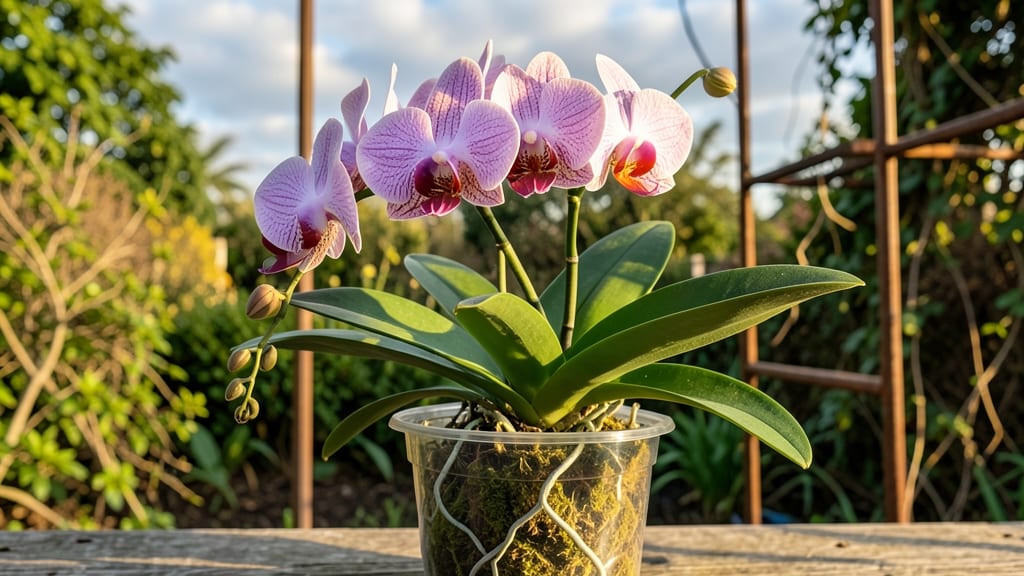
Growing orchids in your garden transforms any space into a lush, exotic oasis—without the fuss of a greenhouse. ✨ I learned the hard way that orchids thrive outdoors in the right spot, and my backyard now features delicate blooms year-round that neighbors can't help but admire.
The key is matching varieties to your climate and giving them the right light, airflow, and moisture balance.
Start with hardy varieties like Dendrobium or Cymbidium for cooler zones, or Vanda or Phalaenopsis for warmer climates. You'll need well-draining soil mixes, sturdy containers, and strategic placement—morning sun with afternoon shade works best for most types.
Pair them with ferns or hostas for a natural, layered look that hides their roots while adding texture.
What you'll end up with is a garden that feels like a tropical retreat, even in temperate zones. The blooms last weeks, the fragrance lingers in the air, and the plants reward minimal care with stunning, long-lasting displays.
Plus, they attract hummingbirds and butterflies that other plants can't compete with. Here's how to make it happen without the stress.
Works in containers, hanging baskets, or even tucked into shady garden beds. The trick is adapting their care to your space—not the other way around. Let's get those orchids growing where you can enjoy them every day.
📚 In This Guide
- What you need
- Instructions
- Tips and common mistakes
- Wrapping up and next steps
What you need
- ● Orchid plants: Choose 3–5 healthy orchids (e.g., Phalaenopsis, Dendrobium, or Cattleya) from a nursery or online retailer. Opt for mature plants with 3+ pseudobulbs or leaves.
- ● Well-draining potting mix: 1–2 bags of orchid-specific bark mix (e.g., fir or pine bark chips, 1–3 inches in size). Avoid garden soil!
- ● Containers: 3–5 orchid pots (4–6 inches wide) with drainage holes, or slotted plastic pots for aerial roots.
- ● Watering can: 1 with a rose or showerhead attachment for gentle watering (avoid overhead pressure).
- ● Fertilizer: 1 bottle of balanced orchid fertilizer (e.g., 20-20-20 or 10-10-10, diluted to half-strength).
- ● Humidity tray or pebbles: 1–2 trays or a bag of pebbles (3/8–1/2 inch) to create humidity around plants.
- ● Pruners or scissors: 1 pair of sterilized pruners for trimming dead roots or spikes.
- ● pH testing kit: 1 to check water/potting mix (ideal pH: 5.5–6.5).
- ● Grow lights: 1–2 LED grow bulbs (5000K–6500K) for low-light gardens (12–14 hours/day).
- ● Moss or sphagnum: 1 small bag for mounting orchids or adding moisture retention.
- ● Support stakes: 3–5 bamboo or plastic stakes for tall orchids (e.g., Dendrobium).
- ● Thermometer/hygrometer: 1 to monitor temperature (60–80°F) and humidity (40–70%).
How to plant and maintain orchids in your garden
Orchids thrive outdoors with the right conditions—here's how to create a lush, low-maintenance display.
🪴 Step 1: Choose the Right Spot and Prepare the Soil
Orchids need bright, indirect light—think dappled shade under trees or a north-facing patio. Avoid harsh afternoon sun, which burns delicate leaves. I dig a shallow trench about 6 inches deep in well-draining soil mixed with 20% perlite or orchid bark to mimic their natural epiphytic habitat.
Test your site by checking moisture levels. Orchids hate soggy roots, so if your soil stays damp for more than a day after watering, amend it further. A simple mix of 50% garden soil, 30% perlite, and 20% coarse sand works wonders. Plant your orchids at the same depth they were in their pots to prevent root stress.
☀️ Step 2: Plant and Provide Proper Airflow
Gently remove orchids from their pots and tease the roots apart if they're tightly bound. Place each plant in the prepared trench, spacing them 8-12 inches apart to allow airflow. I always position them slightly deeper than their original pot level—this encourages stronger root growth.
After planting, water lightly to settle the soil. Orchids need airflow around their roots, so avoid dense mulch. Instead, use a thin layer of orchid bark mulch to retain moisture without suffocating the roots. You'll know your orchids are happy when new roots appear within 4-6 weeks.
💧 Step 3: Water and Fertilize for Year-Round Growth
Water orchids only when the top 1-2 inches of soil feel dry. I use a gentle spray or soak method to avoid disturbing the roots. Overwatering is the fastest way to kill orchids—yellowing leaves or mushy stems are sure signs you're watering too much. In winter, reduce watering to every 10-14 days unless your climate stays mild.
Feed your orchids with a balanced orchid fertilizer diluted to half-strength every 4-6 weeks during growing season (spring and summer). Skip fertilizing in fall and winter when growth slows. You'll see vibrant blooms and lush foliage as a reward for consistent care.
✂️ Step 4: Prune and Monitor for Pests
After flowering, trim spent blooms back to the first node where leaves emerge. This encourages new growth and prevents energy waste. I also remove any yellow or damaged leaves with clean, sharp scissors to keep the plant healthy. Prune in early spring to give orchids a fresh start for the season.
Check for pests like scale or aphids regularly. Orchids attract few pests, but if you spot any, wipe them off with a damp cloth or spray with neem oil. Healthy orchids develop strong, silvery roots that cling to supports or soil—this is your sign they're thriving in your garden.
⏰ Step 5: Adjust Care for Seasonal Changes
In summer, increase watering slightly but keep soil well-draining. In winter, reduce water and fertilizer, and protect orchids from frost with a light cover if temperatures drop below 40°F. I move container-grown orchids to a sheltered spot or indoors if freezing is expected.
Watch for new growth shoots in spring—they signal it's time to resume regular care. With consistent light, airflow, and proper watering, your orchids will reward you with stunning blooms year after year. The key is patience; orchids grow slowly but reward careful gardeners with elegance.
Tips & tricks for perfect orchid care in your garden
A few simple strategies will help your orchids thrive and reward you with stunning blooms for years to come.
Lighting Secret: Orchids need bright, indirect light—think of it like a sunbathing session under a sheer curtain. If your orchids start developing dark green leaves, they need more light. If leaves turn yellow or get sunburned with brown patches, they're getting too much direct sun. I always check leaf color weekly and adjust placement accordingly. A north-facing window or dappled shade under trees works perfectly.
Soil Mix Matters: The 50% garden soil, 30% perlite, and 20% coarse sand mix from Step 1 is crucial for proper drainage. If you notice water pooling around your orchids after watering, amend your soil with more perlite or bark. I like to test drainage by pouring water into a container of the mix—it should drain completely within 10 minutes. Proper drainage prevents root rot, which is the #1 killer of garden orchids.
Root Development Indicator: Those silvery roots you see clinging to supports or soil are your orchids' lifeline. In Step 2, when you plant, position them slightly deeper than their original pot level to encourage stronger root growth. After 4-6 weeks, if you don't see new roots appearing, check your light levels and watering frequency. Healthy roots should be firm and plump, not shriveled or mushy.
Seasonal Adjustment: The 40°F temperature threshold in Step 5 is your winter warning sign. When temperatures drop below this, orchids become vulnerable to frost damage. I always move my container-grown orchids to a sheltered spot or indoors before the first frost. For in-ground orchids, a light frost cloth provides just enough protection. Remember, orchids are tropical plants at heart—they need to be treated with care when winter arrives.
Pro Tips for Orchids In Garden
- A few simple strategies will help your orchids thrive and reward you with stunning blooms for years to come.
- Lighting Secret: Orchids need bright, indirect light—think of it like a sunbathing session under a sheer curtain.
- Soil Mix Matters: The 50% garden soil, 30% perlite, and 20% coarse sand mix from Step 1 is crucial for proper drainage.
Frequently asked questions
Got questions about growing orchids in your garden? You're not alone! Here are some of the most common concerns—and their straightforward solutions—to help you cultivate stunning blooms with confidence.
Can orchids grow year-round in my garden, or do they need seasonal adjustments?
Most orchids thrive year-round in gardens with mild climates (USDA Zones 8-11). In cooler regions, opt for hardy varieties like Dendrobium or Cymbidium, which tolerate frost. For tender types (e.g., Phalaenopsis), move potted plants indoors during winter or use greenhouse structures to protect them. Pro tip: Monitor humidity—orchids love 40-70%—and adjust watering to avoid root rot in winter.
How often should I water orchids in the garden, and what’s the best method?
Water orchids once a week (or when the top 1-2 inches of media feel dry). Use the soak-and-drain method: Place pots in a sink, run lukewarm water for 5-10 minutes, then let them drain completely. Avoid overhead watering—it can cause leaf spots. Key exception: In hot climates, water every 2-3 days and check for wilting. Mist foliage lightly in dry air to mimic their tropical habitat.
Do orchids need full sun, or can they handle shade in the garden?
Orchids prefer bright, indirect light—think morning sun + afternoon shade. Too much direct sun (especially 10 AM–4 PM) can scorch leaves, while deep shade leads to weak growth and fewer blooms. Ideal spots:
- Under high-canopy trees (e.g., oak, maple)
- On east-facing porches or lattice screens for dappled light
- In partial shade with 50% sunlight (use a light meter if unsure!)
What are the most common pests for garden orchids, and how do I get rid of them?
Orchids attract scale, mealybugs, and spider mites. Spot them early:
- Scale: Tiny bumps on stems/leaves. Scrape off with a soft brush or dab with rubbing alcohol (70%).
- Mealybugs: Cottony white clusters. Wipe with soapy water or spray with neem oil.
- Spider mites: Fine webbing on undersides. Blast off with water or use insecticidal soap.
Can I grow orchids in the ground, or do they only do well in pots?
While orchids thrive in pots (for better drainage and monitoring), some terrestrial varieties (like Paphiopedilum or Cypripedium) can grow in garden beds. If planting in-ground:
- Choose well-draining soil (mix 50% peat moss + 50% perlite or bark chips).
- Plant in slightly shaded, sheltered spots (e.g., under shrubs).
- Avoid heavy clay soil—it causes root rot.
Wrapping up and next steps
Transforming your garden into a year-round orchid sanctuary is simpler—and more rewarding—than you might think! 🌸 With the right light, soil, and care routine, these elegant blooms can thrive with minimal fuss, adding a touch of exotic beauty to any space.
Whether you’re a beginner or a seasoned gardener, the key is patience and consistency.
Ready to take the next step? Start small—pick one or two orchid varieties to experiment with, and watch your garden flourish! 🌱 Your green thumb is closer than you think—happy growing!