Light Requirements
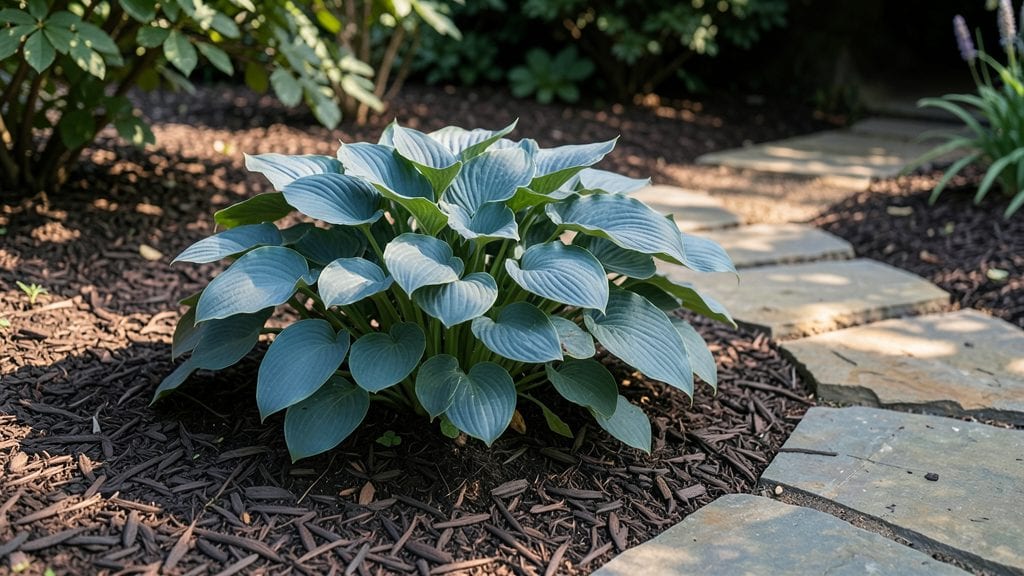
A partial shade garden layout transforms tricky dappled light into a lush, thriving retreat. I’ve designed these spaces for years, and the key is pairing shade-tolerant plants with just enough sunlight to keep them happy—no more struggling with leggy stems or sparse blooms.
The right mix of ferns, hostas, and impatiens creates depth and texture while working with your yard’s natural light patterns.
Start by mapping your shade throughout the day—morning sun vs. afternoon dappled light makes a difference. Layer plants by height: tall ferns or astilbes in the back, medium hostas or coral bells in the middle, and trailing impatiens or sweet woodruff on the ground.
A 5-inch layer of compost mixed into the soil ensures good drainage while keeping roots cool, which is critical for shade plants.
By midseason, you’ll have a garden that feels alive with velvety foliage and bursts of color where others see only shade. The trick is balancing moisture-loving plants near drip lines with drought-tolerant varieties at the edges.
A simple mulch layer keeps soil temperatures steady and reduces weeds, so you spend less time maintaining and more time enjoying.
This layout works for everything from small courtyard gardens to large woodland edges. Whether you’re filling a corner under mature trees or brightening up a north-facing patio, the same principles apply. Let’s turn that tricky shade into your garden’s star feature.
📚 In This Guide
- What you need
- Instructions
- Tips and common mistakes
- Wrapping up and next steps
What you need
- ● Measuring tape (25 ft) – For precise spacing and layout planning.
- ● Garden gloves (1–2 pairs) – Protect your hands while digging and planting.
- ● Hand trowel (small, 6–8") – Perfect for transplanting delicate shade-loving plants.
- ● Garden fork or spade – For breaking up soil and amending beds (12–18" length).
- ● Pruners or shears – Sharp, bypass-style for trimming overgrown foliage.
- ● Wheelbarrow or bucket (5–10 gallons) – For hauling soil, mulch, or amendments.
- ● Garden hose with spray nozzle – Essential for watering new plants gently.
- ● Mulch (shredded bark, pine needles, or composted leaves) (2–3 bags) – Helps retain moisture and suppress weeds.
- ○ Slow-release fertilizer (optional but recommended) – Look for a balanced 10-10-10 or organic options like compost or worm castings.
- ● Partial-shade plants (see article recommendations!) – Quantities depend on bed size (e.g., 3–5 perishable plants for a 4’x4’ area).
- ● Topsoil or garden soil mix (1–2 cubic yards) – Amend with compost for better drainage.
- ○ Mulch rings or landscape fabric (optional) – Helps define beds and reduce weeds.
- ○ Test your soil’s pH (💡 optional but helpful) – Partial shade plants often prefer slightly acidic to neutral soil (6.0–7.0). A simple kit ($10–$15) works!
- ● Check local plant hardiness zones to pick varieties that thrive in your climate.
- ● If your soil is heavy clay, mix in perlite or sand (1 part to 3 parts soil) for better aeration.
Step-by-Step instructions for designing a partial shade garden layout
Creating a thriving partial shade garden starts with smart plant placement and layering for dappled light.
Assess Your Light Conditions
First, observe your space for 2-3 weeks to map how sunlight shifts throughout the day. Partial shade typically means 3-6 hours of direct sun, with filtered light the rest of the day. Note which areas get morning sun, afternoon shade, or dappled light from nearby trees. I like to sketch a quick diagram—marking "sun" spots with an "S" and "shade" with an "Sh" helps visualize the layout before planting.
If your area gets less than 3 hours of sun, focus on true shade-lovers like ferns and hostas. For 6+ hours, consider sun-tolerant varieties. The key is matching plants to the intensity and duration of light they receive. Most partial shade gardens thrive with morning sun and afternoon shade, as the cooler light prevents leaf scorch.
Choose the Right Plants for Dappled Light
Select plants that naturally thrive in partial shade, like heuchera, astilbe, and impatiens, which tolerate 3-6 hours of filtered sun. I always group plants by their light needs—placing sun-lovers at the edge of the shade and shade-tolerant varieties deeper in the garden. For example, coleus and fuchsia love bright, indirect light, while begonias and caladiums prefer softer, dappled conditions.
Layer your garden in three tiers: tall plants (like canna lilies or ornamental grasses) at the back, mid-height foliage (such as heuchera or hostas) in the middle, and trailing or low-growing plants (like sweet potato vine or lobelia) at the front. This creates depth and ensures no plant is overshadowed. Avoid crowding—12-18 inches apart for most perennials gives roots room to breathe.
Prepare the Soil for Partial Shade Success
Partial shade gardens often have moist, slightly acidic soil from fallen leaves and organic matter. Amend the soil with 2-3 inches of compost to improve drainage and fertility, especially if your area stays damp. I mix in a slow-release fertilizer (like 10-10-10) at planting time to give plants a steady nutrient boost without risking burn from over-fertilizing.
Test your soil’s moisture retention—if it stays soggy after rain, add sand or perlite to prevent root rot. Mulch with 2-3 inches of shredded bark or leaves to keep soil cool and retain moisture. This is especially important in partial shade, where evaporation is slower. Avoid thick mulch layers, though—too much can suffocate roots and attract pests.
Arrange Plants for Visual Flow and Light Access
Start by placing tallest plants at the back of the bed, then work forward with medium and low-growing varieties. This ensures even light distribution and prevents smaller plants from being permanently shaded. I like to stagger plants in odd-numbered groupings (3, 5, or 7) for a natural, balanced look. For example, place 3 hostas in a triangle with 1 ornamental grass behind them.
Leave 6-12 inches of space between clusters to allow air circulation and easy maintenance. If your garden has patchy shade, position sun-loving plants near the edges where light filters through. For instance, impatiens or coleus can handle brighter spots, while begonias or ferns thrive in deeper shade. Rotate plants seasonally—what’s partial shade in summer may be full sun in winter.
Maintain Light and Moisture Balance
After planting, monitor how light shifts with the seasons. If leaves yellow or stems stretch (a sign of etiolation), your plants may need more light. Trim nearby branches to open up the canopy gradually. I also check soil moisture weekly—partial shade gardens often stay damp longer, so water only when the top 1-2 inches feel dry. Overwatering is a common mistake in shaded areas.
Fertilize lightly in early spring and mid-summer with a balanced, water-soluble fertilizer to encourage lush growth without overstimulating foliage. Deadhead spent blooms regularly to redirect energy into new growth. By late fall, reduce watering and remove any diseased foliage to keep the garden healthy for next season. A well-maintained partial shade garden will reward you with vibrant color and texture year-round.
Tips & tricks for Perfect partial shade garden layout
A few simple strategies will help you create a thriving partial shade garden that looks stunning year after year. Here's what I've learned from years of trial and error.
The Light Observation Period: Don't rush the 2-3 week observation period in Step 1. I've seen gardens fail when people guessed light patterns instead of tracking them. Use a simple notebook to record sun patterns at different times of day—this becomes your planting blueprint. Marking your diagram with "S" for sun and "Sh" for shade helps visualize where to place each plant type. This step prevents costly mistakes when you realize your ferns are getting too much sun.
Plant Grouping Strategy: When arranging plants in Step 2, think about their light preferences like you would organize books by genre. Place sun-loving plants like coleus and fuchsia at the edges where light filters through, while shade-tolerant varieties like begonias and ferns belong deeper in the garden. This creates natural light gradients that mimic how plants grow in their native habitats. I've found that grouping plants by their light needs reduces stress on individual plants and creates a more cohesive look.
Soil Preparation Secret: The 2-3 inches of compost in Step 3 is non-negotiable for partial shade gardens. I've seen many gardens struggle with poor drainage in shaded areas, so always test your soil's moisture retention before planting. If it stays soggy after rain, mix in sand or perlite to create better drainage while still maintaining moisture. Remember that thick mulch layers (more than 2-3 inches) can actually suffocate roots and attract pests, so keep it moderate.
Seasonal Rotation Tip: Don't forget about seasonal light changes mentioned in Step 4. What's partial shade in summer might become full sun in winter when trees lose their leaves. I recommend planting a few sun-tolerant annuals that you can easily replace in spring if needed. This flexibility gives you a safety net when light conditions shift unexpectedly.
Pro Tips for Partial Shade Garden Layout
- A few simple strategies will help you create a thriving partial shade garden that looks stunning year after year. Her...
- The Light Observation Period: Don't rush the 2-3 week observation period in Step 1. I've seen gardens fail when peopl...
- Plant Grouping Strategy: When arranging plants in Step 2, think about their light preferences like you would organize...
Frequently asked questions
Got questions about creating a stunning partial shade garden?
You’re not alone! Here are some of the most common concerns—and their answers—to help you design with confidence.
What’s the best way to test my garden’s light conditions before planting?
Use a simple sunlight tracker for 24–48 hours. Place a white sheet or a solar-powered calculator in your garden at different times of day. Note how much direct sun hits the area—full sun (6+ hours), partial shade (3–6 hours), or deep shade (<3 hours). This ensures you pick plants that match your space’s unique light patterns!
Can I plant sun-loving flowers in partial shade, or will they struggle?
Some sun-loving plants (like black-eyed Susans or daylilies) tolerate partial shade but may bloom less vibrantly. Opt for native or shade-tolerant sun-lovers like coreopsis or coneflowers, which adapt better. If your garden has hot spots, group these plants where they get morning sun or filtered afternoon light.
How do I layer plants in partial shade to maximize space and beauty?
Start with tall plants (e.g., hostas or ferns) at the back, mid-height perennials (like heucheras) in the middle, and spillers (e.g., ajuga or foamflower) at the front. Add ground covers (e.g., sweet woodruff) to fill gaps and suppress weeds. This creates depth and ensures every inch feels intentional!
Will partial shade plants need extra watering compared to full-sun gardens?
Partial shade gardens often retain moisture longer than sun-drenched areas, but it depends on your soil. Test drainage: Dig a 1-foot hole, fill it with water, and time how long it takes to drain. If it pools for >6 hours, amend with compost or sand. Most partial shade plants thrive with 1–1.5 inches of water weekly, but drought-tolerant picks (like sedum) need less.
What if my partial shade garden looks dull or sparse after the first year?
Don’t panic! Many perennials (e.g., hostas, astilbes) take time to establish. Troubleshoot:
- Thin crowded plants to improve airflow.
- Add mulch (2–3 inches) to retain moisture and deter weeds.
- Prune dead foliage in early spring to encourage new growth.
- Rotate plants every few years—some (like heucheras) benefit from division.
Wrapping up and next steps
Creating a partial shade garden layout is all about embracing the beauty of dappled light and the plants that flourish in it! With the right mix of sun-loving and shade-tolerant species, you can craft a vibrant, low-maintenance space that feels like a lush retreat.
Remember, the key is observation—watch how sunlight shifts throughout the day and let that guide your plant choices.
Now that you’re armed with ideas and insights, it’s time to roll up your sleeves and get planting! Start small—even a single container or a corner of your yard can become a stunning partial shade sanctuary. Happy gardening, and may your dappled-light oasis bring joy for seasons to come! 🌿✨