Vegetables
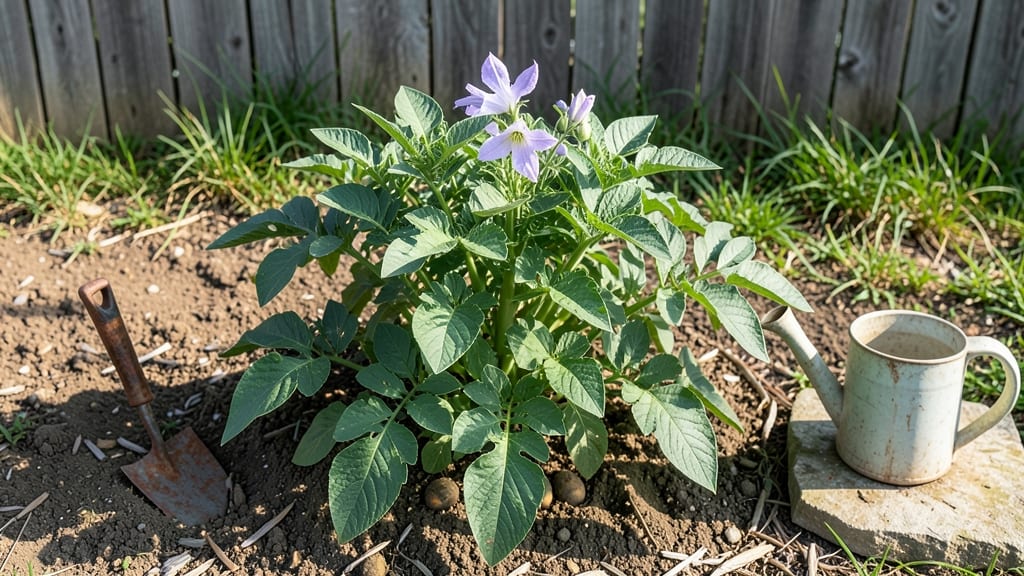
Here are some potatoes gardening tips to ensure your harvest rivals anything you’ve bought—just don’t rush the timing or soil, or you’ll pay the price. 🌱 The secret isn’t complicated, but it’s not what most guides tell you either.
You’ll need cold-hardy varieties for early planting, loose soil that drains like a dream, and a way to hill them as they grow. Skip the fancy tools—just a shovel, some compost, and a sunny spot work.
Within 90 days, you’ll have potatoes so crisp and flavorful they’ll make store-bought taste like cardboard.
📚 In This Guide
- What you need
- Instructions
- Tips and common mistakes
- Wrapping up and next steps
What you need
- ● Potato Seeds: 5–10 lbs of certified disease-free seed potatoes (choose varieties like Yukon Gold, Red Pontiac, or Fingerlings).
- ● Garden Plot or Containers: For in-ground: A well-draining, sunny spot (6+ hours of sunlight) with loose, fertile soil (sandy loam ideal).
- ● For containers: 5–10 gallon pots (1 per plant) with drainage holes.
- ● Compost or Fertilizer: 2–3 cups of balanced 10-10-10 fertilizer or compost per plant (add at planting and mid-season).
- ● Mulch: Straw, grass clippings, or leaves (2–3 inches) to retain moisture and suppress weeds.
- ● Garden Tools: Trowel or hand fork for planting.
- ● Garden fork or spade for hilling (mounding soil around plants).
- ○ Pruners (optional, for removing flowers if growing for tubers).
- ● Potato grow bags (for vertical gardening—saves space!).
- ● Soil pH test kit (ideal pH: 5.0–6.5; amend with lime or sulfur if needed).
- ● Organic slug/bug deterrents (diatomaceous earth or copper tape).
- ● Irrigation system (drip lines or soaker hoses for consistent moisture).
- ● Garden journal to track planting dates, varieties, and harvest times.
Step-by-Step instructions for planting potatoes for year-round harvests
Here's how I grow potatoes that produce consistently—regardless of season or climate.
🌱 Step 1: Choose the Right Variety and Prep Seed Potatoes
Start with certified disease-free seed potatoes from a reputable supplier. I always select varieties suited to my growing zone—Yukon Gold for early harvests and Russet for long-term storage. Cut larger seed potatoes into 2-ounce chunks, ensuring each piece has at least one or two eyes (the little dimples where sprouts emerge). Let the cut pieces dry overnight in a dark, cool spot to prevent rot.
This prevents disease spread and ensures each piece has the energy to sprout quickly. Store leftover seed potatoes in a paper bag in the fridge until planting. The key here is timing—plant when soil reaches 40°F, usually 2-4 weeks before last frost for spring crops.
🪴 Step 2: Build Raised Beds or Hills for Optimal Growth
Potatoes thrive in loose, well-draining soil, so I either build 12-inch-tall raised beds or create hills directly in the garden. If using the raised bed method, fill with a mix of equal parts garden soil, compost, and coarse sand to improve drainage. For hills, mound soil into 6-inch-high piles spaced 3 feet apart. Place one seed potato per hill, 4 inches deep, with the eyes facing upward.
This depth keeps tubers from greening in sunlight and encourages deeper growth. If planting in rows, space hills 18 inches apart to allow room for hilling later. Water immediately after planting to settle the soil and encourage root establishment.
☀️ Step 3: Hill Soil Gradually for Bigger Harvests
When sprouts reach 6 inches tall, mound additional soil around the stems, leaving just the top 2 inches exposed. Repeat every 2-3 weeks until the hill reaches 12 inches high. This hilling process protects new tubers from sunlight (which turns them bitter) and encourages more production. I use the loose topsoil from the bed edges to avoid disturbing roots.
Watch for first flowers—this signals tubers are forming. Stop hilling once flowers appear, as further soil additions can stress the plant. Water deeply once a week, ensuring 1 inch of moisture reaches the base. Mulch with straw to retain moisture and suppress weeds.
⏰ Step 4: Time Harvests for Peak Flavor and Storage
For new potatoes, dig carefully when plants flower. Use a fork to loosen soil around the base, then gently lift the plant to reveal tubers. Harvest young potatoes when they’re golf-ball-sized for tender, sweet flavor. For storage crops, wait until foliage yellows and dies back, usually 2-3 weeks after flowering. Cure harvested potatoes in a dark, dry place at 50°F for 1-2 weeks to toughen skins.
Store in a cool (40-45°F), humid (85-90%) environment—like a root cellar or paper bag in the fridge. Check monthly for soft spots (signs of rot) and remove affected tubers immediately. This method keeps potatoes fresh for 4-6 months.
🌿 Step 5: Rotate Crops and Prevent Common Pests
Potatoes are heavy feeders, so I rotate planting locations yearly to prevent disease buildup. Avoid planting in the same spot for 3-4 years. Use row covers early in the season to deter colorado potato beetles, and handpick adults or larvae when spotted. I also plant marigolds nearby—their scent repels pests naturally.
Watch for blight (brown spots on leaves) and remove infected plants immediately. If soil stays soggy, drainage issues lead to rot. Amend heavy clay soil with compost and sand before planting. This keeps tubers firm and disease-free for consistent harvests.
Tips & tricks for perfect year-round potato harvests
These game-changing strategies will help you avoid common pitfalls and maximize your potato yields throughout the year.
The Soil Temperature Secret: Planting when soil reaches exactly 40°F is critical—this triggers consistent sprouting. Use a soil thermometer to verify, especially in spring when temperatures fluctuate. I've learned the hard way that planting too early in cold soil leads to rot, while waiting for perfect conditions ensures strong root development from day one.
Hilling Technique That Changed Everything: In Step 3, when you're building hills, focus on creating loose, aerated soil rather than compacted mounds. The 2-3 week intervals between hilling sessions allow roots to establish while protecting new tubers from sunlight. I use a garden fork to fluff the soil before adding more—this prevents crusting that can stunt growth.
Storage Wisdom for Long-Term Freshness: The 40-45°F storage temperature range is non-negotiable for preventing sprouting. I store my potatoes in a dark cardboard box with a few apple cores—the apples release ethylene gas that keeps tubers fresh longer. Check monthly for any soft spots (early rot signs) and remove affected potatoes immediately to prevent spreading.
Pest Prevention That Actually Works: The 3-4 year rotation rule is your best defense against blight and other soil-borne diseases. I also plant marigolds around my potato hills—their strong scent confuses potato beetles. For early season protection, use lightweight row covers until flowers appear, which signals tubers are forming and the plant can handle pests better.
Pro Tips for Potatoes Gardening Tips
- These game-changing strategies will help you avoid common pitfalls and maximize your potato yields throughout the year.
- The Soil Temperature Secret: Planting when soil reaches exactly 40°F is critical—this triggers consistent sprouting.
- Hilling Technique That Changed Everything: In Step 3, when you're building hills, focus on creating loose, aerated soil rather than compacted mounds.
Frequently asked questions
Got questions about growing your own potatoes?
You’re not alone! Here are answers to the most common queries to help you grow a bumper crop of spuds—no matter your skill level.
When is the best time to plant potatoes?
Plant potatoes 2 to 3 weeks before your last frost date in spring (or in fall for winter harvests in mild climates). For most regions, this means March–April. Use a soil thermometer—wait until the ground reaches 40–50°F (4–10°C). Early varieties (like ‘Yukon Gold’) thrive in cooler soil, while late varieties (like ‘Russet’) need warmer temps.
How deep should I plant potato seeds?
Start with 4-inch-deep trenches or hill soil around seedlings as they grow. Place seed potatoes (whole or cut) 4–6 inches deep, with eyes facing up. As shoots reach 4–6 inches tall, mound soil around the base to encourage more tubers. Pro tip: Use straw or grass clippings to mulch—it retains moisture and suppresses weeds!
What should I do if my potato plants have holes or wilting leaves?
Holes? Blame colorado potato beetles or slugs. Handpick beetles (and their eggs!) or use neem oil for organic control. Wilting leaves often mean blight (common in humid weather). Remove infected plants immediately, space vines for airflow, and avoid overhead watering. Preventative tip: Plant resistant varieties like ‘Red LaSoda’ if blight is rampant in your area.
How long does it take for potatoes to grow?
Potatoes mature in 60–120 days, depending on the variety:
- New potatoes: Ready in 50–60 days (harvest small, tender tubers early!).
- Maincrop: 90–120 days (e.g., ‘Kennebec’ or ‘Idaho Russet’).
- Storage varieties: 100+ days (like ‘Red Pontiac’).
Can I grow potatoes in containers or small spaces?
Use 5-gallon buckets, fabric grow bags, or deep pots (12+ inches) with drainage holes. Plant 1–2 seed potatoes per container, and fill with loose, well-draining soil. Varieties like ‘Patriot’ or ‘Caribe’ thrive in tight spaces. For vertical gardening, try potato towers (stacked containers) to save space and encourage continuous harvests.
What can I do with leftover potato plants or greens?
Never toss those greens or sprouted potatoes! Greens are edible (like spinach) but can make tubers bitter—harvest them young. For sprouted potatoes, chop and compost them (don’t eat raw—they contain solanine). Save healthy seed potatoes by curing them in a dark, cool place (50°F/10°C) for 2 weeks before storing in a paper bag in the fridge.
Wrapping up and next steps
Growing your own potatoes is rewarding—whether you’re a beginner or a seasoned gardener! 🌱 With the right soil, timing, and care, you can enjoy a bountiful harvest that’s fresher and tastier than store-bought.
Remember: patience and consistency are key, and don’t forget to experiment with varieties to find your favorites.
Ready to dig in? Start small this season, track your progress, and soon you’ll be reaping the benefits of homegrown spuds. Happy gardening—your future meals (and taste buds) will thank you! 🥔✨