How To
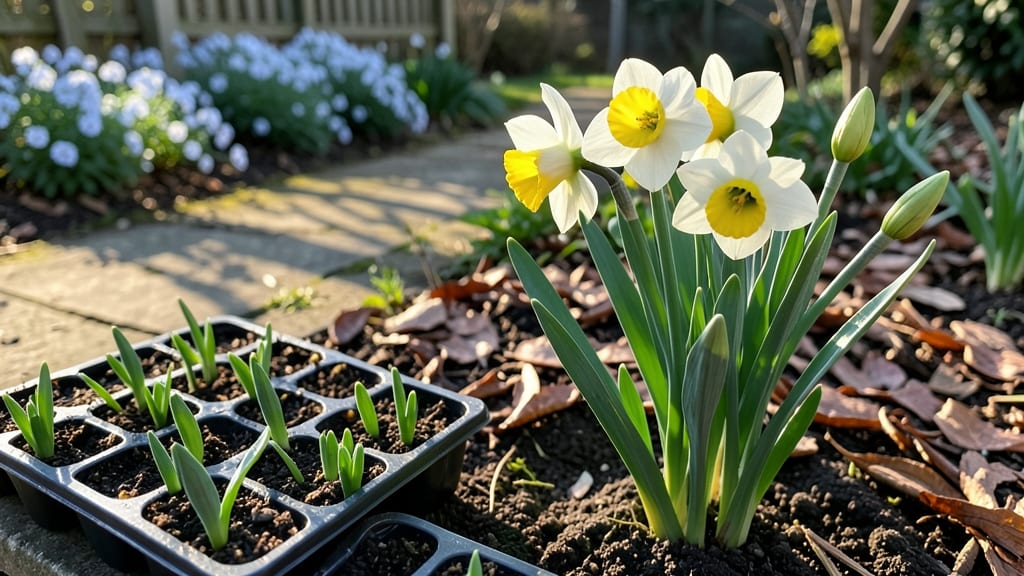
Spring gardening tasks are the foundation for a season of lush growth and abundant harvests, and I’ve learned the hard way that skipping even one step can set you back all year. 🌱 The first frost is still months away, but now is when the soil warms enough to work, weeds start their march, and perennials wake from dormancy—if you miss the window, you’ll be playing catch-up all summer.
Start with a quick soil check: dig a small hole and feel the texture. If it’s still cold or clumpy, wait a week or two—rushing leads to compacted roots and stunted plants.
Then comes the real work: amending beds with compost, testing pH if you’re planting acid-loving crops like blueberries, and clearing out last year’s debris before it smothers new growth. I’ve seen gardens go from barren to bursting just by tackling these basics first.
You’ll also prune back perennials, divide overcrowded clumps, and plant cool-season crops like peas and lettuce before the heat sets in. The payoff? A garden that looks intentional from day one, with fewer pests and stronger plants that handle summer’s challenges like pros.
Even my black thumb can’t mess this up when the timing’s right.
Regional tweaks matter—Zone 5 gardeners should focus on frost dates, while Zone 8 might prioritize shade cloth for heat-sensitive plants. But the core tasks stay the same: prep soil, prune, plant, and protect. Let’s get your garden off to the strongest start possible.
📚 In This Guide
- What you need
- Instructions
- Tips and common mistakes
- Wrapping up and next steps
What you need
- ● Hand trowel – Small (6-8 inches) for precision planting and weeding.
- ● Garden fork – Heavy-duty (18-24 inches) for breaking up soil and compost.
- ● Pruning shears – Bypass type (8-inch blades) for clean cuts on shrubs and perennials.
- ● Garden gloves – Durable, breathable pair (e.g., leather or nitrile-coated).
- ● Watering can or hose – 1-2 gallon capacity with adjustable nozzle for gentle watering.
- ● Rake – Bow rake (18-24 inches) for leveling soil and removing debris.
- ○ Garden kneeler/pad – Optional but highly recommended for comfort during long sessions!
- ● Compost or organic fertilizer – 2-3 bags (5-10 lbs each) for enriching soil.
- ● Mulch – 1-2 cubic yards (pine straw, shredded bark, or composted wood chips).
- ● Plant markers – Biodegradable stakes or labels for labeling seedlings.
- ● Seedlings or seeds – Choose based on your climate zone (e.g., tomatoes, peppers, herbs, or flowers).
- ○ Soil amendments – Optional: perlite, vermiculite, or peat moss for improving drainage.
- ● Pest control – Neem oil, copper tape, or organic insecticide (if needed).
- ● Check your frost dates (last expected frost in spring) for planting timing.
- ● Test your soil pH (use a kit or send a sample to a local extension office).
- ● Plan your garden layout—sketch a map or use a grid system for spacing.
- ● Clear winter debris (leaves, branches) from beds and tools.
Step-by-Step spring gardening tasks for a productive season
Here's how to jumpstart your garden with confidence—no guesswork, just proven seasonal steps.
🌱 Step 1: Clear and Prepare the Garden Beds
Start by removing dead annuals, weeds, and debris from your garden beds. I use a sturdy garden fork to loosen the soil around perennials first—this prevents disturbing their roots while breaking up compacted areas. Rake out any remaining debris and discard diseased plant material in the trash (not compost).
Next, spread a 2-3 inch layer of compost over the entire bed. Work it into the top 6 inches of soil using a broadfork or tiller. This improves drainage, adds nutrients, and encourages beneficial soil microbes. If your soil feels heavy or clay-like, mix in 1-2 inches of coarse sand to improve texture.
☀️ Step 2: Assess and Adjust Sunlight Exposure
Spring is the perfect time to evaluate which areas of your garden receive full sun (6+ hours), partial shade (3-6 hours), or full shade (less than 3 hours). Move any plants that aren't thriving in their current spot—you'll notice leggy growth or yellowing leaves as clear signs they need more light.
If you're adding new plants, sketch a rough layout first. Place taller plants on the north side of beds to avoid shading shorter varieties. I always group plants with similar sunlight needs together—this makes watering and maintenance easier later. Use a tape measure to ensure plants have the spacing recommended on their tags.
💧 Step 3: Test and Amend Soil as Needed
Take a soil sample from 3-4 inches deep in several spots across your garden. If you don't have test results, do a simple squeeze test: Grab a handful of moist soil and squeeze it. If it holds its shape tightly, your soil is too dense. If it crumbles easily, it may need more organic matter.
Based on your test results, amend the soil with the appropriate materials. For acidic-loving plants like blueberries, add sulfur or peat moss. For alkaline-loving plants like lavender, work in crushed limestone. Most gardens benefit from a balanced approach—mix in compost and a slow-release fertilizer like 10-10-10 at planting time.
✂️ Step 4: Prune Perennials and Divide Crowded Plants
Start pruning early bloomers like bleeding heart or lungwort right away—they flower on old wood, so cutting back now encourages healthy new growth. For late bloomers like black-eyed Susans or coneflowers, wait until after they finish flowering. Always use clean, sharp pruners to make clean cuts just above a leaf node or bud.
Divide perennials that have overgrown their space, like hostas, daylilies, or irises. Dig up the entire plant, then separate the roots into smaller sections with at least 3-5 healthy leaves and a good root system. Replant the divisions immediately in prepared soil. This rejuvenates old plants and gives you free new ones for other areas of your garden.
🪴 Step 5: Plant Cool-Season Crops and Tender Perennials
As soon as soil temperatures reach 50°F, plant cool-season crops like lettuce, spinach, peas, and carrots. These thrive in spring's mild temperatures. Work in a 1 inch layer of compost before planting, and keep seeds moist until they germinate. For tender perennials like coleus or geraniums, wait until after the last frost date in your area.
When planting, follow the spacing guidelines on seed packets or plant tags. Water deeply right after planting to settle the soil and remove any air pockets around roots. Mulch with 2-3 inches of straw or shredded leaves to retain moisture and suppress weeds. This keeps your plants happy while you focus on other spring tasks.
Tips & tricks for perfect spring gardening tasks
Here's what nobody tells you about spring gardening—these tricks will save you time and frustration while ensuring your plants thrive.
The Soil Prep Secret: When working in that 2-3 inch layer of compost from Step 1, don't just spread it and call it good. Mix it thoroughly into the top 6 inches of soil—this creates a nutrient-rich zone where roots can really establish. I like to use a broadfork to gently loosen the soil first; it's less disruptive than tilling and preserves beneficial soil organisms. If your soil feels like wet cement, add that 1-2 inches of coarse sand and mix it in—this improves drainage without sacrificing moisture retention.
Sunlight Mapping Hack: In Step 2, when assessing sunlight exposure, I grab my phone and use the timer to track sunlight hours. Set it for 3 hours and move it every hour to different spots—this gives you precise data instead of guessing. You'll be surprised how many "sunny" spots actually get less than 3 hours of direct light. For new plant layouts, I sketch a quick diagram on graph paper where each square represents a foot—this helps visualize spacing before digging.
Pruning Precision: The timing in Step 4 is everything. For early bloomers like bleeding heart, cut back to within 1-2 inches of the ground—this encourages fresh, vigorous growth. For late bloomers, wait until after flowering to avoid removing next year's buds. Here's a trick: After pruning, soak the cut stems in a bucket of water for a few hours. This helps prevent shock and gives your plants a drink while they recover.
Planting Temperature Tip: That 50°F soil temperature threshold in Step 5 is your green light to plant cool-season crops. But don't rush—if nights are still dipping below freezing, wait a few more days. I test soil temperature by placing a thermometer in the ground where I plan to plant. For tender perennials, check your local frost date calendar and mark it on your calendar with a reminder. The 1 inch layer of compost before planting is non-negotiable—it gives seeds and roots the perfect environment to establish.
Pro Tips for Spring Gardening Tasks
- Here's what nobody tells you about spring gardening—these tricks will save you time and frustration while ensuring your plants thrive.
- The Soil Prep Secret: When working in that 2-3 inch layer of compost from Step 1, don't just spread it and call it good.
- Sunlight Mapping Hack: In Step 2, when assessing sunlight exposure, I grab my phone and use the timer to track sunlight hours.
Frequently asked questions
Got questions about tackling your spring gardening tasks?
You’re not alone—here are answers to the most common ones to help you prep like a pro!
When is the exact best time to start spring gardening?
The ideal time depends on your climate, but aim for after the last frost (check local averages) and when soil temps hit 50–60°F. In warmer zones, start in late February–March; in colder areas, wait until April–May. Test soil moisture—if it’s damp but not soggy, you’re golden!
Can I reuse last year’s compost or soil?
Yes, but refresh it! Mix in 2–3 inches of fresh compost or aged manure to replenish nutrients. Avoid reusing soil from diseased plants—sterilize with heat or a 10% bleach solution (rinse well). Pro tip: Add perlite or vermiculite to improve drainage.
What if my plants look wilted after transplanting?
Wilting is normal! Water deeply before and after transplanting, and avoid direct sun for 3–5 days. If leaves turn yellow, it’s often transplant shock. Mulch around the base to retain moisture, and consider a light shade cloth if temps soar. Patience pays off—roots establish in 2–3 weeks!
How do I keep pests away without chemicals?
Start with prevention: Use row covers for young plants, plant pest-repelling herbs (like basil or marigolds), and remove weeds (they attract bugs). For existing pests, try neem oil or a soapy water spray. Introduce beneficial insects (like ladybugs) for long-term defense.
Is it too late to start a vegetable garden in May?
Not at all! Many veggies (like beans, cucumbers, and squash) thrive when planted in late spring. Opt for fast-maturing varieties (check seed packets) and focus on warm-season crops. Just avoid frost-sensitive plants like tomatoes until after May 15 in most regions.
What’s the cheapest way to improve my garden soil?
Skip expensive amendments—try these budget hacks:
- Leaf mold: Collect fallen leaves in a bin for 1 year to create nutrient-rich “dirt.”
- Coffee grounds: Sprinkle used grounds around acid-loving plants (like blueberries).
- Eggshells: Crush and mix into soil for a calcium boost.
- Grass clippings: Use as mulch (avoid thick layers to prevent matting).
Wrapping up and next steps
Spring gardening is your chance to reset, refresh, and revive your garden—one task at a time! 🌱 From prepping soil and planting perennials to tackling pests early, these seasonal steps set the stage for a lush, productive, and beautiful growing season ahead.
Whether you’re a seasoned green thumb or just starting, every small effort makes a difference.
Ready to roll up your sleeves? Start with just one task today—whether it’s clearing debris, testing your soil, or sowing those first seeds. Your future garden will thank you! 🌿