Vegetables
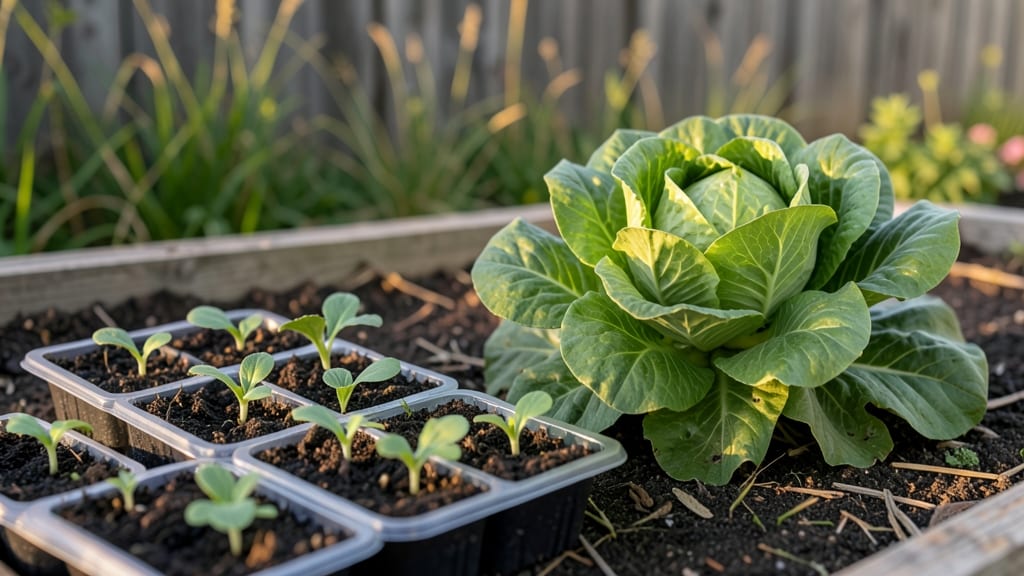
A starter vegetable garden doesn’t need a backyard—just a sunny spot and a few well-chosen plants. I turned a 4x8-foot patch into a summer salad bowl by focusing on fast growers like lettuce, radishes, and bush beans.
The key is keeping it simple: no fancy layouts, just plants that thrive in small spaces and give you results within weeks.
You’ll need basic supplies: a shovel, compost, and containers if you’re not using ground space. Raised beds or large pots work great for beginners, and they solve soil problems right away.
I started with just three 1-gallon pots for herbs and a 4x4-foot raised bed for the rest—no fancy irrigation, just a watering can. The best part? You’ll harvest enough to taste real success before summer’s over.
Picture crisp red radishes popping up in 3 weeks, tender green beans climbing a simple trellis, and lettuce ready to snack on by early June. The layout is foolproof: group plants by their needs—sun-lovers together, shade-tolerant ones near the edges.
Even if you mess up, these plants are hard to kill and forgive mistakes better than fancy flowers.
This works in apartments, balconies, or backyards—anywhere you can fit a container or two. Once you see how easy it is to grow your own food, you’ll wonder why you didn’t start sooner. Let’s get those first seeds in the ground!
📚 In This Guide
- What you need
- Instructions
- Tips and common mistakes
- Wrapping up and next steps
What you need
- ● Growing Space: 1–4 containers (5–10 gallons each) or 1 raised bed (4’x8’ or smaller) or 4’x4’ in-ground plot
- ● Drainage: Drill holes in containers or ensure raised beds have sloped sides
- ● Soil: 1–2 bags of high-quality potting mix (for containers) or 1–2 cubic yards of well-draining garden soil (for in-ground)
- ● Compost: 1–2 bags of organic compost (to enrich soil)
- ● Seeds or Seedlings: 5–10 seed packets (e.g., lettuce, radishes, green beans, cherry tomatoes, basil) or
- ● 4–6 healthy seedlings (if starting with transplants)
- ● Tools: 1 hand trowel (for planting)
- ● 1 garden gloves (to protect your hands)
- ● 1 watering can (1–2 gallons) or hose with gentle spray nozzle
- ● 1 mulch (straw or shredded leaves) to retain moisture
- ● 1 plant markers (to label your veggies)
- ● 1 fertilizer (balanced organic fertilizer or compost tea)
- ● 1 row cover (for frost protection)
- ● 1 pruning shears (for harvesting and trimming)
Step-by-Step instructions for designing your first compact vegetable garden
Let’s create a manageable, high-yield space that fits your skill level and growing conditions.
Choose a Sunny, Accessible Location
Pick a spot that gets at least 6 hours of direct sunlight daily—most vegetables need this to thrive. I recommend a small raised bed, container, or even a patch of ground near your kitchen for easy harvesting. Avoid low areas where water pools, as soggy soil leads to rotten roots. Measure the space: a 4-foot by 4-foot bed gives you enough room for 4 plants with proper spacing.
Check the soil by digging a 6-inch hole. If it feels hard or compacted, you’ll need to amend it later. This is also the time to consider accessibility—place your garden where you’ll actually visit it daily. A spot near a walkway or patio keeps you motivated and makes weeding less of a chore.
Prepare the Soil for Healthy Growth
Remove any weeds or grass from the area, then loosen the top 6 inches of soil with a garden fork or tiller. This helps roots penetrate easily. If your soil is heavy clay or sandy, mix in 2-3 inches of compost to improve drainage and fertility. For containers or raised beds, fill them with a sterile potting mix designed for vegetables.
Test the soil’s moisture by squeezing a handful—it should hold together but not feel soggy. If it crumbles, add a little water and mix again. Avoid working the soil when it’s wet, as this compacts it further. Once prepped, the soil should feel light, crumbly, and rich—like a well-aged cake batter.
Plan a Simple, High-Yield Layout
For beginners, stick to 4 easy-to-grow vegetables like lettuce, radishes, bush beans, and cherry tomatoes. Arrange them in a square-foot grid—each plant gets 1 square foot of space to grow without competing. Place taller plants like tomatoes at the north end of the bed to avoid shading shorter crops.
Label each section with small stakes or flags to track what’s planted where. I like to sketch a quick map first—this prevents overcrowding and makes future care easier. For example, radishes mature in 3-4 weeks, so plant them near the edge where you can harvest without disturbing other crops.
Plant and Water for Strong Starts
Dig holes twice as wide as the root ball and no deeper—this encourages roots to spread outward. Gently place each plant in its spot, then fill the hole with soil, pressing lightly to remove air pockets. Water deeply right after planting to settle the soil and encourage root contact.
Use a soaker hose or drip irrigation to water at the base, avoiding the leaves. This prevents fungal diseases and keeps moisture where the roots need it. Water 1 inch per week, adjusting for rain—let the top 1-2 inches of soil dry out between waterings to avoid overwatering.
Maintain with Minimal Effort
Weed regularly to reduce competition—pull weeds when they’re small, before they steal nutrients. Mulch with 2-3 inches of straw or shredded leaves to retain moisture and suppress weeds. This also keeps soil temperatures stable, which is especially helpful in hot climates.
Fertilize lightly every 4-6 weeks with a balanced, organic fertilizer. Too much can burn young plants, so follow package instructions carefully. Watch for pests like aphids or caterpillars—remove them by hand or spray with soapy water if they appear. A healthy garden rarely has major issues if you stay on top of these basics.
Tips & tricks for perfect starter vegetable gardens
A few simple strategies will help you avoid common pitfalls and create a thriving garden that actually produces food. Here's what I've learned from years of gardening with beginners.
Location is Everything: The 6 hours of sunlight requirement is non-negotiable for most vegetables. I've seen beginners place gardens under trees or against north-facing walls, and the results are always disappointing. Use a sun calculator app to track sunlight patterns in your yard for at least a week before committing to a spot. Morning sun is especially important for leafy greens like lettuce, while afternoon sun benefits tomatoes and beans.
Soil Prep Makes All the Difference: When loosening that top 6 inches of soil in Step 2, think of it like preparing a cake batter—you want it light and airy. If your soil feels like concrete when dry or mud when wet, you'll need to mix in more compost. For containers, I recommend a high-quality vegetable mix rather than regular potting soil, as it has the right balance of nutrients and drainage for edible plants.
Plant Spacing Secrets: The square-foot grid in Step 3 might seem rigid, but it's actually a game-changer for beginners. I've had students crowd plants too closely, leading to competition for nutrients and increased pest problems. Remember that plants need room to breathe—especially taller varieties like tomatoes. If you're short on space, consider vertical growing options for beans or using dwarf varieties of tomatoes.
Watering Wisdom: The 1-inch weekly watering guideline is perfect for most climates, but timing matters just as much as quantity. Water in the early morning whenever possible to reduce evaporation and fungal risks. I've seen many gardens fail because people watered at night, leading to damp leaves that stay wet overnight—a perfect condition for diseases. Use a rain gauge or tuna can to measure your watering accurately.
Pro Tips for Starter Vegetable Gardens
- A few simple strategies will help you avoid common pitfalls and create a thriving garden that actually produces food.
- Location is Everything: The 6 hours of sunlight requirement is non-negotiable for most vegetables.
- Soil Prep Makes All the Difference: When loosening that top 6 inches of soil in Step 2, think of it like preparing a cake batter—you want it light and airy.
Frequently asked questions
Got questions about launching your first compact vegetable garden? You’re not alone! Here are answers to the most common starter questions to help you grow with confidence.
What’s the best time of year to start a starter vegetable garden?
For most regions, spring (after the last frost) or early fall are ideal. Check your local frost dates—cool-season crops like lettuce thrive in spring, while tomatoes and peppers prefer warm soil. If you’re in a mild climate, you can even start in late winter with cold-hardy greens!
How long does it take to see results in a starter garden?
Fast growers like radishes or green onions may sprout in 3–4 weeks, while tomatoes or peppers can take 2–3 months to bear fruit. Patience pays off—track your progress with a simple journal or app to stay motivated!
Can I use containers or do I need a full garden bed?
Containers (like 5-gallon buckets or window boxes) work great for herbs, lettuce, and dwarf varieties. Just ensure they have drainage and 6+ inches of soil. If space is tight, try vertical gardening with trellises for peas or cucumbers.
What should I do if pests or diseases show up?
Start with prevention: Rotate crops, use organic sprays (neem oil), and handpick pests like aphids. For fungal issues, improve airflow and water at the base. If problems persist, isolate affected plants and research localized solutions—many starter gardens thrive with minimal intervention!
What are the easiest vegetables for beginners?
Start with these low-maintenance picks:
- Leafy greens (lettuce, spinach) – Fast, forgiving, and great for small spaces.
- Radishes – Ready in weeks and deter pests!
- Green beans – Bush varieties grow vertically and produce prolifically.
- Herbs (basil, parsley) – Hardy and perfect for snipping fresh.
Wrapping up and next steps
Starting a starter vegetable garden is one of the most rewarding ways to connect with nature and enjoy fresh, homegrown produce—no green thumb required! 🌱 Whether you’re working with a windowsill, balcony, or small backyard, these compact layouts make it easy to grow flavorful veggies with minimal effort.
The key is to start small, stay consistent, and celebrate every harvest, no matter how tiny.
Ready to take the next step? Pick your favorite veggies, grab your tools, and plant your first seeds today! Your future self (and taste buds) will thank you. 🌿