Picking
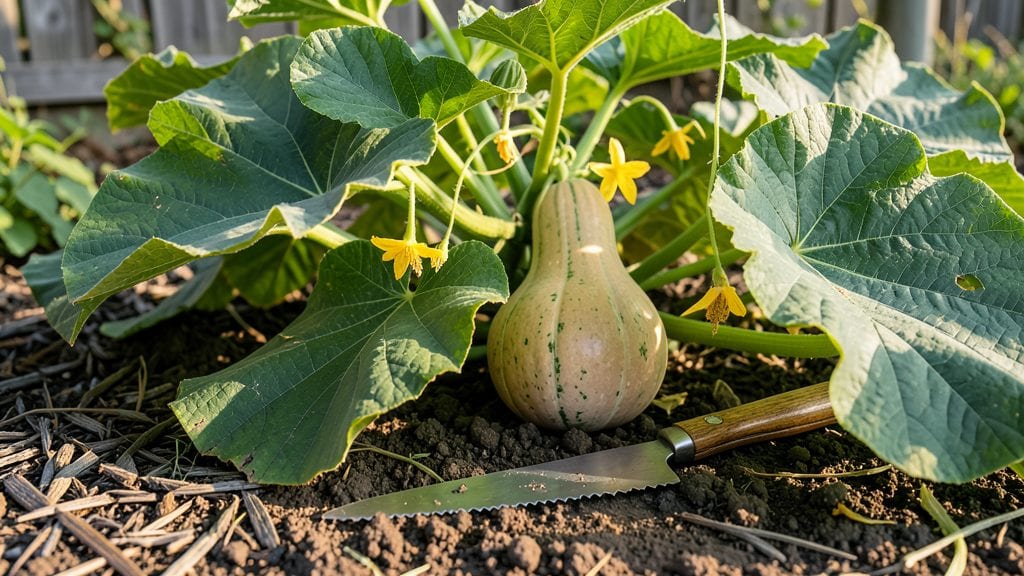
Knowing when to pick butternut squash from your garden transforms your harvest from bland and fibrous to rich, caramel-sweet perfection—here’s how to spot the perfect moment.
Harvesting too early gives you bland, watery squash, while waiting too long risks frost damage or overripe fruit. The key is watching for three telltale signs: a hard, papery rind, a shriveled stem, and a dull tan color.
In USDA Zone 6a, your butternut squash will be ready 80–100 days after planting, typically in late September or early October. But don’t rely solely on the calendar—check the squash itself for readiness.
Below, I’ll walk you through the exact visual cues to look for, plus tips for testing doneness and storing your harvest for months of delicious meals.
Butternut squash ripeness guide: color and texture clues for harvest time
Harvesting your butternut squash at the right moment transforms bland, fibrous flesh into sweet, velvety perfection. The key lies in reading visual cues and tactile signals—like a rind that’s hard enough to resist your thumbnail but not so tough it’s past its prime.
I’ve learned the hard way that waiting too long means rubbery texture, while picking too early delivers underwhelming flavor. Here’s how to nail that sweet spot every time.
First, focus on the rind color, which shifts from bright green to a dull tan or beige as the squash matures. This isn’t the vibrant orange you might expect—butternut squash ripens to a more muted, earthy hue.
The transition happens gradually, so check your plants every 3–5 days once they’re nearing maturity (around 80–100 days after planting). Pro tip: Morning light enhances color visibility, so do your inspections after sunrise when dew has evaporated.
Next, examine the stem where it meets the fruit. A ripe butternut squash will have a stem that’s dried, shrunken, and papery—almost like it’s separating from the vine. If the stem is still plump and green, your squash needs more time.
This is one of the most reliable harvest indicators because it signals the plant has stopped nourishing the fruit. I once missed this cue and ended up with squash that stored poorly because the stem wasn’t dry enough.
The tapping test is another foolproof method I swear by. Give the squash a firm tap with your knuckles—it should sound hollow and deep, like knocking on a wooden door. An underripe squash will produce a dull, thudding noise.
This test works because the seed cavity fills with mature seeds as the fruit ripens, creating that telltale echo. Pair this with pressing your thumbnail into the rind: if it doesn’t dent easily, it’s ready.
Here’s a quick ripeness checklist to summarize these clues before you harvest:
summary-table
Ripeness Indicator
Ready for Harvest?
What to Look For
Action
Rind Color
✅ Yes
Dull tan or beige (not bright green or orange)
Proceed to harvest
Stem Condition
✅ Yes
Dried and shrunken near the fruit
Harvest within 1–2 days
Tapping Sound
✅ Yes
Hollow, deep (like knocking on wood)
Pick immediately
Thumbnail Test
✅ Yes
Rind resists indentation (no dent from nail)
Harvest ready
Seed Cavity
✅ Yes
Plump, mature seeds inside
Cut open to confirm
Not Ready Signs
❌ No
Soft green rind, pliant stem, spongy feel
Wait 3–5 more days
Timing your harvest is also about avoiding frost. Butternut squash cannot tolerate freezing temperatures, so if a frost is forecasted within 48 hours, harvest immediately—even if the squash isn’t perfectly ripe.
The flavor won’t be as sweet, but it’s better than risking rot or spoilage in cold, wet conditions. In my Zone 6a garden, I always have my pruning shears ready by late October, just in case.
After harvesting, let your butternut squash cure for 10–14 days in a warm, dry place (around 80–85°F) to develop full flavor. This process hardens the skin and concentrates sugars. Store cured squash in a cool, dark place (like a basement) where temperatures stay between 50–55°F.
With proper curing and storage, your harvest can last 2–3 months without losing quality.
One final pro tip: Harvest on a dry morning after the dew has evaporated. Wet squash is more prone to rot during curing, and handling damp fruit can spread disease to other plants.
I’ve ruined entire batches by ignoring this simple step—don’t make my mistake! The extra 30 minutes waiting for dew to dry is worth it for a perfect harvest.
Mastering these ripeness cues ensures your butternut squash delivers that sweet, nutty flavor we all love. Whether you’re planning to roast, puree, or store them for winter, nailing the harvest timing is the first step to gardening success.
Common mistakes that ruin your butternut squash harvest (and how to avoid them)
Harvesting butternut squash too early or too late can turn your sweet, velvety harvest into tough, bland disappointment. The biggest mistake is relying on days-to-maturity alone—your local climate and soil conditions play huge roles.
Even experienced gardeners miss subtle ripeness cues that signal peak flavor, leading to wasted effort or poor storage life.
Another common error is ignoring the stem condition. Many gardeners assume a squash is ready just because it’s large, but a dry, shriveled stem is your best indicator of true ripeness.
Skipping this check often means harvesting squash that’s still immature inside, with underdeveloped seeds and bland flesh. Let’s fix these mistakes before your next harvest.
⚠️ When to Pick Butternut Squash: Don’t Miss These Critical Signs
Overripe squash loses sweetness and develops a woody texture, while underripe squash stays tough and watery. Here’s how to nail the perfect harvest window:
- Rind color: Dull tan or beige (not bright green or orange)
- Stem condition: Dry, shriveled, and separated from the fruit
- Texture test: Press your thumbnail—if it doesn’t dent, it’s ready
- Tapping sound: Hollow thud when tapped (like a pumpkin)
Pro tip: Harvest before the first frost—cold temperatures turn starches to sugar, but frost-damaged squash spoils quickly.
Your growing zone affects timing too. In warmer climates (Zones 8-10), butternut squash may mature 2-3 weeks earlier than in cooler Zones 4-6. For example, a Waltham Butternut in California might be ready by late August, while the same variety in Maine waits until October.
Always adjust your harvest schedule based on your last frost date and average first frost.
Soil health also sneaks up on gardeners. Poor drainage or compacted soil slows maturity, making squash take longer to reach harvest size. If your soil feels heavy or clay-like, amend it with compost or sand before planting.
Well-draining soil ensures even ripening and prevents rot or blossom-end rot, which can ruin your harvest before you even pick it.
Finally, variety matters. Some butternut types, like Gold Rush, mature faster (80 days) than Long Neck varieties (100 days). Always check the seed packet for days-to-maturity and cross-reference with your local frost dates.
Planting a mix of early, mid, and late varieties spreads out your harvest and reduces waste from overripe squash.
By watching for these ripeness cues and adjusting for your climate and soil, you’ll avoid the most common harvest mistakes. Next time, your butternut squash will be sweet, firm, and ready for storage or cooking—no guesswork needed!