Landscaping
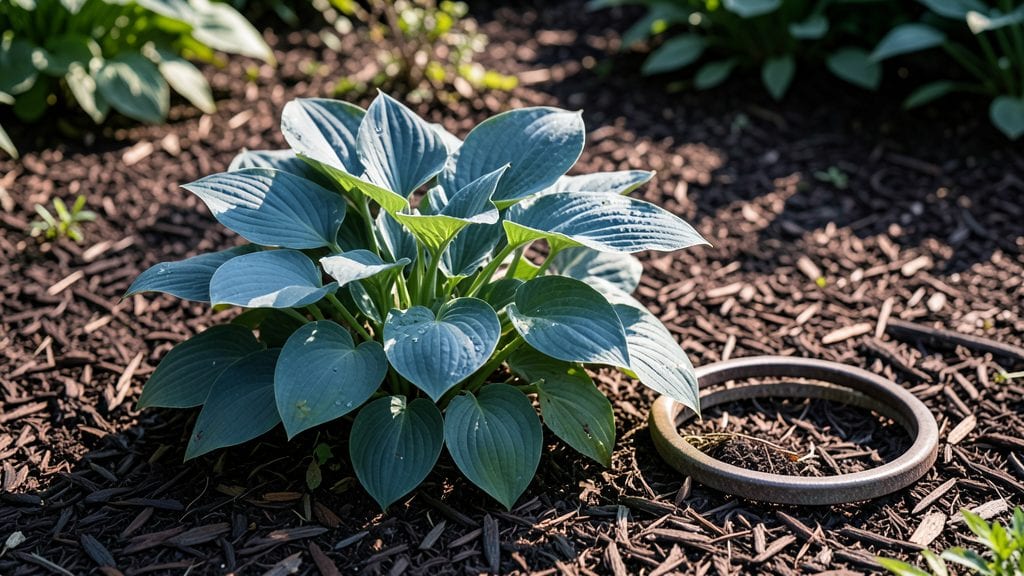
Creating a circle garden design starts with a blank canvas and a vision for layered beauty that feels effortless to maintain.
The first time I sketched one on graph paper, I realized how much symmetry could simplify my garden’s care—no more fighting weeds in tight corners or struggling to reach the center.
The key lies in those concentric rings, each serving a purpose whether it’s a fragrant herb spiral, a low shrub border, or a showstopping focal point like a small fountain or statue.
You’ll need a few basics: a 10-foot diameter circle as your starting point (adjustable for space), a hose or string to mark perfect arcs, and plants that thrive in your climate’s sun exposure.
I use three rings—outer for tall perennials, middle for mid-height blooms, and center for ground covers or a decorative element. The outer ring acts as a living fence, the middle brings seasonal color, and the center stays lush with minimal fuss.
What you end up with is a garden that feels like a living mandala—every layer complements the next, and the symmetry makes maintenance a breeze.
Imagine strolling through in summer, the scent of lavender and rosemary rising from the outer ring while the center bursts with sunflowers or a bubbling birdbath. The best part? You can start small—even a 5-foot circle on a patio works—and expand over time.
This design works for any yard size, from suburban backyards to urban balconies with large pots. The trick is playing with height, texture, and seasonal interest so there’s always something to admire.
Ready to sketch your first circle? Grab a pencil and let’s turn that vision into a garden that feels like a hug every time you walk by.
📚 In This Guide
- What you need
- Instructions
- Tips and common mistakes
- Wrapping up and next steps
What you need
- ● Garden twine or spray paint: For marking the perfect circle (use a 10-foot radius for a cozy design or adjust to your space).
- ● Topsoil: 2–3 cubic yards (depending on circle size) for a nutrient-rich base.
- ● Mulch: 1–2 bags (cedar or pine) to retain moisture and suppress weeds.
- ● Perennials/shrubs: 5–7 plants (e.g., lavender, hostas, or ornamental grasses) for layered texture.
- ● Garden edging: 10–15 feet (flexible metal or stone) to define the circle’s borders.
- ● Basic tools: Shovel
- ● Rake
- ● Garden gloves
- ● Wheelbarrow
- ● Decorative stones or pavers: For a polished centerpiece or pathway.
- ● Solar-powered lights: To highlight your circle garden after dark.
- ● Drip irrigation system: For low-maintenance watering.
- ● Seasonal plants: Annuals (e.g., marigolds or pansies) for pops of color.
- ● Birdbath or small fountain: To attract wildlife and add charm.
Instructions for creating a low-maintenance circle garden
Here’s how to craft a balanced, eye-catching circle garden that thrives with minimal effort.
Mark and Measure the Garden’s Center
Use a tape measure to mark the garden’s center with a wooden stake or garden flag. For a 4-foot diameter circle, measure 2 feet from the center in all directions to define the outer edge. I like to use a 3-foot length of string tied to the center stake and stretched outward to trace the perfect circle with a garden hose or spray paint. This ensures symmetry from the start.
Double-check your measurements by walking around the circle to confirm it looks even. If one side feels uneven, adjust the string and retrace. A well-measured circle prevents uneven plant placement later, which can throw off the garden’s balance. Skipping this step often leads to lopsided designs that look rushed.
Divide the Circle into Four Equal Quadrants
Draw two perpendicular lines through the center—one north-south and one east-west—to split the circle into four equal quadrants. Use a 4-foot ruler or measuring tape to ensure the lines intersect perfectly at the center. I mark these lines with small stakes or flags for visibility while planting.
Each quadrant will hold a different layer of plants: tall anchor plants in the outer ring, mid-height fillers in the middle, and low ground covers closest to the center. This vertical layering creates depth and prevents taller plants from shading smaller ones. If your circle is larger, adjust the spacing accordingly—6-foot circles need 3-foot quadrants for the same effect.
Plant the Outer Ring with Tall Anchor Plants
In the outermost 1-foot band of each quadrant, plant tall, structural plants like sunflowers, hollyhocks, or ornamental grasses. Space them 12–18 inches apart to allow room for growth without overcrowding. Dig holes twice as wide as the root ball but only as deep as the container they came in.
Water each plant deeply after placing it in the hole to settle the soil around the roots. These anchor plants frame the circle and draw the eye inward. If you notice leggy growth later, it’s a sign they need more sunlight—circle gardens often cast shade in the center, so position taller plants where they’ll get at least 6 hours of sun daily.
Fill the Middle Layer with Mid-Height Plants
Move inward 1–2 feet from the outer ring and plant mid-height plants like shrubs, perennials, or small trees in the next 1-foot band. These should be half the height of the outer plants to create a gradual transition. For a 4-foot circle, this layer typically includes plants like boxwood, lavender, or dwarf conifers, spaced 10–12 inches apart.
Amend the soil in this layer with 1–2 inches of compost to improve drainage and fertility. Mid-height plants often struggle if the soil is too dense, so mixing in compost ensures they establish strong roots. Water lightly after planting to avoid disturbing the roots, and mulch with 2–3 inches of organic mulch to retain moisture and suppress weeds.
Add Low Ground Covers to the Center
In the innermost 1–2 feet of the circle, plant low-growing ground covers like creeping thyme, ajuga, or moss to soften the design and prevent soil erosion. These should spill over slightly to create a cohesive look. Space them 6–8 inches apart and water thoroughly to encourage root spread.
This layer is where texture matters most—mix leaf shapes and colors for visual interest. For example, pair silver foliage with deep green to create contrast. Avoid overwatering here; ground covers thrive in well-draining soil and can rot if kept too wet. If the center looks bare after a few weeks, it’s a sign the soil needs more organic matter or the plants need a little more time to fill in.
Mulch and Maintain for Long-Term Beauty
Spread 2–3 inches of organic mulch evenly across the entire circle, keeping it 2 inches away from plant stems to prevent rot. Use shredded bark, pine straw, or cypress mulch for a clean, polished look. Mulching suppresses weeds, retains moisture, and regulates soil temperature—critical for low-maintenance gardens.
Water deeply once a week (or more in hot climates) to encourage deep root growth. Circle gardens are prone to dry soil in the center, so a soaker hose placed in a spiral from the outer edge inward ensures even moisture distribution. Check for pests weekly, especially in the outer ring where taller plants can attract aphids or spider mites.
Tips & tricks for perfect circle garden design
Creating a balanced circle garden takes careful planning, and these tips will help you avoid common pitfalls while maximizing visual impact and low-maintenance success.
Precision in Step 1 Pays Off: When marking your 4-foot diameter circle, I recommend using a small level to ensure your center stake is perfectly vertical. This prevents the string from sagging when you trace the circle, which can create uneven edges. For larger circles (up to 6 feet), consider using a garden hose or flexible measuring tape instead of string—it's easier to adjust and maintain perfect symmetry. Double-checking your measurements by walking around the circle is worth the extra 2 minutes it takes.
Layering Secret for Depth: The key to that professional-looking vertical transition between plant layers lies in proper spacing. In Step 3, when planting your tall anchor plants, measure their mature height and space them accordingly—taller varieties (like sunflowers) should be 18 inches apart, while medium-height grasses can be 12 inches apart. For the mid-height layer in Step 4, I like to use a simple formula: space plants at 1/3 of their mature height. This creates natural flow between layers without overcrowding.
Soil Preparation Matters Most: Don't skip amending the soil in Step 4 with 1-2 inches of compost—this is where many circle gardens fail. I've seen beautiful designs collapse because mid-height plants struggled in compacted soil. For the center layer in Step 5, mix in perlite or coarse sand if your soil drains poorly. Ground covers like creeping thyme actually prefer slightly drier conditions, so avoid over-amending with organic matter in this zone. A soil test kit costs just $20 and can save you from guessing.
Maintenance Shortcut: The weekly watering recommendation in Step 6 works perfectly for most climates, but I've found that placing a rain gauge in the center helps track moisture levels more accurately than relying on memory. For hot summers, consider installing a simple drip irrigation system with a timer—it delivers that once-weekly deep watering automatically while you're at work. The spiral pattern mentioned for soaker hoses is particularly effective for even distribution in circle gardens.
Pro Tips for Circle Garden Design
- Creating a balanced circle garden takes careful planning, and these tips will help you avoid common pitfalls while maximizing visual impact and low-maintenance success.
- Precision in Step 1 Pays Off: When marking your 4-foot diameter circle, I recommend using a small level to ensure your center stake is perfectly vertical.
- Layering Secret for Depth: The key to that professional-looking vertical transition between plant layers lies in proper spacing.
Frequently asked questions
Got questions about creating your dream circle garden?
Here are answers to the most common ones—from planning to upkeep—so you can design with confidence!
What’s the best time of year to plant a circle garden?
The ideal time depends on your climate! In cool regions, plant perennials in early spring or fall (after the last frost). In warm zones, opt for late winter or early spring before summer heat sets in. Annuals can go in spring or fall for continuous blooms.
How do I choose the right size for my circle garden?
Start small—3 to 5 feet in diameter is perfect for beginners! Measure your space and consider:
- Walkways: Leave at least 2 feet of clearance around the edge for easy access.
- Sunlight: Smaller circles (3–4 ft) work well in shady spots; larger ones (5+ ft) thrive in full sun.
- Purpose: Herb spirals (2–3 ft) or pollinator circles (4–6 ft) need tailored sizing.
Can I make a circle garden on a budget?
Skip expensive edging by using natural borders like mulch, rocks, or even recycled bricks. For plants, start with cuttings or seeds (e.g., mint, thyme, or marigolds) instead of mature specimens. Repurpose containers (buckets, old tires) as planters for a zero-waste design.
How do I keep pests out of my circle garden?
Prevention is key! Use these low-maintenance tricks:
- Interplanting: Mix pest-repellent herbs (basil, lavender) with vulnerable plants.
- Mulch: Apply 2–3 inches of organic mulch (straw, wood chips) to deter weeds and pests.
- Companion plants: Marigolds + tomatoes or nasturtiums + cucumbers create natural barriers.
- Neem oil: Spray weekly (diluted) for organic pest control.
How often should I water a circle garden?
Water deeply 2–3 times per week (adjust for rain). Use the "finger test": Stick your finger 1 inch into the soil—if it’s dry, water! For low-maintenance designs:
- Group plants with similar water needs (e.g., succulents + lavender together).
- Install a drip irrigation system or soaker hose to save time.
- Water in the early morning to reduce evaporation and fungal risks.
Wrapping up and next steps
A circle garden design isn’t just a trend—it’s a timeless, low-maintenance masterpiece that brings harmony to your outdoor space. With its symmetrical layers, it’s perfect for creating a serene, visually stunning retreat that’s easy to care for.
Whether you’re a seasoned gardener or just starting, this design offers endless creativity with minimal effort!
Ready to transform your yard? Start small—sketch your design, gather your materials, and take the first step today! Your future garden (and future self) will thank you. 🌿✨