Light Requirements
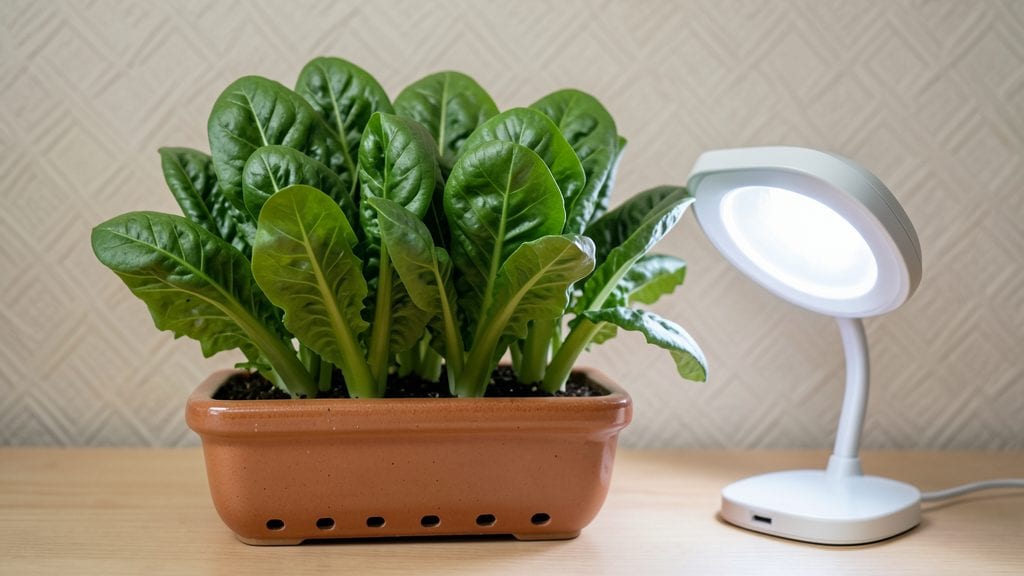
An indoor kitchen garden that actually thrives—no matter how little sunlight you have. 🌱 I’ve turned my own dim kitchen corner into a year-round greens factory by ditching the "sunny window" myth and focusing on smart layouts instead. The key isn’t more light—it’s how you arrange what you’ve got.
Start with the right plants: leafy greens like spinach and kale grow well under fluorescent or LED grow lights, while herbs such as basil and parsley tolerate lower light better than most vegetables.
Stack shelves vertically to maximize space, and keep pots small—5-7 inches deep is plenty for most greens. A basic grow light on a timer (12-16 hours/day) works better than hoping for natural light, especially in winter.
By week 4, you’ll have tender baby greens ready to harvest, and the setup stays productive for months. The best part? No more wilting store-bought herbs or sad lettuce—just fresh, crisp greens steps from your stove.
Even a 10-square-foot windowsill or countertop can feed a family of two reliably.
This works for apartments, tiny kitchens, or even a sunny corner you’ve been ignoring. The secret isn’t fancy equipment—it’s thoughtful placement and choosing the right plants for the light you do have. Let’s get growing!
📚 In This Guide
- What you need
- Instructions
- Tips and common mistakes
- Wrapping up and next steps
What you need
- ● Growing Containers: 1-3 6-12 inch deep pots or planters (with drainage holes) – 1 per plant
- ○ Optional: Self-watering planters or vertical garden kits for space-saving
- ● Growing Medium: 2-3 bags of lightweight potting mix (avoid garden soil—it compacts!)
- ○ Optional: Perlite or vermiculite (1 part per 4 parts soil) for aeration
- ● Seeds or Seedlings: Herbs: Basil, mint, parsley, or chives (fast-growing & low-light tolerant)
- ● Leafy Greens: Lettuce, spinach, or kale (choose compact varieties)
- ● Pro Tip: Start with seedlings if short on time—just transplant into pots!
- ● Lighting: Grow Lights: 1-2 LED or fluorescent full-spectrum bulbs (12-16 hrs/day)
- ● Natural Light: South-facing window (6+ hrs/day) or a sunny kitchen counter
- ● Watering & Care: Spray bottle (for gentle watering)
- ● Small watering can (with narrow spout)
- ○ Optional: Humidity tray (shallow tray + pebbles + water)
- ● pH testing kit (to monitor soil acidity)
- ● Organic fertilizer (balanced 10-10-10 or fish emulsion)
- ● Pruning shears (for harvesting & shaping plants)
- ● Label markers (to track plant types)
- ● Thermometer/hygrometer (for ideal temp/humidity)
Step-by-Step instructions for designing sunlight-smart indoor kitchen gardens
Here's how to maximize your space and light for a thriving indoor harvest.
🪴 Step 1: Assess Your Light Sources and Select Containers
Start by mapping your kitchen's natural light. South-facing windows provide the most consistent 6+ hours of direct sunlight, while east or west windows offer 4-6 hours. If your space lacks windows, a full-spectrum LED grow light becomes essential—position it 4-6 inches above plants for optimal growth. Choose containers with drainage holes (terra cotta pots work best) and select sizes based on plant maturity: 6-inch pots for herbs, 8-inch pots for leafy greens, and 12-inch pots for larger plants like dwarf tomatoes.
I arrange containers in tiers—smaller pots on top shelves to catch light, larger ones on lower surfaces. This vertical approach maximizes sunlight exposure without sacrificing floor space. Place reflective surfaces like aluminum foil or white trays behind pots to bounce extra light onto leaves, especially in dimmer corners.
☀️ Step 2: Group Plants by Sunlight Needs
Organize your greens into three sunlight zones: high-light, medium-light, and low-light. High-light plants like basil, parsley, and chives need 6+ hours of direct sun—place them closest to the window. Medium-light plants (spinach, kale, lettuce) thrive with 4-6 hours of sun, while low-light plants (microgreens, arugula) can survive with 2-4 hours or grow lights. Rotate containers quarter-turn weekly to prevent plants from leaning toward the light source, ensuring even growth.
Here's the thing—don't overcrowd. Leafy greens need at least 6 inches of space between plants to avoid competition. If using grow lights, space them 12-18 inches apart for uniform light distribution. I’ve found that grouping plants by type also makes watering and harvesting easier—just move the whole tray at once.
💧 Step 3: Establish a Watering and Fertilizing Routine
Use the finger test to check moisture: stick your finger 1 inch into the soil. If it feels dry, water until excess drains from the bottom. Overwatering is the fastest way to kill indoor plants—never let containers sit in saucers of standing water. I water in the morning to allow excess moisture to evaporate by evening, reducing the risk of fungal diseases. For fertilizing, use a balanced liquid fertilizer (10-10-10) every 2-3 weeks during active growth, cutting back in winter when plants slow down.
Mist leaves occasionally to increase humidity, especially in dry indoor environments. A humidity tray (a shallow tray filled with pebbles and water) under pots can help maintain moisture levels without drowning roots. Watch for yellowing leaves—this usually signals overwatering, while crispy edges mean the air is too dry. Adjust your routine based on what you observe.
✂️ Step 4: Prune and Harvest for Continuous Growth
Regular pruning encourages bushier growth and prevents legginess. Pinch back the tips of basil, mint, and parsley when they reach 6 inches tall to promote branching. For leafy greens like spinach and kale, harvest outer leaves first, leaving the inner growth intact. This cut-and-come-again method ensures a steady supply without sacrificing the plant. Harvest herbs in the morning after dew has dried but before the heat of the day—this preserves flavor and moisture.
Don’t skip deadheading spent flowers on herbs like dill or cilantro—this redirects energy into leaf production instead of seed formation. If a plant becomes too leggy or sparse, consider replacing it with a new one. I like to keep a small notebook nearby to track what’s thriving and what isn’t, adjusting my layout as needed for the next season.
⏰ Step 5: Adjust for Seasonal Light Changes
Indoor light shifts with the seasons—winter sunlight is weaker and lower in the sky, while summer light is intense and direct. In winter, supplement with a grow light for 12-14 hours daily to maintain growth. Move containers closer to the window in winter to capture every ray of light, and further away in summer to prevent scorching. Rotate plants daily if using grow lights to ensure even exposure, as bulbs can create hot spots.
Watch for stretched or pale leaves—this is your cue to adjust light or fertilizer. In fall, reduce fertilizing as daylight shortens, and prune back any overgrown plants to prep for winter. I’ve found that a little seasonal tweaking keeps my indoor garden productive year-round, even in the darkest months.
Tips & tricks for perfect indoor kitchen gardens
A few strategic tweaks can transform your indoor garden from struggling to spectacular. Here's what I've learned after years of trial and error in my own kitchen.
Light Optimization: In Step 1, when positioning your grow lights 4-6 inches above plants, consider using a timer for 12-14 hours daily in winter—this mimics natural daylight cycles. For south-facing windows, place reflective surfaces at a 45-degree angle behind pots to maximize light bounce. I've found that adding a second light source (like a clip-on LED) during cloudy days prevents light deprivation.
Container Strategy: The tiered approach in Step 1 works best when you pair 6-inch pots for herbs with lightweight materials like coconut coir. For 8-inch pots of leafy greens, use self-watering containers to maintain consistent moisture without overwatering. I've had success with fabric grow bags that allow roots to breathe while preventing soil compaction.
Seasonal Transition: When adjusting for seasonal changes in Step 5, don't just move containers closer—rotate them daily if using grow lights to prevent uneven growth. In summer, I place a sheer curtain between plants and windows to diffuse intense light that can scorch leaves. For winter, supplement with a red-blue spectrum LED that mimics natural sunlight more effectively than white bulbs.
Harvesting Hack: For continuous growth in Step 4, harvest basil and parsley by cutting just above a set of leaves (never more than 1/3 of the plant at once). For leafy greens, use clean, sharp scissors to avoid tearing stems. I've found that harvesting in the morning gives the most flavorful leaves, and storing them in a paper towel-lined container keeps them crisp for up to 5 days in the fridge.
Pro Tips for Indoor Kitchen Gardens
- A few strategic tweaks can transform your indoor garden from struggling to spectacular.
- Light Optimization: In Step 1, when positioning your grow lights 4-6 inches above plants, consider using a timer for 12-14 hours daily in winter—this mimics natural daylight cycles.
- Container Strategy: The tiered approach in Step 1 works best when you pair 6-inch pots for herbs with lightweight materials like coconut coir.
Frequently asked questions
about indoor kitchen gardens—because growing greens inside should be simple, not stressful! Here are answers to the most common questions to help you get started confidently.What’s the best lighting setup for an indoor kitchen garden?
LED grow lights or full-spectrum bulbs (12–16 hours/day) work best for most greens. If natural light is limited, place plants near a south-facing window (6+ hours of sunlight) or supplement with a small grow light. Avoid fluorescent bulbs—they’re too weak for most herbs and veggies!
How quickly can I expect to harvest my indoor kitchen garden?
Timing varies by plant! Leafy greens like basil or spinach may be ready in 3–4 weeks, while root veggies (like radishes) take 4–6 weeks. Herbs like cilantro or parsley can be harvested in 2–3 weeks if pruned regularly. Patience pays off—consistent care speeds up harvests!
What’s the easiest way to water an indoor kitchen garden without overdoing it?
Use the finger test: Stick your finger 1 inch into the soil—if it’s dry, water lightly until it drains from the bottom. Avoid soggy soil (root rot risk!) and opt for self-watering planters or drip systems if you’re forgetful. Pro tip: Water in the morning for best absorption.
Can I grow an indoor kitchen garden in a tiny apartment with no balcony?
Start with space-efficient setups like vertical hydroponic towers, hanging planters, or countertop herb gardens. Dwarf varieties (e.g., ‘Baby Leaf’ lettuce) thrive in small pots. Even a sunny windowsill can yield fresh greens—just rotate plants weekly for even light exposure!
What should I do if my indoor plants get pests or mold?
Act fast! For pests (like aphids), wipe leaves with neem oil or a soapy water spray. Mold (fuzzy spots) means overwateringPrevent it: Use well-draining soil and avoid crowded pots.
Which indoor-friendly greens are the easiest for beginners?
Start with these low-maintenance picks:
- Herbs: Basil, mint, parsley, and chives (thrive in pots, harvest often).
- Leafy Greens: Spinach, arugula, and ‘Lollo Rossa’ lettuce (fast-growing, forgiving).
- Microgreens: Radish or broccoli sprouts (ready in 10 days!).
Wrapping up and next steps
Indoor kitchen gardens are your secret weapon for fresh, homegrown greens—no matter the weather! By optimizing light with sunlight-smart layouts, you can enjoy year-round harvests while keeping your space vibrant and productive.
Whether you’re a seasoned gardener or just starting, the key is small, strategic steps—like choosing the right containers, maximizing natural light, and supplementing with grow lights when needed.
Ready to greenify your kitchen? Start small with a single shelf or windowsill garden, then expand as you gain confidence. Your future self (and taste buds!) will thank you for this fresh, flavorful adventure. 🌱