Tools
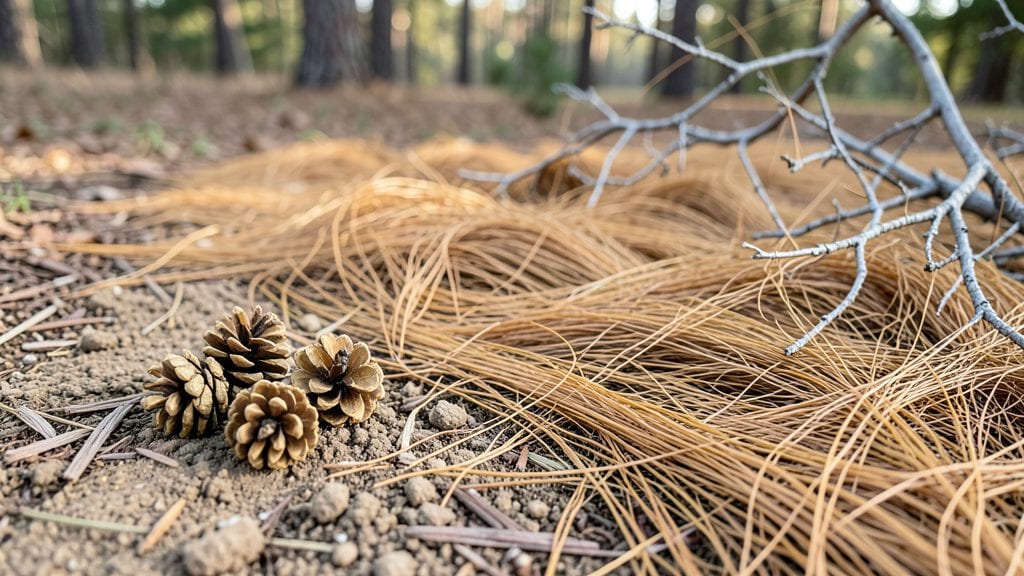
My garden stays moist and weed-free all year thanks to this simple trick: spreading pine straw mulch. 🌿 The golden needles hold moisture like a sponge while keeping weeds from popping up—no more endless pulling or watering every other day.
I’ve used it around shrubs, flower beds, and even my vegetable patch, and the difference in soil health is night and day.
You’ll need about 2-3 inches of pine straw spread evenly over the soil surface, keeping it a few inches away from plant stems. It’s lightweight, easy to spread, and breaks down slowly, releasing nutrients over time.
Unlike wood chips, it doesn’t compact or smother plants, and it won’t steal nitrogen like fresh mulch can. Plus, it stays in place during rain or wind—no flying debris to clean up.
By spring, your soil will look richer, retain water better, and stay cooler in summer heat. The mulch also suppresses weeds naturally, so you’ll spend less time weeding and more time enjoying your garden.
It’s the kind of low-maintenance solution that makes gardening feel effortless—once you see how it transforms your beds, you’ll never go back.
Works for acid-loving plants like azaleas, blueberries, and hydrangeas, but also safe for most vegetables and flowers. Just avoid using it in areas where you’ll be planting seeds—it can block light and moisture too much.
For best results, refresh the layer every 1-2 years or when it starts to break down. Simple, effective, and game-changing for any garden.
📚 In This Guide
- What you need
- Instructions
- Tips and common mistakes
- Wrapping up and next steps
What you need
- ● Pine straw mulch: 10–20 bags (or ~1 cubic yard, depending on garden size). Choose long-staple (3–4") for better weed suppression.
- ● Garden gloves: 1 pair (nitrile or leather for durability).
- ● Rake: 1 medium-sized (8–12" teeth) for spreading evenly.
- ● Pruners or shears: 1 pair (for trimming plants before mulching).
- ● Watering can or hose: To dampen soil before applying mulch.
- ● Drop cloth or tarp: 1–2 (to protect pathways or tools from stray mulch).
- ● Wheelbarrow: 1 (for hauling heavy bags of pine straw).
- ○ Garden twine or landscape fabric: Optional for edges or slopes to contain mulch.
- ● Soil pH tester: Helpful if your garden has acidic soil (pine straw thrives in pH 4.5–6.0).
How to apply pine straw mulch for consistent soil moisture
This method keeps your garden beds hydrated and weed-free without the mess of traditional mulch.
🌱 Step 1: Prepare the Garden Bed
Start by clearing the area of any existing weeds or debris—pine straw works best when applied to clean soil. I like to use a garden rake to pull up stubborn weeds with their roots, especially around established plants. For new beds, simply remove any rocks or old mulch remnants.
Once the area is clear, give the soil a light watering until it's moist to 2 inches deep. This ensures the pine straw will settle evenly and make contact with the soil surface. If the soil is already dry, watering now prevents gaps that could let weeds slip through later.
💧 Step 2: Apply Pine Straw Evenly
Spread the pine straw in a 3-4 inch thick layer over the prepared bed, working from one end to the other. I find it easiest to use my hands to fluff the straw as I go—this keeps it from clumping and ensures even coverage. For larger areas, a rake helps distribute it smoothly.
Overlap the straw slightly at the edges to prevent gaps where weeds could grow. If you're covering a circular bed, start at the center and work outward in concentric circles. This method prevents uneven thickness and keeps the mulch looking neat.
✂️ Step 3: Adjust Around Plants
Use your fingers or a small hand rake to gently pull the pine straw away from plant stems, leaving a 1-2 inch gap around each one. This prevents moisture buildup that could cause rot, especially for woody plants like shrubs or young trees. I always check for any stray needles that might have fallen into the gap—those can smother stems.
For delicate perennials, I tuck a small handful of straw around the base to protect the crown from temperature swings. The straw’s natural insulation helps roots stay consistently moist without the risk of overwatering.
☀️ Step 4: Maintain Through the Seasons
Check the straw every 4-6 weeks to ensure it hasn’t compacted or shifted. If it looks thin in spots, simply add more to maintain that 3-4 inch thickness. I’ve found that pine straw breaks down slowly, so you’ll rarely need to replace it entirely—just top up as needed.
In late fall, rake the straw to redistribute it before winter. This prevents it from forming a thick mat that could smother soil life when spring arrives. A light raking also helps the straw blend naturally into the landscape.
🪴 Step 5: Refresh for Next Season
When spring arrives, give the bed a final check before new growth starts. Remove any old straw that’s decomposed into fine needles—this prevents it from clogging soil pores. I usually spread a fresh layer of 2-3 inches over the top to replenish moisture retention.
This is also a great time to fluff the remaining straw and check for weed seeds that might have blown in over winter. A quick pass with a rake keeps your garden looking tidy and ready for the growing season ahead.
Tips & tricks for perfect pine straw mulch application
Getting the most out of your pine straw mulch means paying attention to details that keep your garden beds perfectly hydrated and weed-free.
Soil Prep is Everything: In Step 1, when you water the soil to 2 inches deep, don't just give it a light sprinkle. Use your finger to check moisture—it should feel damp like a wrung-out sponge. This ensures the pine straw makes proper contact with the soil surface, which is crucial for consistent moisture retention. I've seen gardens where the straw sat on top of dry soil, creating gaps that let weeds slip through and moisture evaporate.
Thickness Matters: The 3-4 inch thickness specified in Step 2 isn't just a suggestion—it's the sweet spot for moisture regulation. Too thin (under 3 inches) and you'll get poor weed suppression, too thick (over 4 inches) and you risk suffocating plant roots. For circular beds, I measure the thickness at multiple points with a ruler to ensure uniformity. This consistency is what keeps your soil moist without becoming waterlogged.
Plant Protection Strategy: When creating that 1-2 inch gap around plants in Step 3, take an extra moment to check for any stray needles that might have fallen into the gap. These can act like tiny mulch pieces and create moisture pockets that cause rot. For woody plants, I even go so far as to create a slight mound of straw around the base—this provides insulation while maintaining that crucial air gap.
Seasonal Maintenance Secret: The 4-6 week check mentioned in Step 4 is your best friend for long-term success. I've found that pine straw tends to compact in shady areas, so I make it a point to fluff those spots first. In late fall, that light raking isn't just about redistribution—it's about preventing a thick mat that could smother soil microbes when spring arrives. This simple step keeps your mulch working effectively for years.
Pro Tips for Garden Pine Straw
- Getting the most out of your pine straw mulch means paying attention to details that keep your garden beds perfectly hydrated and weed-free.
- Soil Prep is Everything: In Step 1, when you water the soil to 2 inches deep, don't just give it a light sprinkle.
- Thickness Matters: The 3-4 inch thickness specified in Step 2 isn't just a suggestion—it's the sweet spot for moisture regulation.
Frequently asked questions
Got questions about garden pine straw mulch? You’re not alone!
Here are answers to the most common queries to help you mulch like a pro.
What’s the best time of year to apply pine straw?
Apply pine straw in late spring or early summer (after the last frost) for best results. This gives roots time to establish before winter. If you’re mulching existing beds, spread it in fall to protect soil over the cold months. Just avoid winter application—it can smother tender plants!
How often should I reapply pine straw mulch?
Pine straw breaks down slower than wood chips but still needs refreshing. Reapply a 2–3 inch layer every 12–18 months (or sooner if it thins). Check for bare spots—thick mulch (4+ inches) can suffocate plants, while too little won’t suppress weeds effectively.
Can I use pine straw instead of regular mulch?
Pine straw is a great alternative to wood chips or bark, especially in sandy or acidic soils. It’s lightweight, easy to spread, and improves soil as it decomposes. Just avoid using it under evergreen trees—pine straw can encourage fungal growth like Phytophthora.
Why is my pine straw attracting pests or mold?
Pests (like ants or termites) or mold often mean your mulch is too thick or damp. Fluff the layer to 2–3 inches and improve drainage. If mold appears, remove the top layer, let the bed dry, and reapply fresh pine straw. Avoid piling mulch against tree trunks—keep it 3–4 inches away to prevent rot.
Is pine straw mulch cost-effective compared to other options?
Yes! Pine straw is affordable and long-lasting, typically costing $3–$6 per bale (covers ~10 sq ft). It’s lighter than wood chips, so shipping is cheaper, and it lasts 1–2 years per application. For large gardens, it’s one of the most budget-friendly organic mulches.
Wrapping up and next steps
Transforming your garden with pine straw mulch is a game-changer—keeping soil moist, suppressing weeds, and adding a natural, rustic charm all year long! 🌿 Whether you're a seasoned gardener or just starting, this low-maintenance solution makes gardening easier and more rewarding. Ready to elevate your outdoor space?
Your next step? Grab a bale of pine straw and start layering—your plants (and future self) will thank you! For extra tips, revisit our FAQ section or experiment with creative mulching designs. Happy gardening! 🌱