Planting
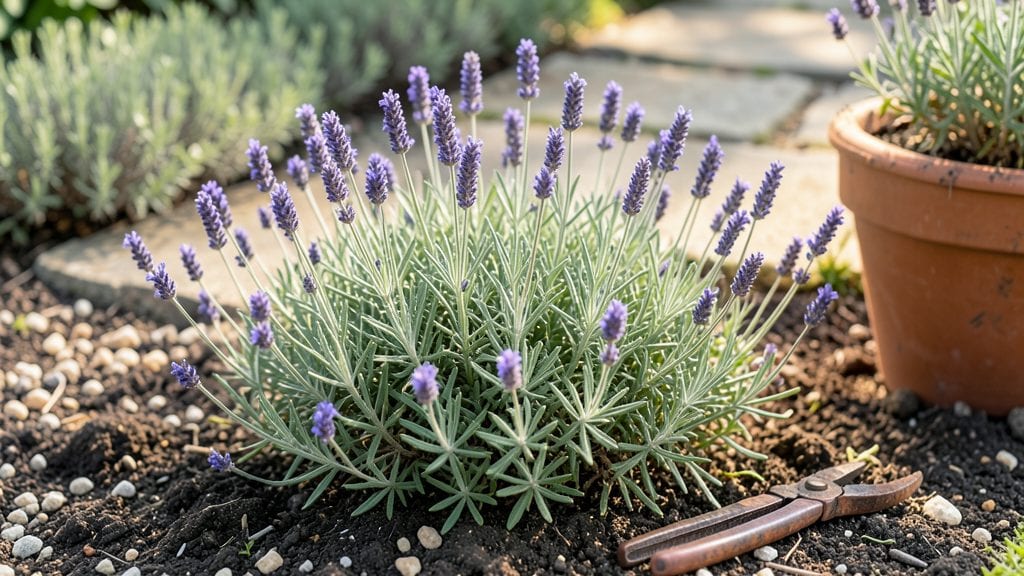
Growing a home-sown garden means every plant has a story—starting from a tiny seed in your hand. 🌱 I fell in love with this style when I watched my first tomato seedling push through the soil, knowing it would end up on my plate.
There’s something deeply satisfying about creating a garden where every bloom, leaf, and vegetable traces back to a seed you chose and nurtured.
The beauty of home-sown gardens lies in their adaptability—whether you have a windowsill, a balcony, or a small backyard, you can craft a space that thrives on your terms. Start with easy-to-grow seeds like marigolds, basil, or cherry tomatoes, which reward beginners with quick results.
Arrange them in containers or raised beds to maximize space, and mix heights and textures for a visually dynamic display that evolves with the seasons.
You’ll end up with a garden that’s not just productive but also a living canvas of your gardening journey. Imagine snipping fresh herbs for summer meals, watching sunflowers sway in the breeze, or harvesting crisp lettuce straight from your patio.
The best part? Each season brings new surprises as you experiment with heirloom varieties and seasonal favorites that stores can’t match.
This approach also cuts costs, boosts biodiversity, and connects you to the natural rhythm of growth. Plus, there’s no better feeling than showing off a garden where every plant is a testament to your green thumb. Ready to turn your space into a home-sown haven?
📚 In This Guide
- What you need
- Instructions
- Tips and common mistakes
- Wrapping up and next steps
What you need
- ● Containers: 5–10 gallon pots (10–12" deep) for root crops like carrots or beets
- ● 3–5 hanging baskets (10–12" diameter) for trailing plants (e.g., strawberries, herbs)
- ● 1–2 raised beds or planters (at least 6" deep, width/length varies by space)
- ○ Optional: self-watering planters for low-maintenance growing
- ● Growing Medium: 1–2 bags of high-quality potting mix (sterile, well-draining; ~1–2 cubic feet per container)
- ○ Optional: compost or worm castings (1–2 cups per pot for nutrient boost)
- ○ Optional: hydroponic clay pebbles (for soilless setups)
- ● Seeds: Start with fast-growing, compact varieties (e.g., lettuce, radishes, bush beans, cherry tomatoes)
- ● Quantity: 50–100 seeds (varies by plant; check seed packets for spacing)
- ○ Optional: seedling starters (if you prefer transplants over direct sowing)
- ● Tools: 1 hand trowel (for planting/seeding)
- ● 1 pair of pruning shears (for harvesting/pruning)
- ● 1 spray bottle (for gentle watering of seedlings)
- ○ Optional: garden gloves, kneeling pad, or small rake
- ● Sunlight: At least 6+ hours of direct sun daily (south-facing windows or balconies work best). Use a light meter or observe shadows to gauge.
- ● Water Access: A watering can with a rose attachment or drip irrigation kit (for consistent moisture).
- ● Location: Sturdy, level surface (e.g., table, deck, or ground)
- ● Protection from strong winds (use trellises or windbreaks if needed)
- ○ Optional Upgrades: Grow lights (LED, full-spectrum) for indoor setups or low-light spaces
- ● Mulch (straw or shredded leaves) to retain moisture
- ● Labels or markers (to track plant varieties)
How to design a thriving home sown garden in small spaces
Here's the approach I've used to pack serious harvests into balconies and patios—no yard needed.
🌱 Step 1: Plan Your Layout for Maximum Yield
Start by sketching your space on paper. Group plants by their height and sunlight needs—tall varieties like sunflowers or corn go in the back, while shallow-rooted herbs and lettuce take the front. I always reserve the north side for shade-tolerant plants like spinach or arugula, keeping sun-lovers on the south or west exposure.
For 4 plants, a 4x4-foot area works perfectly. Draw a simple grid with 12-inch squares—this ensures each plant has enough room to grow without competing. If your space is rectangular, adjust the grid to fit while maintaining equal spacing. Think vertically too: trellises for beans or cucumbers save floor space and keep vines off the ground.
🪴 Step 2: Prepare the Soil for Compact Growth
Remove any existing plants or weeds and loosen the top 6 inches of soil with a garden fork. Break up clumps so roots can spread easily. If your soil is heavy clay or sandy, mix in 2 gallons of compost to improve texture and fertility. I like to work it in by hand—this also helps aerate without compacting.
For raised beds or containers, fill with a lightweight mix of 50% potting soil and 50% perlite to prevent waterlogging. The goal is soil that holds moisture but drains freely—stick your finger in after watering. If it feels like a damp sponge (not dripping), you're good. Avoid garden soil in containers; it compacts and suffocates roots.
☀️ Step 3: Sow Seeds at the Right Depth and Spacing
Check each seed packet for depth—most vegetables need to be planted twice as deep as their diameter. For example, tomato seeds go ¼ inch deep, while larger beans need 1 inch. Use a small stick or your finger to make holes, then drop in 2-3 seeds per spot. I tap the soil gently to cover them lightly—over-deepening delays germination.
Space seeds according to their mature size. Carrots and radishes can crowd at 1 inch apart, but broccoli needs 18 inches to avoid competition. Water gently with a spray bottle to avoid displacing seeds. Keep the soil consistently moist (not soggy) until sprouts appear—usually within 7-14 days, depending on the plant.
💧 Step 4: Maintain Consistent Moisture and Light
Water deeply once a week (or daily in extreme heat) to encourage deep root growth. I check moisture by sticking my finger 1 inch into the soil—if it's dry, water until moisture reaches 6 inches down. Drip irrigation or soaker hoses work best; overhead watering can spread disease. Mulch with 1 inch of straw or shredded leaves to retain moisture and suppress weeds.
Rotate plants a quarter turn weekly to prevent them from leaning toward the light. Most vegetables need 6-8 hours of sunlight daily, so adjust your layout if shadows appear. If your space gets less light, opt for shade-tolerant varieties like Swiss chard or lettuce. Watch for yellowing leaves—a sign of either overwatering or insufficient light.
✂️ Step 5: Harvest and Succession Plant for Continuous Bounty
Pick vegetables at their peak for flavor and to encourage more production. For example, harvest lettuce when leaves reach 3-4 inches and pick beans every 2-3 days to keep plants productive. Deadhead flowers like nasturtiums regularly to promote new blooms. I always save seeds from healthy plants (like tomatoes or beans) for next season—just let a few fruits mature fully on the vine.
As soon as you harvest one crop, replace it with a fast-growing "follow-up." After pulling carrots, sow radishes or lettuce in the same spot—they mature in 3-4 weeks. This keeps your garden productive all season without expanding your space. Rotate families (like tomatoes and peppers) to prevent soil-borne diseases from building up.
Tips & tricks for perfect home sown gardens
A few simple strategies that'll transform your small space into a thriving garden oasis.
Layout Precision: When sketching your 4x4-foot grid in Step 1, use a ruler to maintain those 12-inch squares. I've found that even slight deviations can lead to overcrowding as plants mature. For rectangular spaces, divide the area into equal sections—this ensures each plant gets its fair share of sunlight and nutrients. Don't forget to mark your north side clearly to position shade-tolerant plants correctly from the start.
Soil Science: In Step 2, if you're working with containers, consider adding a handful of worm castings to that 50% potting soil and 50% perlite mix. Worm castings boost nutrient density without altering texture. For in-ground planting, test your soil's pH before adding compost—most vegetables thrive between 6.0 and 7.0. You can buy inexpensive test kits at garden centers or send samples to your local extension office for analysis.
Seed Starting Secrets: For Step 3, I've discovered that planting 2-3 seeds per hole gives you backup plants when germination rates are inconsistent. Once your seedlings reach 2 inches tall, thin to the strongest one by snipping at soil level rather than pulling. This prevents disturbing nearby roots. For large seeds like beans, consider pre-soaking them overnight to speed up germination—especially helpful when working with short growing seasons.
Watering Wisdom: When following the once-a-week deep watering guideline in Step 4, use the "poke test" method I mentioned: stick your finger 1 inch deep. If it feels dry, water until moisture reaches 6 inches down. For containers, I've found that watering in the morning gives roots time to absorb moisture before evening evaporation. And remember—mulch isn't just for moisture retention; it also regulates soil temperature and suppresses weeds, saving you time and effort.
Pro Tips for Home Sown Gardens
- A few simple strategies that'll transform your small space into a thriving garden oasis.
- Layout Precision: When sketching your 4x4-foot grid in Step 1, use a ruler to maintain those 12-inch squares.
- Soil Science: In Step 2, if you're working with containers, consider adding a handful of worm castings to that 50% potting soil and 50% perlite mix.
Frequently asked questions
Got questions about growing your own home-sown garden?
You’re not alone! Whether you’re a beginner or a seasoned green thumb, these answers will help you cultivate success—no matter how small your space.
What’s the best way to start a home-sown garden with limited space?
Use container gardening or vertical planters to maximize space! Opt for compact varieties like cherry tomatoes, bush beans, or dwarf peppers. Raised beds or window-box gardens work too—just ensure they’re at least 6–12 inches deep for root growth. Succession planting (sowing seeds in waves) keeps harvests steady.
When is the ideal time to sow seeds for a continuous harvest?
Timing depends on your climate, but cool-season crops (like lettuce or spinach) go in early spring or fall, while warm-season crops (tomatoes, peppers) need soil temps above 60°F (usually late spring). For year-round harvests, stagger plantings every 2–3 weeks—check seed packets for days to maturity to plan overlaps.
Are there affordable alternatives to expensive seed-starting kits?
Repurpose plastic containers, egg cartons, or toilet paper rolls as seed starters. Use potting soil (or a mix of coco coir + compost) and spray bottles for watering. Save $50+ by skipping kits—just ensure drainage holes are added. DIY seedling trays from cardboard or wood work too!
How do I keep pests away without harsh chemicals?
Prevent pests with companion planting (e.g., marigolds repel aphids, basil deters mosquitoes). Use neem oil or soapy water sprays for mild infestations. Handpick larger pests (like tomato hornworms) early in the morning. Row covers (lightweight fabric) protect young plants, and healthy soil (rich in microbes) makes plants more resilient.
What should I do if my seedlings look leggy or weak?
Leggy seedlings need more light—move them to a sunny windowsill or use a grow light 12–16 hours/day. If they’re top-heavy, bury stems deeper when transplanting (roots grow from buried sections). Avoid overcrowding and thin seedlings to 1–2 inches apart for better airflow. Fertilizer (like diluted fish emulsion) can help if soil nutrients are lacking.
Wrapping up and next steps
Creating a home-sown garden in compact spaces isn’t just possible—it’s rewarding! 🌱 Whether you’re growing herbs on a windowsill, veggies in containers, or flowers in raised beds, the key is starting small, staying consistent, and celebrating every harvest. Your green thumb doesn’t need a backyard to thrive.
Ready to dive in? Start with one easy plant—like basil, lettuce, or marigolds—and let your confidence (and garden!) grow from there. Happy sowing! 🌿