Plants
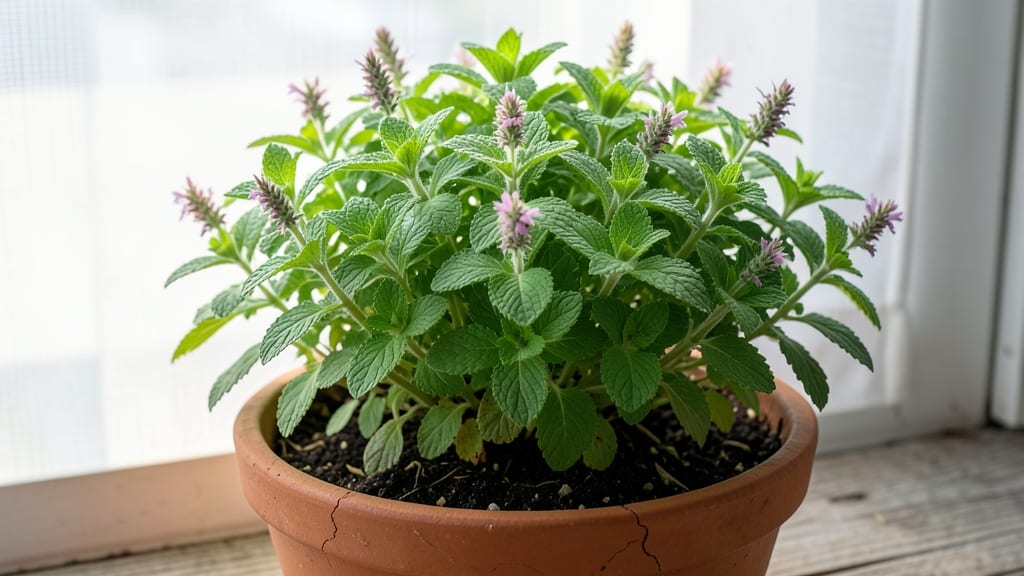
Here are some mint gardening tips you’ll love—growing mint from cuttings is the fastest way to get a thriving plant, and I’ve found that even a single stem can become a lush, fragrant bush in just 3-4 weeks.
The secret lies in keeping the soil consistently moist—not soggy—and giving it bright, indirect light, whether indoors by a sunny window or outdoors in partial shade. Most people overwater, which causes the roots to rot, but mint is surprisingly forgiving once you get the balance right.
Once established, mint spreads aggressively, which is why I recommend growing it in containers—it keeps the plant from taking over your garden. Harvest leaves regularly to encourage bushier growth, and pinch back the flowers if you want to keep the flavor strong.
The best part? You’ll have fresh mint for teas, cocktails, or cooking within a month, and the scent alone makes any space feel alive.
📚 In This Guide
- What you need
- Instructions
- Tips and common mistakes
- Wrapping up and next steps
What you need
- ● Mint plants: Start with 3-5 healthy cuttings (preferably from a trusted source) or 1-2 nursery-grown plants (spearmint, peppermint, or chocolate mint varieties work well).
- ● Containers: 1-2 large pots (12+ inches deep) with drainage holes (or a raised garden bed if planting outdoors). Mint spreads aggressively, so containers are ideal!
- ● Potting soil: 1 bag of high-quality, well-draining potting mix (avoid garden soil—it compacts too easily).
- ● Watering can or hose: With a gentle spray nozzle to avoid disturbing roots.
- ● Organic fertilizer: Balanced liquid fertilizer (10-10-10 or 20-20-20) for occasional feeding.
- ● Pruning shears (for trimming and harvesting).
- ● Garden gloves (to protect hands from mint’s oils).
- ● Mulch (straw or shredded leaves to retain moisture).
- ○ pH test kit (optional but useful—mint prefers 6.0-7.0 pH).
- ● Spray bottle (for misting seedlings if humidity is low).
Step-by-Step instructions for growing mint with minimal effort
Here’s how to grow vigorous mint plants that spread beautifully without taking over your garden.
Choose the Right Location for Your Mint
Mint thrives in partial shade to full sun, but in hot climates, it’s best to plant it where it gets morning sun and afternoon shade. This prevents the leaves from scorching while still encouraging lush growth. I always place my mint near the edge of a garden bed or in a container—this keeps it contained and prevents it from spreading uncontrollably into other plants.
Check the soil drainage before planting. Mint dislikes soggy roots, so if your soil stays wet for more than a few hours after rain, amend it with 2-3 inches of compost to improve drainage. You’ll know the spot is right when the soil feels crumbly and holds moisture without becoming waterlogged.
Plant Mint Cuttings or Seeds Correctly
If you’re using mint cuttings (the easiest method), strip the lower leaves and plant the stem 2 inches deep in moist soil. Space plants 12-18 inches apart to give them room to grow without crowding. For seeds, sow them ¼ inch deep and keep the soil consistently moist until germination, which usually takes 10-14 days.
Press the soil gently around the cuttings or seeds to ensure good contact with the roots. Water lightly after planting to settle the soil and remove any air pockets. Avoid deep watering at this stage—you want the roots to establish without becoming waterlogged. Once planted, mint grows quickly, so don’t be surprised if you see new growth within 2-3 weeks.
Water and Fertilize for Healthy Growth
Keep the soil evenly moist but not soggy—mint loves water but hates sitting in puddles. Water deeply once a week, adjusting for rain. You’ll know it’s time to water again when the top inch of soil feels dry. Mulch around the plants with 2 inches of straw or shredded leaves to retain moisture and suppress weeds.
Fertilize lightly once a month during the growing season with a balanced, water-soluble fertilizer (like 10-10-10). Too much fertilizer can make the leaves less flavorful, so follow the package instructions and dilute it to half-strength. Stop fertilizing in late summer to encourage a slower, more flavorful harvest.
Prune and Harvest Regularly
Pinch back the tips of new growth when the plant reaches 6 inches tall to encourage bushier growth. This also prevents mint from becoming leggy and woody. Harvest leaves regularly by snipping stems just above a set of leaves—this encourages more branching and a fuller plant.
For the best flavor, harvest in the morning after the dew has dried but before the heat of the day sets in. Avoid cutting more than one-third of the plant at a time, or you’ll slow down its growth. If your mint starts to flower, snip the buds immediately—they make the leaves bitter and reduce yield.
Control Spread and Prevent Overgrowth
Mint spreads aggressively through underground runners, so contain it if you don’t want it taking over your garden. Plant it in containers or sunken beds lined with landscape fabric to keep roots from escaping. If it does spread, dig up and remove unwanted shoots as soon as you spot them—the sooner you act, the easier it is to control.
Divide mature plants every 2-3 years to rejuvenate them. Dig up the plant, separate the roots, and replant the healthiest sections. This also gives you extra plants to share with friends or replant elsewhere. With proper containment, your mint will stay manageable while still producing abundant, flavorful leaves all season long.
Tips & tricks for perfect mint gardening
Growing mint doesn't have to be complicated—these simple tricks will help you cultivate lush, flavorful plants with minimal effort.
Location is Everything: In Step 1, when choosing your spot, consider adding a small shade cloth (like 30% shade fabric) if your area gets intense afternoon sun. This gives you more flexibility in hot climates while still allowing enough light for vigorous growth. I've found that mint planted near the edge of garden beds or in containers stays much more manageable and produces better flavor.
Planting Strategy: For Step 2, if you're using cuttings, select healthy stems with at least 3-4 leaves and no signs of yellowing. Planting them 2 inches deep ensures strong root development, but don't pack the soil too tightly—mint roots need room to breathe. A little trick I learned is to dip the cut ends in water for 10-15 minutes before planting to encourage faster root growth.
Watering Wisdom: In Step 3, when maintaining that "evenly moist but not soggy" balance, I've found that watering in the early morning gives the plants plenty of time to absorb moisture before the heat of the day. You can also use a moisture meter to check soil conditions—aim for keeping the top 2 inches of soil consistently damp rather than relying on the "top inch" test, which can be too late for mint's preferences.
Harvesting Technique: When following Step 4's harvesting instructions, always use clean, sharp scissors or pruning shears to avoid damaging the plant. For the best flavor, I harvest just before the plant starts flowering—this is when the essential oils (and therefore the flavor) are at their peak. A little secret: the more frequently you harvest, the more bushy your mint will grow, but never take more than one-third at a time to maintain its vigor.
Pro Tips for Mint Gardening Tips
- Growing mint doesn't have to be complicated—these simple tricks will help you cultivate lush, flavorful plants with m...
- Location is Everything: In Step 1, when choosing your spot, consider adding a small shade cloth (like 30% shade fabri...
- Planting Strategy: For Step 2, if you're using cuttings, select healthy stems with at least 3-4 leaves and no signs o...
Frequently asked questions
Got questions about growing mint like a pro?
Here are the answers to the most common ones—no stress, just straightforward tips to keep your mint thriving!
How often should I water my mint plant?
Mint loves moisture but hates soggy roots. Water it when the top inch of soil feels dry—usually every 2–3 days in warm weather or weekly in cooler months. Pro tip: Use a pot with drainage holes to prevent root rot!
When is the best time to harvest mint?
Harvest mint before it flowers for the strongest flavor! Snip stems in the morning after dew dries but before the heat peaks. Regular pruning (every 4–6 weeks) encourages bushier growth. Bonus: Freeze fresh sprigs in ice cubes for later use!
Can I grow mint in a regular garden bed instead of a pot?
Yes, but expect it to spread aggressively—mint has invasive roots! Plant it in a contained pot or a dedicated bed with barriers buried 12+ inches deep. If you’re committed, harvest often to control its spread!
Why are my mint leaves turning yellow?
Yellow leaves usually mean overwatering, poor drainage, or pests. Check for root rot (squishy soil) or aphids (tiny bugs on stems). Fix it: Trim affected leaves, repot if needed, and spray with neem oil for pests.
How do I revive a leggy or woody mint plant?
Leggy mint? It’s begging for a haircut! Prune back by ⅓ to encourage new growth. If it’s woody, propagate cuttings in water or fresh soil—mint roots easily! For future plants, harvest regularly to keep it lush.
Wrapping up and next steps
Growing mint is simpler than you think—just sunlight, water, and a little patience 🌱! With these zero-fuss tips, you’ll enjoy fresh, fragrant leaves year-round, whether in pots or garden beds. Whether you’re a beginner or a seasoned gardener, mint’s resilience makes it the perfect addition to your green space.
Ready to dive in? Start small—pick a sunny spot, grab a pot, and plant those cuttings today! Your kitchen (and taste buds) will thank you.