Picking
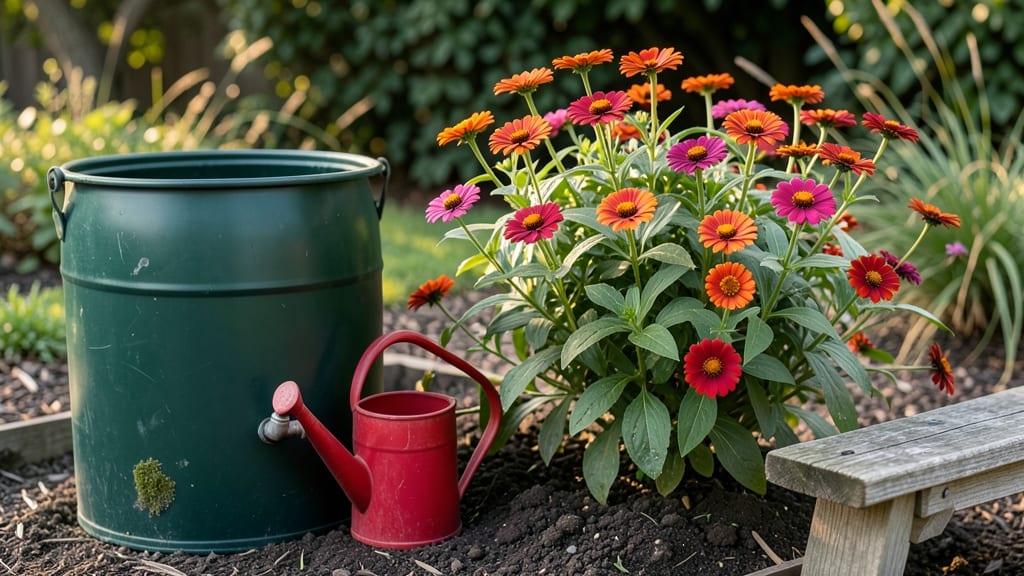
A self-sustaining oasis starts with collecting every raindrop your garden deserves. 🌧️ I designed my first rainwater harvesting system after watching stormwater rush down the driveway, carrying away soil and nutrients I’d spent months nurturing. That’s when I realized how much potential we waste—just by letting nature’s free resource disappear.
The setup doesn’t need to be fancy: a simple 55-gallon barrel under a downspout collects enough to water plants through dry spells, while larger cisterns handle bigger spaces.
You’ll integrate it seamlessly with drip irrigation or soaker hoses, turning what was once wasted into a lush, thriving garden that drinks deeply from its own supply. The best part? No more hauling watering cans or watching your water bill climb during summer.
By the time you’re done, your garden will look like it belongs in a zero-waste paradise—vibrant perennials, drought-tolerant natives, and even a small pond fed by overflow. The soil stays moist longer, roots grow deeper, and you’ll notice fewer pests struggling in dry conditions.
Plus, the system blends into the landscape so well, neighbors will ask how you did it.
Whether you’re working with a small balcony setup or a full backyard, the principles stay the same: place collectors strategically, use filters to keep debris out, and let gravity do the work.
The payoff isn’t just in savings—it’s in a garden that feels alive, resilient, and completely self-sufficient. Let’s make it happen.
📚 In This Guide
- What you need
- Instructions
- Tips and common mistakes
- Wrapping up and next steps
What you need
- ● Rainwater Collection System: 1–2 food-grade rain barrels (55–75 gallons each, with a tight-fitting lid)
- ● 1 first-flush diverter (to filter out debris from the first heavy downpour)
- ● Gutters & Downspouts: Gutter system (adjust length to match your roof’s edge, typically 10–12 ft sections)
- ● 1–2 downspout extenders (to direct water into barrels)
- ● Filtration & Storage: 1 mesh screen (for gutter attachment, 1/8" mesh or finer)
- ● 1–2 sediment filters (50–100 micron for barrels)
- ○ Optional: 1 berkey filter or DIY sand/gravel filter (for drinking-grade water)
- ● Garden Infrastructure: Drip irrigation kit (with soaker hoses or emitters)
- ● 1–2 swales or berms (for slow water absorption, if designing a rain garden)
- ● Mulch (straw, wood chips, or leaves for soil moisture retention)
- ● Legal Check: Verify local regulations—some areas restrict rainwater storage or require permits.
- ● Roof Condition: Ensure your roof is clean and free of mold/moss (use a leaf blower or soft broom for prep).
- ● Elevation: Position barrels on a stable, raised surface (e.g., cinder blocks or a pallet) to allow gravity-fed flow.
- ● Plants: Choose drought-resistant natives (e.g., lavender, succulents, or ornamental grasses) to thrive on harvested water.
Step-by-step instructions for building a rainwater harvesting garden
Here's the method I've used to create lush, self-watering garden beds that thrive without municipal water.
🪴 Step 1: Select and Prepare Your Collection System
Choose a primary collection surface—roof gutters work best for most gardens. Install 1-2 inch PVC downspouts with fine mesh screens to filter debris before water enters your system. I use 100-gallon food-grade barrels (like those from rainwater harvesting suppliers) because they're durable and won't leach chemicals into your water.
Position your barrels on cinder blocks or sturdy stands to elevate them 12-18 inches off the ground. This creates gravity-fed irrigation pressure and prevents stagnation. Connect the downspouts to the barrels using flexible vinyl tubing—this reduces vibration that can loosen connections over time.
💧 Step 2: Install Irrigation Distribution Points
Drill small holes (⅛ inch diameter) along the bottom of 5-gallon buckets—these become your self-watering planters. Place them beneath the barrels so water drains directly into the soil. For larger gardens, install a drip irrigation system with pressure regulators set to 10-15 PSI to prevent soil erosion.
Use perforated landscape fabric as a false bottom in each bucket to keep soil in place while allowing water to flow freely. This creates a reservoir effect—water collects at the bottom and wicks up as plants need it. I like to bury the buckets halfway in the soil to stabilize them and blend them into the landscape.
☀️ Step 3: Choose and Plant Drought-Tolerant Species
Select native plants or xeriscaped varieties that thrive with irregular watering. Succulents like sedum, agave, and echeveria are ideal—they store water in their leaves and tolerate dry spells beautifully. For flowers, lavender, yarrow, and blanket flower all perform well with collected rainwater.
Plant in well-draining soil mixes (I blend 50% native soil, 30% compost, and 20% perlite) to prevent compaction. Space plants according to their mature size—12-18 inches apart for most perennials—so they don't compete for the limited water supply. Mulch heavily with 3-4 inches of wood chips to reduce evaporation and regulate soil temperature.
⏰ Step 4: Set Up Overflow and Maintenance Protocols
Install an overflow pipe from your barrels to divert excess water to a secondary rain garden or percolation pit. This prevents spillage and maximizes water use. I also add a first-flush diverter—a simple 5-gallon bucket placed at the downspout's beginning to catch the first ½ inch of rain, which often contains the most pollutants.
Check your system weekly during dry spells to ensure barrels aren't empty. If water levels drop below 20% capacity, supplement with dechlorinated water (let tap water sit for 24 hours to off-gas chlorine). Clean screens and tubing monthly to prevent clogs—this keeps your system running efficiently and extends its lifespan.
🌿 Step 5: Monitor and Adjust for Seasonal Changes
In spring and fall, when rainfall is more frequent, your plants may need less frequent watering. Observe leaf color—dull green or wilting signals thirst, while yellowing leaves often mean overwatering. Adjust by adding or removing distribution buckets based on plant needs.
During summer droughts, prioritize watering deep-rooted perennials first—they'll survive better than shallow-rooted annuals. If your barrels run dry, consider adding a small solar-powered pump to pull water from a deeper source, like a swale or pond, to keep your garden thriving year-round.
Tips & tricks for perfect rainwater harvesting garden design
Building a self-sustaining rainwater garden takes thoughtful planning—here are the key strategies I've learned to maximize efficiency and beauty.
Barrel Placement Precision: When positioning your 100-gallon barrels on cinder blocks for that 12-18 inch elevation, aim for the sweet spot of 15 inches—this creates optimal gravity-fed pressure while preventing stagnation. I place them slightly uphill from my garden beds so water flows naturally downward, eliminating the need for pumps. For urban spaces, consider wall-mounted systems that attach directly to downspouts without taking valuable ground space.
Bucket Reservoir Optimization: The ⅛ inch holes in your 5-gallon buckets should be spaced 1-2 inches apart along the bottom to balance water distribution. Too few holes create dry spots, while too many cause erosion. I mark hole locations with a pencil before drilling to ensure even spacing. For larger gardens, add a secondary bucket layer—place unperforated buckets beneath the perforated ones to catch excess water and redistribute it during dry spells.
Soil Mix Science: That 50-30-20 blend of native soil, compost, and perlite isn't just arbitrary—it creates the perfect moisture-retention-to-drainage ratio for rainwater systems. The compost feeds microbes that break down organic matter, while the perlite prevents compaction. I always add 1 cup of worm castings per 5-gallon bucket to boost nutrient availability for my drought-tolerant plants. For sandy soils, increase perlite to 30% to prevent water from draining too quickly.
Seasonal Adjustment Strategy: The weekly checks during dry spells are non-negotiable, but your spring/fall adjustments should go beyond just observing leaves. In spring, I add 2-3 extra distribution buckets to handle increased rainfall, while in fall I reduce to 1-2 buckets as evaporation decreases. For summer droughts, I prioritize watering deep-rooted perennials first—their extensive root systems help them survive longer without water than shallow-rooted annuals.
Pro Tips for Rainwater Harvesting Garden
- Building a self-sustaining rainwater garden takes thoughtful planning—here are the key strategies I've learned to max...
- Barrel Placement Precision: When positioning your 100-gallon barrels on cinder blocks for that 12-18 inch elevation, ...
- Bucket Reservoir Optimization: The ⅛ inch holes in your 5-gallon buckets should be spaced 1-2 inches apart along the ...
Frequently asked questions
Got questions about turning your garden into a zero-waste oasis with rainwater harvesting?
Here are the answers to the most common queries—so you can dive in with confidence!
How much rainwater can I realistically collect in my garden?
This depends on your roof size, rainfall, and storage capacity. A typical 1,200 sq. ft. roof collects ~600 gallons per inch of rain. Start with a 500-gallon tank for small gardens or expand as needed. Use a rainfall calculator to estimate your potential yield!
When is the best time to install a rainwater harvesting system?
Install before the rainy season (spring/fall in most climates) to maximize early collection. However, any time is better than never! If you’re retrofitting, plan during dry spells to avoid disruptions. Pro tip: Schedule installation when plants are dormant to reduce stress on your garden.
Can I use harvested rainwater for all my plants, or are there restrictions?
Rainwater is safe for most edible plants, but avoid using it for crops grown in soil with high heavy-metal contamination (test soil first). Never use it for drinking or cooking without proper filtration. For non-edibles (flowers, shrubs), it’s perfectly safe and often improves soil health!
What are the cheapest alternatives if I can’t afford a full system?
Start small! Use buckets or barrels under downspouts (DIY for <$50), or repurpose old containers. Group plants with similar water needs to minimize waste. Over time, upgrade to a low-cost cistern or permeable paving to boost efficiency.
What should I do if my harvested water smells or looks cloudy?
Cloudiness is often algae or sediment—clean filters or let water settle before use. A musty smell? Stagnant water may need chlorine treatment (1 tsp/100 gallons) or a UV purifier. Always inspect gutters for debris clogging the system.
Does rainwater harvesting really reduce waste?
Absolutely!
A typical household wastes ~30,000 gallons/year on lawns/landscape. Harvesting even 50% of roof runoff cuts municipal water use drastically. Plus, it recharges groundwater and reduces stormwater runoff pollution.
Wrapping up and next steps
Transforming your garden into a self-sustaining oasis with rainwater harvesting isn’t just eco-friendly—it’s empowering! 🌱 By collecting and reusing rainwater, you’re reducing waste, cutting water bills, and nurturing a thriving green space that thrives on nature’s own resources.
The best part? Every drop you save is a step toward a greener planet and a more resilient garden.
Ready to take the plunge? Start small—whether it’s a simple barrel system or a full-scale garden redesign. Your next step: sketch a plan, gather your materials, and let your garden become a zero-waste masterpiece! 💧✨