Landscaping
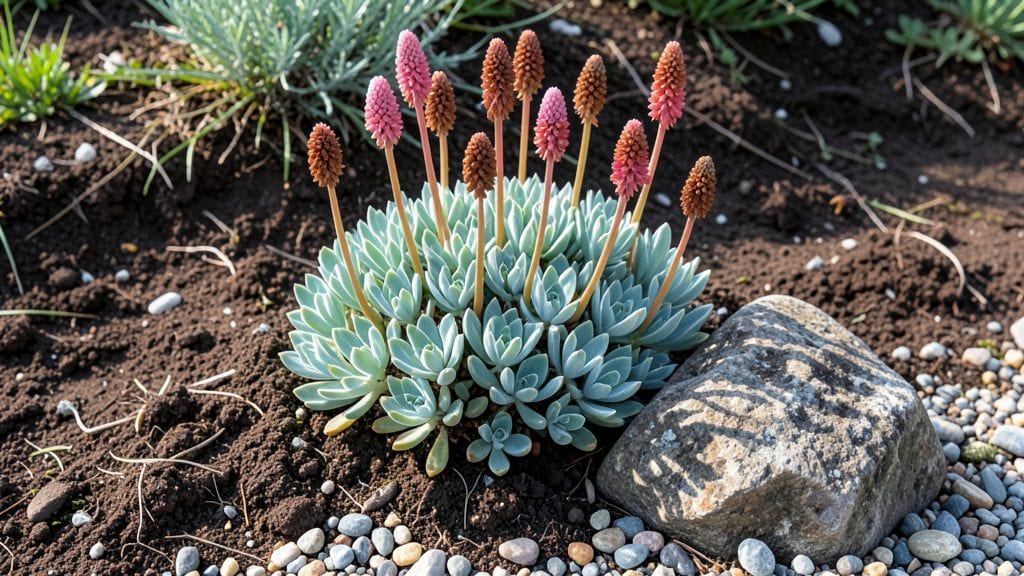
Transforming flat spaces into breathtaking mountain-inspired landscapes, these rockery garden ideas turned my boring backyard into a tiered alpine retreat teeming with creeping thyme, sedum, and delicate plants. alpine plants that thrive where others fail.
The key isn’t just the rocks; it’s how they frame the plants, creating natural layers that catch the light like a real mountainside.
Start with local fieldstone or river rocks (avoid heavy quarried stone) and arrange them in 3-5 uneven tiers to mimic natural slopes. Add sharp-edged gravel between layers for drainage, and tuck in small pockets of soil just deep enough for alpine plants.
This setup works in zones 3-8, though drought-tolerant succulents need extra care in hot climates—think sedum, sempervivum, or Lewisia for year-round color.
By summer’s end, your rockery will burst with velvety foliage and jewel-toned blooms, while the stones stay cool to the touch. The best part? Maintenance is minimal—just weekly weeding and seasonal topsoil refreshes to keep plants happy. Even my black thumb keeps this garden thriving with almost no effort.
Pro tip: Add a small recirculating water feature (like a tiny moss garden with a solar fountain) to draw in hummingbirds and create a soothing soundtrack. The rocks amplify the sound, turning your yard into a serene escape. Ready to bring the mountains home?
📚 In This Guide
- What you need
- Instructions
- Tips and common mistakes
- Wrapping up and next steps
What you need
- ● Rocks and Stones: A mix of flat stones (for steps/terraces) and larger boulders (for structure). Aim for 50–100 lbs per square foot of garden area, depending on desired height and stability.
- ● Gravel: ½-inch to 1-inch crushed stone (2–3 cubic yards for a medium-sized rockery). Use as a base layer for drainage.
- ● Soil: Well-draining potting mix or cactus/succulent soil (1–2 cubic yards). Avoid heavy garden soil to prevent waterlogging.
- ● Landscape Fabric: Non-woven, 3–4 ft wide (enough to cover the base area + 1 ft overlap). Keeps weeds at bay!
- ○ Edging Material: Optional but recommended: Metal, plastic, or stone edging (10–20 ft, depending on design).
- ● Shovel and Spade: For digging and shaping soil.
- ● Wheelbarrow: To haul rocks, gravel, and soil efficiently.
- ● Level and String Line: Ensures terraces are even and aligned.
- ● Rubber Mallet or Sledgehammer: For gently positioning large rocks.
- ● Garden Gloves and Safety Goggles: Because rocks don’t care about your hands! 😉
- ● Measuring Tape and Stakes: Mark out your design before digging.
- ● Retaining Wall Blocks: For extra stability in steep designs.
- ● Drip Irrigation Kit: Water-loving plants will thank you!
- ● Native Plants or Succulents: Choose drought-resistant varieties like sedum, lavender, or ornamental grasses.
- ● Solar Lights or Pathway Markers: Add ambiance to your rockery after dark.
Step-by-Step guide to designing a tiered rockery garden
Transform flat spaces into stunning mountain-inspired landscapes with these strategic rockery techniques.
Select and Arrange Your Base Rocks
Choose rocks that vary in size—large boulders as anchors, medium stones for structure, and smaller ones for filling gaps. I like to start with the largest rocks first, placing them in a way that creates natural-looking tiers. Think of it like building a mountain range: the biggest rocks form the highest points, while smaller stones cascade down around them.
Arrange the rocks in uneven clusters rather than straight lines to mimic natural erosion patterns. Leave spaces between rocks for planting pockets and drainage. The goal is to create a sense of depth and movement, so don't worry about perfect symmetry—imperfections make it look organic. Once positioned, lightly tap each rock into place to stabilize it without shifting its natural angle.
Build Gradual Terraces for Planting Zones
Use the smaller rocks and garden soil to create gentle slopes between the larger boulders. I fill the gaps with a mix of 2 parts soil and 1 part coarse sand to improve drainage—a critical detail for rockeries, where water can pool in crevices. Build terraces that are 12-18 inches wide at the top, narrowing slightly as they descend, to create stable planting ledges.
Angle each terrace so water naturally flows toward the lowest point, preventing erosion. Press the soil mixture firmly around the edges of the rocks to secure them while leaving the surface loose enough for roots to penetrate. This layered approach also allows you to plant species suited to different moisture levels—drought-tolerant plants on upper tiers, moisture-loving ones in lower pockets.
Install Drainage and Erosion Control
Before adding plants, check that water drains freely. I like to bury perforated drainage pipes at the base of the rockery, angled slightly downward, to carry excess water away from the structure. Cover the pipes with a landscape fabric to prevent soil from clogging them while still allowing moisture to seep through.
For extra stability, weave native ground cover plants like creeping thyme or sedum between the rocks in the early stages. These act as natural erosion barriers while their roots help bind the soil. Avoid using plastic mesh—it can degrade over time and looks unnatural in a rockery setting. Instead, let the plants themselves create the structural integrity.
Select and Plant Rockery-Suitable Species
Choose plants that thrive in well-draining conditions and complement the rockery's natural aesthetic. I recommend alpine plants like stonecrop, Lewisia, or dwarf conifers for their hardiness and compact growth. Place taller plants toward the back of each tier and shorter ones in front to create visual layers. Avoid heavy feeders—they'll deplete the lean soil too quickly.
Dig planting holes just deep enough to accommodate the root ball, then backfill with the same soil-sand mix used earlier. Water thoroughly after planting to settle the soil around roots, but avoid overwatering—the goal is to encourage deep root growth, not surface moisture. Mulch lightly with 1-2 inches of gravel or small stones to suppress weeds while maintaining the natural look.
Add Finishing Touches for Long-Term Maintenance
Once plants are established, add small decorative rocks in contrasting colors to fill any remaining gaps. I like to choose stones that echo the natural palette of the area—local fieldstone or river rocks work beautifully. This step also helps prevent soil erosion from wind and rain while keeping the rockery looking intentional rather than haphazard.
Install a drip irrigation system with emitters placed at the base of each plant to deliver water directly to roots. Set it on a timer for 10-15 minutes every 2-3 days during dry spells, adjusting based on rainfall. Regularly check for weeds, especially in the first growing season, and remove them before they compete with your planted species. With proper care, a rockery garden will mature into a low-maintenance, high-impact landscape feature.
Tips & tricks for perfect tiered rockery gardens
Creating a stunning tiered rockery requires attention to detail—here are the insights I've gathered over years of building these dramatic landscapes that elevate any outdoor space.
Rock Selection Strategy: When arranging your base rocks in Step 1, prioritize irregular shapes over smooth, rounded stones. The rougher textures create natural-looking crevices that enhance the mountain-inspired aesthetic. I recommend collecting rocks from your property or local area—their unique colors and patterns will make your rockery feel authentically organic rather than manufactured. For the largest rocks, consider their weight distribution; place them on stable ground or use landscape fabric underneath to prevent shifting over time.
Terrace Construction Insight: The 2 parts soil to 1 part coarse sand ratio in Step 2 isn't just about drainage—it's about creating the perfect balance of stability and root penetration. When building your 12-18 inch wide terraces, I find it helpful to create slight curves rather than straight edges. This organic shaping prevents water from pooling along terrace edges while maintaining visual interest. For particularly steep slopes, consider adding a few small retaining rocks to prevent soil slippage during watering.
Drainage System Enhancement: While the instructions mention perforated drainage pipes, I've found that adding a layer of small gravel (about 2 inches deep) beneath the pipes creates an additional drainage layer that prevents clogging. This simple modification extends the life of your drainage system significantly. When installing landscape fabric in Step 3, leave 6-12 inches of fabric extending beyond the pipe edges to ensure complete coverage and prevent soil intrusion.
Plant Placement Technique: In Step 4, when arranging alpine plants, I recommend creating "plant groups" of 3-5 similar species rather than single plants. This mimics natural plant communities and creates visual impact. For the taller plants at the back of each tier, leave about 12 inches of space between them and the rock face to allow for proper air circulation—this prevents fungal issues while maintaining the natural look. The 1-2 inch gravel mulch isn't just decorative; it helps regulate soil temperature and reduces evaporation during dry periods.
Pro Tips for Rockery Garden Ideas
- Creating a stunning tiered rockery requires attention to detail—here are the insights I've gathered over years of building these dramatic landscapes that elevate any outdoor space.
- Rock Selection Strategy: When arranging your base rocks in Step 1, prioritize irregular shapes over smooth, rounded stones.
- Terrace Construction Insight: The 2 parts soil to 1 part coarse sand ratio in Step 2 isn't just about drainage—it's about creating the perfect balance of stability and root penetration.
Frequently asked questions
Got questions about creating your own rockery garden?
Here are some of the most common ones—and their practical answers—to help you build with confidence!
What’s the best time of year to build a rockery garden?
For most climates, spring or early fall is ideal—soil is workable, and extreme temperatures won’t stress plants. Avoid winter (frozen ground) and peak summer (drought risk). If you’re in a mild zone, late winter works too, as long as you protect new plants from frost.
How much does a rockery garden cost to build?
Costs vary widely! A small DIY rockery with reclaimed stones and basic plants may run $100–$300. Larger, professional designs with premium materials (like slate or bluestone) can exceed $1,000+. Factor in soil amendments, drainage layers, and plant costs—budgeting for 20–30% extra covers unexpected expenses.
Can I build a rockery without rocks? What are the alternatives?
Try these space-saving or budget-friendly swaps:
- Wooden tiers: Use cedar or redwood planks stacked with soil and plants for a rustic look.
- Concrete blocks: Stacked creatively, they mimic rock layers and add modern structure.
- Bricks or pavers: Arrange them in staggered heights for a clean, geometric vibe.
- Recycled materials: Old tires, pallets, or even large plant pots can create layered textures.
My rockery keeps getting weeds—how do I stop them?
Weeds thrive in disturbed soil and poor drainage. Try these fixes:
- Landscape fabric: Lay it under rocks (not touching plants) to block weed seeds.
- Mulch generously: Use gravel, bark, or pine needles to smother weeds and retain moisture.
- Hand-pull early: Weeds are easiest to remove when young—check weekly.
- Choose ground covers: Plants like creeping thyme or sedum outcompete weeds naturally.
Do rockeries need special drainage? What if my area floods?
Yes! Poor drainage causes root rot and erosion. Ensure your rockery has:
- A gravel or crushed stone base (4–6 inches deep) to wick away water.
- A slight slope (1–2 inches per foot) to direct runoff away from plants.
- Perforated pipes hidden beneath for heavy rainfall areas.
Wrapping up and next steps
Transforming your outdoor space into a breathtaking rockery garden is all about embracing creativity and nature’s raw beauty! Whether you’re drawn to cascading tiers, lush greenery, or striking stone contrasts, these ideas prove that even small spaces can feel like a mountain retreat.
The key is to start small—pick a design that excites you, gather your materials, and let your garden evolve over time.
Ready to get your hands dirty? Sketch your vision, gather supplies, and begin layering stones and plants with confidence! Your future rockery awaits—happy gardening! 🌿✨