Advice
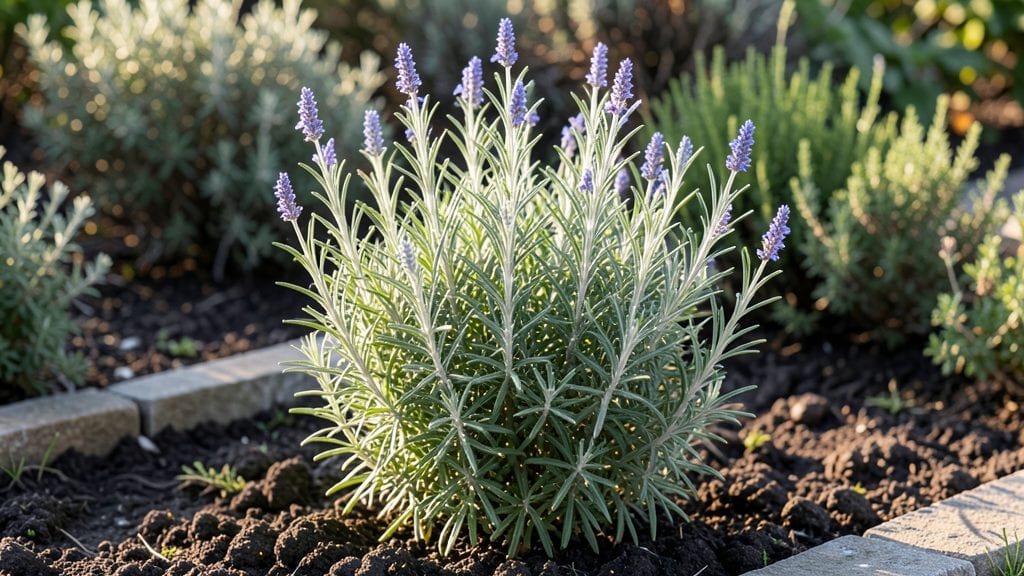
Here are rosemary gardening tips you won’t find in most guides—like how to turn one plant into a whole herb garden with just a glass of water and a snip. 🌿 I’ve turned my single rosemary plant into a whole herb garden by snipping stems and rooting them in water, and the secret isn’t complicated: just pick the right stems and keep them moist.
The key is timing—do this in late winter or early spring when growth slows down, and you’ll have bushy new plants ready for transplanting by summer.
Once rooted, these new rosemary plants thrive with minimal fuss: full sun, well-draining soil, and water only when the top inch feels dry. Overwatering is the real enemy—rosemary hates soggy roots, so if your soil stays damp for more than a day, you’re doing it wrong.
The payoff? Fragrant, drought-tolerant bushes that keep producing fresh herbs for years with just a little pruning here and there.
📚 In This Guide
- What you need
- Instructions
- Tips and common mistakes
- Wrapping up and next steps
What you need
- ● Rosemary plants: 1–3 healthy nursery-grown plants (upright or trailing varieties) or 5–10 seeds (if starting from scratch).
- ● Well-draining soil: 10–20 lbs of potting mix (or garden soil amended with 20–30% perlite or coarse sand for drainage).
- ● Containers (if potted): 1–2 large pots (12–18" diameter) with drainage holes, or raised beds (if gardening in-ground).
- ● Pruning shears: Sharp, clean bypass pruners (avoid anvil pruners—they crush stems).
- ○ Gloves: 1 pair of gardening gloves (optional but helpful for thorny varieties like Rosemarinus officinalis ‘Prostratus’).
- ● Watering can or hose: With a gentle spray nozzle (rosemary hates soggy roots!).
- ● Organic fertilizer: 1–2 tbsp of low-nitrogen, balanced fertilizer (e.g., 5-5-5 or 10-10-10) or composted manure.
- ● Mulch: 1–2 inches of gravel, pine bark, or straw to retain moisture and deter weeds.
- ● pH test kit: To check soil acidity (ideal range: 6.0–7.0).
- ● Rooting hormone: For propagation (speeds up root growth in cuttings).
- ● Shade cloth: Lightweight fabric (30–50% shade) for seedlings or hot climates.
- ● Label tags: To track varieties (e.g., ‘Blue Spires’ vs. ‘Arp’).
Step-by-Step guide to prune and propagate rosemary year-round
Here's how to keep your rosemary thriving—whether you're shaping it for harvests or multiplying your plants.
✂️ Step 1: Prune for Shape and Health
Use clean, sharp pruning shears to trim back leggy stems by about ⅓ their length in early spring. This encourages bushier growth and prevents woody stems. I like to shape mine into a rounded mound—it looks neat and makes harvesting easier. Always cut just above a leaf node where new growth will emerge.
Rosemary handles pruning well, but don't overdo it. If you trim too much at once, the plant may struggle to recover. Focus on removing dead or yellowing branches first—they sap energy from healthy growth. After pruning, give the plant a light watering to help it recover.
🌿 Step 2: Propagate from Cuttings
Take 4-6 inch cuttings from healthy, non-flowering stems in late spring or early summer. Remove the lower leaves, leaving just a few at the top. Dip the cut end in rooting hormone (optional but helpful) and plant it in a small pot filled with well-draining soil. I use a mix of potting soil and perlite for best results.
Keep the cutting in bright, indirect light and maintain moisture by misting the soil daily. After about 4-6 weeks, you'll see new growth—this means roots have formed. Once rooted, transplant the new rosemary into its permanent spot. This method gives you free plants to share or expand your garden!
🪴 Step 3: Transplant Mature Plants
If your rosemary has outgrown its space, transplant it in early spring or fall when temperatures are mild. Dig a hole twice as wide as the root ball but no deeper. Gently remove the plant, loosen the roots if they're tightly bound, and place it in the new hole. Fill in with soil and water thoroughly to settle everything.
Rosemary thrives in well-draining soil and full sun. After transplanting, avoid heavy watering for a few days to let the roots adjust. Mulch lightly around the base to retain moisture, but don't pile mulch against the stem—this can cause rot. You'll know it's settled in when new growth appears within a few weeks.
☀️ Step 4: Maintain Through Seasons
In summer, keep an eye out for overgrowth. Trim back any stems that look crowded or leggy to maintain airflow and prevent disease. Rosemary is drought-tolerant once established, but water deeply once a week during dry spells. In winter, reduce watering—rosemary needs less moisture when growth slows.
If your rosemary starts to look woody or sparse, it's time for a rejuvenation prune. Cut back about half the plant in early spring. It might look drastic, but new shoots will sprout from the base, giving you a fresh start. This keeps your rosemary productive for years to come.
Tips & tricks for perfect rosemary pruning and propagation
Here's what I've learned after years of keeping rosemary thriving—these little details make all the difference for healthy plants.
Pruning Precision: When you're trimming those leggy stems in Step 1, look for where the leaves grow in pairs along the stem. Cut just above that leaf node—this is where new growth will sprout. I've found that making clean cuts with sharp shears prevents tearing and helps the plant recover faster. Between us, I used to cut randomly and wondered why my rosemary never looked full!
Cutting Selection: For propagation in Step 2, focus on non-flowering stems that are about pencil-thick. Flowering stems will be tougher to root, and you want your new plants to focus on establishing roots rather than making flowers. The 4-6 inch length is perfect because it gives you enough stem for roots while leaving plenty of leaves for photosynthesis.
Rooting Environment: That bright, indirect light during propagation is crucial—direct sun can scorch your cuttings while too little light means weak roots. I keep mine on an east-facing windowsill where they get morning sun but gentle afternoon light. A clear plastic bag loosely draped over the pot creates a mini greenhouse effect that helps retain moisture without suffocating the plant.
Transplanting Wisdom: In Step 3, when loosening those roots, be gentle but thorough. I use my fingers to carefully separate any circling roots—this prevents them from strangling themselves in the new hole. The twice-as-wide hole gives roots plenty of room to spread out, which helps the plant establish itself faster. Don't skip the thorough watering after transplanting; it helps settle the soil and removes any air pockets around the roots.
Pro Tips for Rosemary Gardening Tips
- Here's what I've learned after years of keeping rosemary thriving—these little details make all the difference for healthy plants.
- Pruning Precision: When you're trimming those leggy stems in Step 1, look for where the leaves grow in pairs along the stem.
- Cutting Selection: For propagation in Step 2, focus on non-flowering stems that are about pencil-thick.
Frequently asked questions
Got rosemary questions? You’re not alone!
Here are answers to the most common queries about growing, pruning, and propagating this fragrant herb—so you can keep your plants thriving all year.
When is the best time to prune rosemary?
Prune rosemary after flowering in late spring or early summer to encourage bushier growth. For year-round maintenance, light trims (removing ⅓ of the plant) can happen anytime—just avoid heavy pruning in winter. Pro tip: Never cut into woody stems, as rosemary won’t regrow from them!
Can rosemary survive winter outdoors?
Most rosemary varieties (Rosmarinus officinalis) are hardy to USDA Zone 7 or warmer. In colder climates (Zones 6 or below), protect it with mulch or move potted plants indoors before frost. Pro tip: Trim back dead growth in early spring—new shoots will emerge once temperatures rise above 50°F (10°C).
How do I propagate rosemary from cuttings?
Take 4–6 inch cuttings from healthy stems (avoid flowering tips). Remove lower leaves, dip in rooting hormone (optional), and plant in well-draining soil or perlite. Keep soil moist and place in bright, indirect light until roots form (4–6 weeks). Pro tip: Use a plastic bag to create humidity—roots grow faster!
Why is my rosemary turning yellow or dropping leaves?
Yellowing leaves often signal overwatering (rosemary hates soggy soil!). Check drainage—pots should have holes, and soil should dry completely between waterings. Other culprits: pests (aphids, spider mites) or nutrient deficiency (feed with balanced fertilizer in spring). Pro tip: Wipe leaves with neem oil to deter pests naturally.
Can I grow rosemary indoors year-round?
Place rosemary near a sunny window (6+ hours of light daily) or under grow lights. Use terracotta pots (they wick away moisture) and a well-draining potting mix. Pro tip: Rotate the pot weekly for even growth—indoor rosemary can get leggy without proper light!
Wrapping up and next steps
Growing rosemary is a rewarding journey that brings fragrant beauty and culinary delights to your garden! 🌿 With the right pruning techniques and propagation secrets, you’ll keep your rosemary thriving year-round—whether it’s in pots or the ground.
Remember, consistency is key: trim regularly, propagate with cuttings, and enjoy the perks of this versatile herb.
Ready to elevate your green thumb game? Start small—pick one tip to try this week, like pruning or harvesting cuttings—and watch your rosemary flourish! 🌱 For more herbal gardening inspiration, explore our other guides or share your progress with fellow plant lovers.