Vegetables
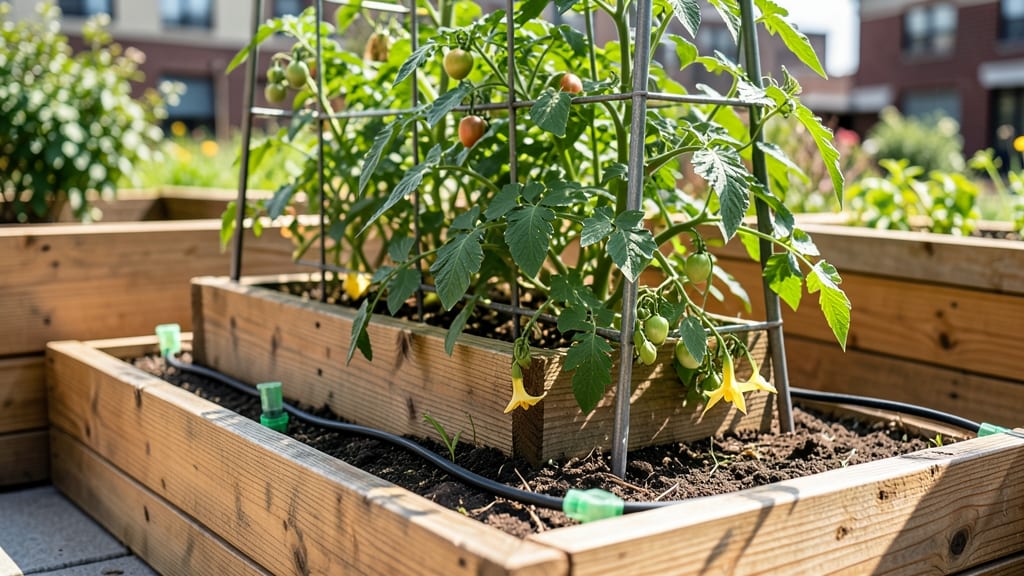
My terrace vegetable garden transformed from a concrete slab to a thriving food forest using just 12 square feet of space. 🌱 The key? Vertical growing, smart containers, and arranging plants by sunlight needs—not by what looks pretty.
I went from dreaming about fresh tomatoes to harvesting them every summer, and you can too.
You’ll need lightweight containers (fabric grow bags work wonders), sturdy railing planters, and a drip irrigation kit to keep roots happy without wasting water. Most terraces get partial sun, so I prioritize shade-tolerant greens like lettuce and kale alongside sun-lovers like cherry tomatoes and peppers.
The secret’s in the layers—trellises for vining plants, hanging pots for herbs, and shallow troughs for radishes.
By midsummer, you’ll be snipping basil for sandwiches, plucking ripe cherry tomatoes, and watching your neighbors’ jaws drop at your tiny-but-mighty harvest. The best part? No more struggling with weeds or bending over—everything’s at eye level. Let’s design a layout that actually works for your space and sun.
Works for any balcony, patio, or rooftop—even if you’ve only got a single window ledge. The same principles apply whether you’re in a high-rise or a cottage with limited ground space. Here’s how to make every inch count without sacrificing beauty or bounty.
📚 In This Guide
- What you need
- Instructions
- Tips and common mistakes
- Wrapping up and next steps
What you need
- ● Containers or Raised Beds: 5–10+ containers (12"–18" deep, 10"–12" diameter) or a raised bed (at least 6" deep, 4'x8' size recommended).
- ● Materials: Wood (cedar or redwood), plastic, or fabric grow bags.
- ● Growing Medium: High-quality potting mix (sterile, well-draining) or a mix of 60% topsoil, 30% compost, and 10% perlite/sand (1–2 cubic feet per container).
- ○ Optional: Coco coir or vermiculite for moisture retention.
- ● Vegetable Seeds or Seedlings: Choose compact varieties (e.g., cherry tomatoes, bush beans, lettuce, herbs). Start with 3–5 plants per container.
- ● Pro Tip: Buy organic seeds or seedlings from a local nursery for better adaptability! 🌱
- ● Basic Tools: Trowel or small hand shovel
- ● Garden gloves (for protection)
- ● Watering can or hose with a gentle spray nozzle
- ○ Optional (But Helpful!): Pruners (for trimming herbs/tomatoes)
- ● pH testing kit (to monitor soil health)
- ● Trellis or stakes (for climbing plants like cucumbers or peas)
- ● Drip irrigation kit (for automated watering)
- ● ✅ Sunlight: At least 6–8 hours of direct sun daily (south-facing terrace ideal).
- ● ✅ Drainage: Ensure containers have drainage holes or your terrace has a slight slope.
- ● ✅ Access to Water: A nearby water source or portable watering setup.
- ● ✅ Space Planning: Sketch a layout to maximize sunlight and airflow between plants.
Step-by-Step instructions for terrace vegetable gardening
Transform limited space into a productive terrace garden with these proven layouts.
🪴 Step 1: Assess Weight Limits and Choose Containers
Check your terrace's weight-bearing capacity—most balconies support 20-50 pounds per square foot. I use lightweight fabric grow bags (10-gallon size) for leafy greens and stackable plastic pots (5-gallon) for tomatoes and peppers. These distribute weight evenly while allowing drainage.
Place containers near the railing for security, but ensure they won't tip in wind. For windy terraces, anchor pots with cable ties threaded through handles and attached to the railing. This prevents accidents during storms—trust me, a toppled 20-gallon pot is a nightmare.
☀️ Step 2: Design a Vertical and Tiered Layout
Maximize vertical space by using wall-mounted planters (6-inch depth) for herbs and shallow-rooted crops like lettuce. Place these at eye level to avoid straining. Below them, install stackable shelves (12-inch spacing) for bush beans, radishes, and dwarf varieties of tomatoes.
Group plants by sunlight needs: full sun (6+ hours) for tomatoes, peppers, and herbs on the south side; partial shade (3-6 hours) for leafy greens on the north or east side. I always keep a portable grow light (LED, 12-inch height) on standby for cloudy days—it saves my basil from stretching.
🌱 Step 3: Layer Soil and Mulch for Moisture Retention
Fill containers with 3 inches of coarse perlite (for drainage) at the bottom, then 2 inches of compost, followed by 4 inches of potting mix. Top with 1 inch of organic mulch (straw or shredded leaves) to retain moisture and suppress weeds. This layering prevents compaction and keeps roots oxygenated.
Water deeply after planting until it drains from the bottom. Let excess water pool in saucers for 10 minutes, then empty them—soggy bottoms rot roots faster than you'd think. I check soil moisture by sticking my finger 1 inch deep; if it's dry, it's time to water.
💧 Step 4: Implement a Drip Irrigation System
Set up a simple drip irrigation kit with 1/4-inch tubing and emitters spaced 6 inches apart. Run the tubing along the edges of containers and secure it with plastic clips. This delivers water directly to roots, reducing evaporation and fungal risks. I program the timer for early morning (6 AM) to minimize leaf wetness.
For terraces without plumbing, use 5-gallon watering cans with rose attachments—they distribute water evenly without splashing. Avoid overhead watering after noon; it burns leaves and invites powdery mildew. You'll see healthier plants with fewer pests when roots stay consistently moist but not waterlogged.
✂️ Step 5: Prune and Harvest Strategically
Pinch back leggy stems on herbs like basil and cilantro to encourage bushier growth. For tomatoes, remove suckers (the small shoots between main stems and branches) weekly—they drain energy from fruit production. I harvest leafy greens by cutting outer leaves, leaving the inner growth intact for regrowth.
Rotate containers quarter-turn weekly so all sides get even sunlight. This prevents plants from leaning toward the light and maximizes yield. When harvesting, use clean pruners to avoid spreading disease. A sharp cut just above a leaf node keeps plants healthy and productive.
Tips & tricks for perfect terrace vegetable gardening
A few strategic moves can turn your terrace into a thriving garden—here's how to avoid common pitfalls and maximize every inch.
Container Weight Strategy: When selecting containers in Step 1, prioritize materials that balance weight and durability. Fabric grow bags are lightweight but can dry out faster, so I line them with a plastic liner to retain moisture while keeping the weight manageable. For heavier plants like tomatoes, distribute the 5-gallon pots evenly across your terrace rather than clustering them—this prevents overloading specific areas and maintains structural integrity. Remember, a 20-gallon pot can weigh over 50 pounds when full, so always check your terrace's load-bearing capacity before planting.
Sunlight Optimization: In Step 2, don't just group plants by sun exposure—consider their growth habits too. Tall plants like tomatoes should face north to prevent shading shorter crops below, while leafy greens can handle partial shade from taller neighbors. I've found that rotating containers quarter-turn weekly (as mentioned in Step 5) not only ensures even sunlight exposure but also prevents plants from leaning toward the light source. For cloudy days, position your 12-inch LED grow light just above the tallest plants to maintain consistent light exposure across all levels.
Soil Layering Secrets: The soil composition in Step 3 makes all the difference. For containers with drainage holes, I add an extra 1 inch of perlite at the very bottom to prevent clogging while ensuring maximum airflow to roots. When mixing your 4 inches of potting mix, incorporate 10% vermiculite for moisture retention—this helps maintain consistent moisture levels between waterings, especially in those 10-minute draining periods after watering. The mulch layer isn't just decorative; it acts as a natural insulator, protecting roots from temperature fluctuations that can occur on exposed terraces.
Irrigation Troubleshooting: For Step 4's drip system, I recommend testing your setup before planting. Run water through the 1/4-inch tubing with emitters spaced 6 inches apart and check for even distribution—some emitters may need adjustment to prevent dry spots. If you're using the 5-gallon watering cans alternative, fill them only halfway to avoid overwhelming smaller containers. The key is consistent moisture without waterlogging; I've seen root rot develop within days when saucers aren't emptied after those 10-minute draining periods. For terraces with afternoon sun, consider adding a second watering session at 4 PM during hot summer months to compensate for evaporation.
Pro Tips for Terrace Vegetable Gardening
- A few strategic moves can turn your terrace into a thriving garden—here's how to avoid common pitfalls and maximize every inch.
- Container Weight Strategy: When selecting containers in Step 1, prioritize materials that balance weight and durability.
- Sunlight Optimization: In Step 2, don't just group plants by sun exposure—consider their growth habits too.
Frequently asked questions
Got questions about terrace vegetable gardening?
Here are answers to the most common ones to help you grow like a pro—even in small spaces!
What’s the best layout for a terrace vegetable garden?
Square-foot gardening or vertical planters work best for terraces. Use raised beds (1–2 ft deep) for root crops like carrots, while shallow containers suit leafy greens. Check our materials guide for space-saving tips!
When is the best time to start terrace gardening?
Start indoors (4–6 weeks before last frost) for cool-season crops like lettuce or spinach. For warm-season veggies (tomatoes, peppers), wait until soil temps hit 60°F+. Terraces let you extend seasons with shade or cold frames!
How much does terrace vegetable gardening cost?
Costs vary: DIY containers (repurposed buckets, pallets) can be $20–$50, while pre-made raised beds or hydroponics run $100–$300+. Prioritize soil quality—compost or potting mix (not cheap fill dirt!) ensures healthy plants.
What pests commonly attack terrace gardens, and how do I stop them?
Common culprits: aphids (spray with soapy water), slugs (use beer traps or copper barriers), and spider mites (introduce ladybugs). Elevate containers to deter rodents, and rotate crops yearly to break pest cycles.
Can I grow vegetables in a terrace garden without soil?
Try hydroponics (nutrient-rich water), aeroponics, or coco coir-based mixes. Leafy greens (kale, herbs) thrive soil-free, while root veggies need deeper media. Just ensure proper drainage—root rot is a no-go!
Wrapping up and next steps
Terrace vegetable gardening proves that big harvests don’t require big spaces—just creativity and a little effort! Whether you’re working with a balcony, rooftop, or sloped yard, these space-saving layouts make growing fresh produce accessible and rewarding.
Start small, experiment with what thrives in your climate, and soon you’ll be enjoying homegrown veggies that taste better than anything store-bought.
Ready to dive in? Pick one layout from this guide, gather your supplies, and plant your first seeds this weekend! 🌱✨ Your future meals—and your neighbors’ green envy—will thank you.