Landscaping
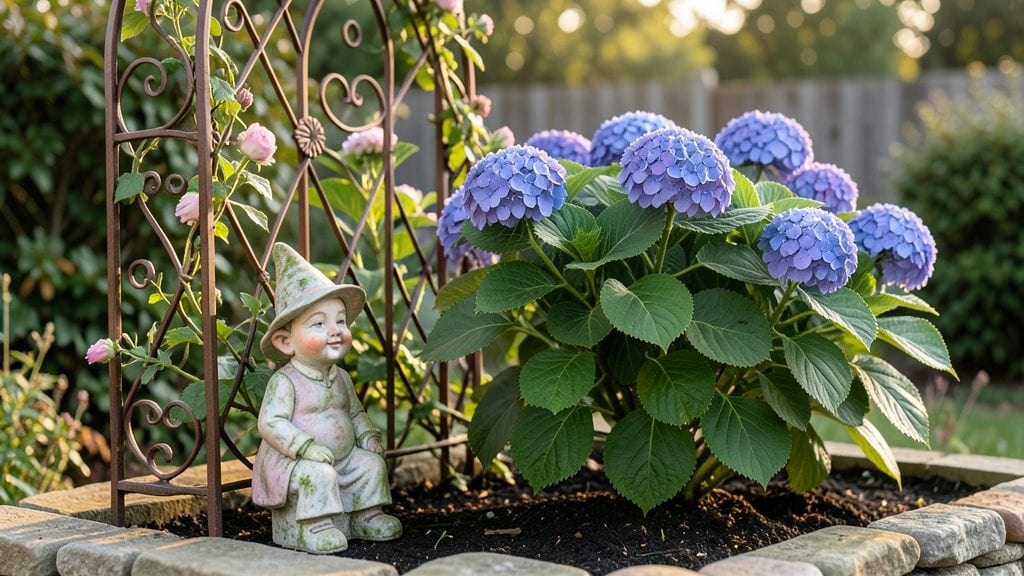
My garden decor style used to be an afterthought—until I realized how much a few intentional layers could transform a space from ordinary to stunningly inviting. 🌿 The key isn’t just picking pretty things; it’s weaving them into the plants, colors, and textures that already exist, so everything feels like it belongs.
That first "wow" moment—when a guest steps onto your patio and says, "I could live here"—comes from harmony, not clutter.
Start with a theme that excites you: maybe it’s the rustic charm of weathered galvanized pots paired with lavender, or the sleek lines of concrete planters against dark foliage. The materials matter too—think terracotta for Mediterranean vibes, wrought iron for classic elegance, or driftwood for a coastal touch.
The magic happens when decor mirrors the plants’ natural shapes: tall grasses beside arched trellises, trailing vines framing arched doorways, or pebbled paths winding through low shrubs.
You’ll end up with a garden that feels like a curated escape, where every piece tells a story—whether it’s a vintage wind chime that caught your eye at a flea market or a modern lantern that casts the perfect glow on a stone path.
The best part? These layers work year-round: swap out seasonal blooms, add cozy throws in fall, or tuck in solar lights for winter charm. It’s not about perfection; it’s about creating a space that feels uniquely yours.
Here’s the thing—most people underestimate how much a little thought can do. A single statement piece, like a hand-painted birdhouse or a sculptural tree stump, can anchor the whole look. And the best news? You don’t need a big budget or a sprawling yard to make it work.
Even a small balcony can shine with the right mix of greenery and decor. Let’s bring that curb appeal to life, naturally.
📚 In This Guide
- What you need
- Instructions
- Tips and common mistakes
- Wrapping up and next steps
What you need
- ● Base Materials: Pebbles or gravel (50 lbs, ½"–1" size for pathways or borders)
- ● Mulch (2–3 bags, shredded or dyed for color)
- ● Natural wood slats or pallets (2–4, untreated for rustic look)
- ● Terracotta pots or ceramic planters (3–6, varying sizes)
- ● Wrought iron or bamboo trellises (1–2, 4’–6’ tall)
- ● Decorative Accents: Wind chimes (1–2 sets, mixed metals or glass)
- ● Solar-powered garden lights (5–10, string or stake-style)
- ● Vintage signs or wooden plaques (2–3, weather-resistant)
- ● Macramé hangers or woven baskets (3–4, for climbing plants)
- ● Painted rocks or mosaic tiles (10–15, for borders or stepping stones)
- ● Tools: Garden shears or pruners (for trimming plants)
- ● Level (for even placement of structures)
- ● Measuring tape (25’)
- ● Drill/driver (for assembling trellises or pallets)
- ● Staple gun (for securing mulch or fabric)
- ● Gloves and knee pads (for comfort and protection)
- ● Fairy lights or LED string lights (for magical evening ambiance)
- ● DIY birdhouses or bat boxes (eco-friendly decor)
- ● Water features (small fountain or bubbling stone)
- ● Custom stencils or chalkboard paint (for personalized touches)
- ● Seasonal decor (e.g., pumpkins in fall, floral garlands in spring)
Instructions: layer whimsical garden decor for instant curb appeal
Here’s how to transform any outdoor space into a charming, layered retreat—no design degree required.
🌿 Step 1: Define Your Base with Structural Elements
Start with the foundation—think pathways, seating, or architectural features. A simple gravel path (4 feet wide) or a wooden bench instantly creates structure. I like to use natural stone borders to frame flower beds, as they blend seamlessly while adding texture. These elements anchor the space and give your decor something to play off.
For a whimsical touch, add a vintage-style metal gate or a trellis wrapped in climbing roses—these add height and intrigue. Place them near entry points or along pathways to draw the eye. The key is to keep it functional; if it doesn’t serve a purpose, it’ll feel like clutter later.
☀️ Step 2: Add Height with Vertical Accents
Vertical decor lifts your garden from flat to dynamic. Start with tall planters (12-18 inches in diameter) filled with lush greenery like ornamental grasses or bamboo. Place them at varying heights—some near seating areas, others along fences—to create visual interest.
Next, hang macramé plant hangers from overhead structures like pergolas or tree branches. Fill them with trailing plants like string of pearls or fuchsia for soft, cascading movement. This layer adds movement and softens hard lines in the space. Avoid overcrowding; aim for 3-5 vertical pieces per section to keep it airy.
🪴 Step 3: Introduce Whimsical Focal Points
Now for the fun part—quirky details that make your garden uniquely yours. A painted wooden birdhouse (in muted pastels or bold colors) or a wind chime made of seashells adds charm without overwhelming the space. Place these near seating areas or along pathways where they’ll catch the eye.
For a playful touch, scatter terracotta pots in mismatched sizes filled with succulents or herbs. Group them in odd numbers (3 or 5) for a natural, collected look. Avoid symmetry—whimsical decor thrives on asymmetry. A small garden statue (like a gnome or a ceramic frog) can also anchor a corner and spark joy.
✂️ Step 4: Soft Layers with Textiles and Lighting
Textiles bring warmth and comfort. Drape a chunky knit throw over a bench or weave woven baskets into planters for a cozy feel. Choose fabrics in earthy tones or soft neutrals to complement your color palette. Add outdoor cushions in weather-resistant materials for seating areas.
Lighting sets the mood. String fairy lights along fences or wrap them around tree branches for a magical glow. Place solar-powered lanterns along pathways to guide visitors safely at night. For a whimsical touch, add candle holders (real or LED) in varying heights—this creates depth and warmth as dusk falls.
💧 Step 5: Finishing Touches with Nature-Inspired Details
Incorporate natural elements to tie everything together. Scatter river rocks or smooth pebbles around planters for texture. Add a small water feature, like a bubble fountain or a miniature pond, to draw in wildlife and soothe the senses.
Finally, don’t forget the little details: hand-painted signs with garden quotes, driftwood slices as plant markers, or woven coasters on side tables. These finishing touches make your garden feel lived-in and intentional. Step back and admire—your whimsical layers should feel cohesive yet full of personality!
Tips & tricks for whimsical garden decor that stands out
Creating a garden that feels magical takes more than just throwing together pretty things—it’s about intentional layering and those little details that make it uniquely yours. Here’s what I’ve learned from transforming my own space into a whimsical retreat.
Start with the Golden Ratio: When placing your 12-18 inch tall planters in Step 2, aim for a 1:3 ratio—one large focal piece to three smaller accents. This creates natural balance without feeling forced. For example, place one big ornamental grass planter near your seating area, then scatter three smaller bamboo pots around it. This trick works for all layers, from terracotta pots in Step 3 to candle holders in Step 4.
Color Harmony Secret: Pick a dominant color palette (like soft blues and greens) and use it across all layers—your chunky knit throw, fairy lights, and even painted wooden birdhouse. I like to pull colors from nature around me: if my garden has lots of lavender, I’ll use that hue in my textiles. This creates cohesion without needing to match everything exactly.
Functional Whimsy: Every decorative piece should serve a purpose. That vintage-style metal gate in Step 1? Use it to mark a secret garden corner or as a privacy screen. Those macramé plant hangers? Hang them near seating areas so they provide shade while adding beauty. The magic happens when decor doubles as functional elements—no wasted space!
Lighting Layering: Don’t just string up fairy lights randomly. In Step 4, I create three layers of lighting: ambient (overhead string lights), task (solar-powered lanterns along pathways), and accent (candle holders at varying heights). This makes your garden feel magical at night while also being practical for evening gatherings.
Pro Tips for Garden Decor Style
- Creating a garden that feels magical takes more than just throwing together pretty things—it’s about intentional layering and those little details that make it uniquely yours.
- Start with the Golden Ratio: When placing your 12-18 inch tall planters in Step 2, aim for a 1:3 ratio—one large focal piece to three smaller accents.
- Color Harmony Secret: Pick a dominant color palette (like soft blues and greens) and use it across all layers—your chunky knit throw, fairy lights, and even painted wooden birdhouse.
Frequently asked questions
Got questions about transforming your garden into a stylish, inviting space? Here are some of the most common queries—and answers—to help you get started with confidence!
What’s the best budget-friendly way to start garden decor?
Start small with thrifted or repurposed items like vintage signs, old wooden crates, or even painted rocks. Add potted plants from local nurseries or swap decor with neighbors. Focus on one focal point (like a trellis or birdbath) to create impact without overspending.
How do I choose a decor style that matches my home?
Look to your home’s architecture and color palette for clues. A cottage-core garden pairs well with pastel homes, while rustic metal accents suit farmhouse styles. Mix textures (e.g., woven baskets + smooth stone) for harmony. Pro tip: Snap photos of your favorite outdoor spaces for inspiration!
Can I install garden decor myself, or should I hire a pro?
DIY is perfect for lightweight items like planters, solar lights, or wall art. For heavier pieces (e.g., stone statues, fountains, or pergolas), hire a pro to avoid damage or injuries. Check local permits if installing permanent structures like trellises or decks.
How do I protect garden decor from weather damage?
Use weather-resistant materials like treated wood, galvanized metal, or resin. Store delicate items (e.g., ceramic pots) in a shed during storms. Elevate decor off the ground with concrete blocks or pedestals to prevent water damage. Seal wooden pieces annually with outdoor varnish.
What’s the easiest low-maintenance decor to keep my garden looking fresh?
Opt for drought-tolerant plants (e.g., succulents, lavender) paired with artificial greenery or faux flowers for year-round color. Solar-powered lights, pebble pathways, and self-watering planters also reduce upkeep. Choose durable fabrics (like polyester) for outdoor cushions.
Wrapping up and next steps
Transforming your garden into a stunning, whimsical retreat is easier than you think! From natural textures to playful accents, the right decor can turn your outdoor space into a showstopper that reflects your personality.
Whether you’re drawn to rustic charm, boho elegance, or modern minimalism, the key is to layer elements thoughtfully—start small, experiment, and let your creativity bloom! 🌿✨
Ready to take the next step? Sketch a vision, gather inspiration from local nurseries or Pinterest, and begin with one statement piece—like a vibrant planter or a quirky sculpture. Your garden’s curb appeal (and joy!) will thank you.