Tools
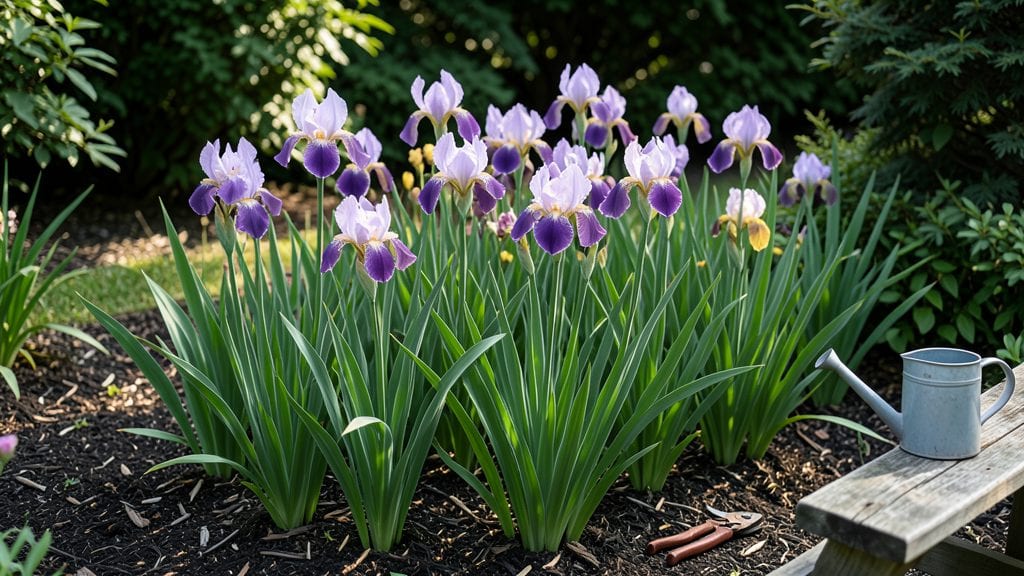
My iris garden transformed my backyard from ordinary to unforgettable—those sword-like leaves and dramatic blooms create vertical drama that no other plant can match. 🌿 I planted them along my front walkway, where their rich purple spikes stand out against the green, and now neighbors stop to ask which flowers they are.
The key is spacing them 12-18 inches apart so each plant has room to establish its strong rhizomes without crowding.
Pairing irises with other perennials makes the design even stronger. I tuck low-growing thyme or catmint at their base to fill empty spaces, while taller grasses like fountain grass sway behind them for movement.
For a cottage garden feel, mix in peonies or daylilies—they bloom at different times, ensuring color from spring through summer. The rhizomes thrive in well-draining soil, so amending clay with compost makes all the difference.
What really sells me on irises is how they perform with almost no effort. Once established, they spread slowly but surely, creating natural drifts that look intentionally planted. The foliage stays attractive even after blooming, and deer tend to leave them alone.
In late summer, you can cut back the old leaves to keep the garden tidy while still enjoying their architectural presence.
This design works for any garden style—formal borders, wild meadows, or even container gardens. The secret is letting their natural shape shine while using companions to enhance their drama. Ready to add some bold vertical accents to your space? Let’s get planting!
📚 In This Guide
- What you need
- Instructions
- Tips and common mistakes
- Wrapping up and next steps
What you need
- ● Iris rhizomes: Choose bearded irises (for classic blooms) or siberian/Japanese irises (for height and texture). Plan for 3–5 rhizomes per square foot for a lush look.
- ● Well-draining soil: Mix 1 part compost with 2 parts native soil or sand to prevent rot. Test soil pH—irises thrive in 6.0–7.0.
- ● Organic mulch: 2–3 inches of pine bark, straw, or shredded leaves to retain moisture and suppress weeds.
- ○ Stakes or trellises (optional but recommended): Tall irises (like Siberian) benefit from bamboo stakes or wire mesh (4–6 ft tall) for vertical support.
- ● Slow-release fertilizer: 5-10-10 NPK ratio (apply 2 tbsp per square foot at planting time).
- ● Garden trowel or transplant spade (for precise rhizome placement).
- ● Pruners or shears (for trimming foliage post-bloom).
- ● Garden hose with adjustable nozzle (for gentle watering).
- ● Measuring tape or ruler (to space rhizomes 12–24 inches apart).
- ● Gloves (to protect hands from sharp rhizome edges).
- ● Decorative rocks or pebbles (for a modern, minimalist border around plantings).
- ● Drip irrigation system (to automate watering and reduce maintenance).
- ● Companion plants: Pair irises with salvia, catmint, or ornamental grasses for texture contrast.
- ● Garden markers (to label varieties if you’re experimenting with colors/heights).
How to design a striking iris garden with vertical impact
Here's my approach to crafting an iris garden that stands out all season long—bold, layered, and effortlessly elegant.
🌱 Step 1: Choose the Right Iris Varieties for Height and Seasonal Interest
Start with a mix of bearded irises (the classic sword-leaf types) and sibiritis (taller, more delicate varieties) to create vertical drama. For early spring color, plant Iris reticulata or Iris histrioides—they bloom when little else does. I always include at least two bearded iris varieties (like 'Blue Flag' and 'Purple Sword') for mid-season drama, plus one tall sibiritis (such as 'Harmony' or 'Caesar's Brother') to anchor the back.
Real talk: Avoid planting all irises of the same height. You'll end up with a flat, boring look. Instead, stagger heights from 12 inches (reticulatas) to 36 inches (sibiritis) for that wavy, layered effect. Group 3-5 plants of each variety together—they'll multiply over time, filling in naturally.
☀️ Step 2: Select the Perfect Sunny Spot with Well-Draining Soil
Irises demand full sun—at least 6 hours daily—for their best blooms. I test locations by marking where the sun hits at midday (their peak energy time). If your soil drains poorly, amend with 2-3 inches of coarse sand or perlite mixed into the top 12 inches of soil. Irises rot in soggy conditions, and that's a heartbreak you don't need.
Dig a hole twice as wide as the root ball but only as deep as the rhizome sits naturally. The top of the rhizome should peek above soil level—never bury it. I like to mound the soil slightly around the base to encourage drainage. If your garden has heavy clay, consider raised beds or containers for irises—they'll thrive with the extra airflow.
🪴 Step 3: Plant Rhizomes Correctly for Strong Growth
Handle rhizomes like delicate treasures—no squeezing or bending. Plant them 3-4 inches apart in rows 18-24 inches apart for a natural, flowing look. The "fan" of roots should face outward, not upward. I always plant with the thicker end toward the back of the border, so the blooms arch gracefully forward.
Press the soil lightly around the rhizome but don't tamp it down. The key is loose, well-draining soil—irises hate compacted roots. Water deeply once after planting, then let the soil dry out completely before watering again. Overwatering now will smother the roots before they establish.
✂️ Step 4: Mulch Lightly and Prune for Next Season's Blooms
Skip heavy mulch—irises prefer their rhizomes exposed to sunlight and air. Instead, spread a 2-inch layer of gravel or coarse bark around the base to deter weeds while keeping the rhizomes dry. I avoid organic mulch like wood chips, which can rot against the rhizomes and invite slugs.
After blooms fade, cut back the leaf stalks to 6 inches tall but leave the fan of sword leaves intact. These leaves feed next year's flowers, so don't remove them! I mark each clump with a small stake to track varieties—irises multiply fast, and you'll forget which is which by spring.
💧 Step 5: Feed and Maintain for Long-Term Elegance
Feed irises once a year in early spring with a low-nitrogen, high-phosphorus fertilizer (like 5-10-10). I scatter granules around the base, then water deeply to wake up the roots. Too much nitrogen = lush leaves, but few blooms. Irises are divas—they want strong roots, not leafy greenery.
Divide clumps every 3-4 years when blooms thin or leaves crowd. Dig up rhizomes in late summer, separate the fans, and replant immediately. Discard the oldest, woody centers—they won't rebloom. This keeps your garden vibrant and prevents overcrowding. You'll see stronger, more abundant blooms within a season of dividing.
Tips & tricks for perfect iris garden design
Creating a showstopping iris garden takes more than just planting—it's about strategic layering and care that makes all the difference. Here's what I've learned after years of trial and error to ensure your vertical iris display thrives.
Variety Layering: In Step 1, when selecting your iris varieties, consider planting reticulatas in the front for their early spring blooms, then progress to bearded irises in the middle, and finally tall sibiritis at the back. This creates a stunning wave of color that unfolds throughout the season. I like to place the tallest varieties (30-36 inches) against fences or walls to maximize their vertical impact while keeping the shorter 12-18 inch reticulatas near pathways where you can appreciate their delicate blooms up close.
Soil Preparation Secret: For Step 2, don't just amend the soil—transform it. I've found that mixing in 1 part coarse sand to 2 parts garden soil creates the perfect drainage while retaining enough moisture. Test your soil's drainage by digging a hole, filling it with water, and timing how long it takes to drain completely. If it takes longer than 30 minutes, you need more sand. This simple test prevents the heartbreak of rotting rhizomes.
Planting Orientation: When following Step 3, pay attention to how you position each rhizome. The thicker end should always face the back of the border, while the thinner end points forward. This creates a natural arching effect as the blooms emerge. I've noticed that when planted this way, the flowers tend to face outward, making them more visible from garden paths and viewpoints. It's a small detail that makes a big difference in the overall visual impact.
Pruning Precision: In Step 4, when cutting back leaf stalks after blooming, use clean, sharp pruners and cut at a 45-degree angle just above a leaf node. This encourages new growth from the base while maintaining the plant's energy reserves. I've learned the hard way that leaving too many leaves can shade the rhizomes and reduce next year's blooms. Aim to leave about 6 inches of healthy leaves—this gives the plant enough time to store energy for next season's flowers.
Pro Tips for Iris In Garden
- Creating a showstopping iris garden takes more than just planting—it's about strategic layering and care that makes all the difference.
- This creates a stunning wave of color that unfolds throughout the season.
- Soil Preparation Secret: For Step 2, don't just amend the soil—transform it.
Frequently asked questions
Got questions about adding irises to your garden? You’re not alone! Here are some of the most common inquiries—plus quick, practical answers to help you design with confidence.
When is the best time to plant irises in my garden?
The ideal time to plant irises is in early fall (6–8 weeks before the first frost) or late winter/early spring (as soon as the soil is workable). This gives roots time to establish before extreme heat or cold. Avoid planting in summer—irises hate soggy soil and high temperatures!
How often should I water newly planted irises?
Water irises deeply but infrequently—about once a week during the first growing season (unless rain does the job). Once established, they’re drought-tolerant! Overwatering can rot rhizomes, so let the soil dry out between waterings. Pro tip: Aim the hose at the base, not the leaves, to prevent fungal issues.
Can I grow irises in containers, or do they need garden beds?
Irises thrive in containers with well-draining soil and a mix of sand/perlite. Choose pots with drainage holes (at least 12 inches deep) and place them in full sun. Just repot every 3–4 years to refresh the soil and divide overcrowded rhizomes. Bonus: Container irises add vertical drama to patios and balconies!
Why are my iris leaves turning yellow, and how do I fix it?
Yellowing leaves often signal overwatering, fungal disease (like iris borer), or nutrient deficiency. First, check drainage—irises hate "wet feet." If fungal spots appear, remove affected leaves and treat with neem oil. For nutrients, feed with a balanced fertilizer in early spring. Preventive tip: Space plants 12–24 inches apart for airflow.
What’s the easiest way to add height and drama with irises?
Plant irises in odd-numbered groupings (3, 5, or 7) along pathways, borders, or near water features for vertical impact. Pair tall bearded irises (3–4 feet) with shorter Siberian or Louisiana types for layered texture. Design hack: Use them as natural "room dividers" in cottage-style gardens!
Wrapping up and next steps
Transforming your garden with irises is a rewarding way to add year-round elegance and bold vertical accents—whether you’re a seasoned gardener or just starting out. From choosing the right varieties to mastering care techniques, every step brings you closer to a stunning, low-maintenance landscape that blooms with personality. 🌸
Now that you’re armed with the knowledge, why not take the next step? Start small with a single iris border or go big with a full garden redesign. Your garden’s masterpiece is just a shovel’s throw away!