Tools
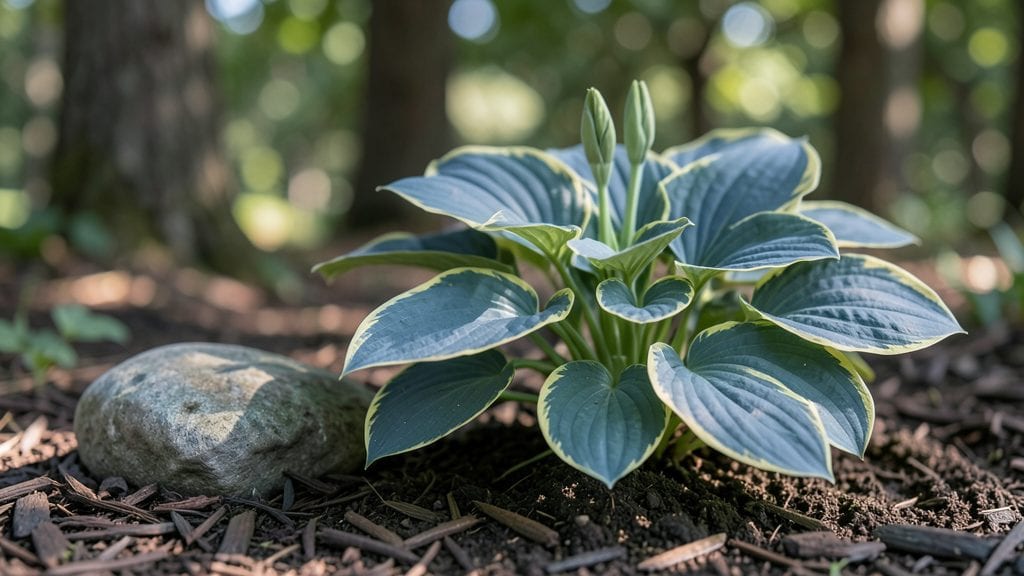
A mini hosta garden transforms shady corners into lush, low-maintenance living art—just a few square feet of foliage magic that thrives where nothing else will. 🌿 I designed mine in a 3x3-foot patch under a maple tree, and now it’s the green jewel of the yard, even when everything else is brown.
The secret? Layering dwarf varieties with contrasting colors and textures so they play off each other all season.
Start with three core supplies: a small shovel, a 2-inch layer of compost mixed into the soil, and 5-7 hosta varieties (think ‘Blue Mouse Ears’ for drama, ‘Halcyon’ for golden edges, and ‘Francee’ for compact size).
Add a few shade-tolerant companions like ferns or astilbe to fill gaps, and you’ve got instant structure. Containers work too—just use pots with drainage and group odd numbers for natural balance.
By summer, you’ll have a velvety carpet of leaves in blues, golds, and deep greens that stay vibrant even in deep shade. The best part? Hostas multiply every year, so you’ll have extras to share or replant.
Just remember: keep the soil moist (but not soggy) and pull weeds before they steal the show.
This design scales from a balcony planter to a woodland-edge garden—adjust the scale, not the principles. Whether you’re reviving a dull corner or adding color to a patio, hostas deliver year-round interest with almost no effort. Let’s build yours!
📚 In This Guide
- What you need
- Instructions
- Tips and common mistakes
- Wrapping up and next steps
What you need
- ● Hostas: 5–10 plants (mix of sizes: 3–4 medium, 2–3 small, and 1–2 large for depth). Tip: Choose varieties like Hosta 'Blue Angel' or Hosta 'Francee' for vibrant colors!
- ● Container or in-ground bed: Containers: 3–5 pots (12–18" diameter) with drainage holes, or a single large trough (e.g., 24" x 12").
- ● In-ground: A 2' x 2' shaded spot with well-draining soil.
- ● Potting mix: 5–10 gallons of moisture-retentive, well-draining mix (e.g., 60% peat moss, 30% perlite, 10% compost).
- ● Mulch: 2–3 bags of organic mulch (e.g., shredded bark or pine needles) to retain moisture.
- ● Garden tools: Trowel or small hand shovel
- ○ Gloves (optional but recommended!)
- ● Decorative accents: Small rocks, pebbles, or moss for texture.
- ● Fertilizer: Slow-release balanced fertilizer (10-10-10) or organic options like worm castings.
- ● Shade cloth: If your spot gets partial sun, use lightweight shade cloth (30–50% coverage).
- ● Label tags: For tracking hosta varieties (because every hosta deserves a name!).
Step-by-Step instructions for creating a mini hosta garden
Here's how to craft a lush, layered shade garden that thrives year-round with minimal fuss.
🌱 Step 1: Choose and Prepare Planting Sites
Hostas love partial to full shade, so scout your space for areas receiving 2-6 hours of morning sun or dappled light all day. Avoid spots where water pools—hostas rot easily when soggy. I mark each spot with a 12-inch diameter circle (using a garden hose or chalk) to visualize planting zones.
Loosen the soil within each circle to a depth of 6-8 inches using a garden fork. Amend with 2-3 inches of compost mixed into the top 4 inches of soil. This improves drainage while feeding roots. If your soil is heavy clay, add 1 part perlite to every 3 parts soil to create air pockets.
🪴 Step 2: Plant Hostas at the Right Depth
Dig holes slightly wider than the hosta's root ball but no deeper—the crown (where roots meet stems) should sit just below soil level. This prevents rot while allowing foliage to emerge above ground. Gently tease apart roots if they're circling tightly in the pot.
Place each hosta in its hole, spacing smaller varieties (12-18 inches apart) and larger ones (24-36 inches apart). Fill gaps with soil, pressing lightly to eliminate air pockets. Water deeply until moisture reaches 4 inches down—this settles the roots and removes air gaps.
☀️ Step 3: Layer Mulch for Moisture and Protection
Spread 2-3 inches of shredded bark mulch (or pine needles) over the soil surface, keeping it 2 inches away from stems to prevent rot. Mulch conserves moisture, regulates soil temperature, and suppresses weeds—hostas hate competition. I use dark brown mulch to contrast with the vibrant foliage.
Water again after mulching to help it settle and make contact with the soil. Avoid wetting the leaves when watering—this promotes fungal diseases. Instead, water at the base until the top 2 inches of soil feel damp (not soggy).
🌿 Step 4: Maintain for Year-Round Beauty
Hostas thrive with consistent moisture—water 1-2 times weekly during dry spells, adjusting for rainfall. Yellowing leaves? You're either overwatering or underwatering. Check soil moisture by sticking your finger 1 inch down; if dry, water. If muddy, hold off.
Divide clumps every 3-4 years when centers become bare. Dig up the plant, split with a clean knife, and replant sections. Fertilize lightly in early spring with a balanced 10-10-10 formula—hostas don’t need much, just enough to keep leaves lush.
✂️ Step 5: Prune and Protect Seasonally
Remove yellow or damaged leaves in early spring to encourage new growth. Cut back brown foliage after the first frost, but leave healthy leaves until spring—they protect the crown. In late fall, apply a 2-inch layer of mulch to insulate roots through winter.
Watch for slugs and snails—hostas are a favorite! Place copper tape barriers around plants or use organic slug bait (like iron phosphate) if needed. A few nibbles won’t kill them, but heavy damage ruins the look. I check for pests after rain, when they’re most active.
Tips & tricks for perfect mini hosta garden
Creating a stunning mini hosta garden comes down to a few key details that make all the difference between a garden that thrives and one that struggles.
Location is Everything: The 2-6 hours of morning sun mentioned in Step 1 is crucial—hostas can handle shade, but they need that gentle morning light to prevent leggy growth. I've seen hostas in deep shade grow tall and sparse, while those with morning sun stay compact and vibrant. If your space only gets afternoon sun, consider moving your hostas to a spot with filtered light instead.
Soil Prep Makes the Difference: Don't skip the 6-8 inch soil loosening in Step 1—this creates room for roots to spread without competing with compacted soil. For heavy clay soil, I've found mixing in perlite (1 part to 3 parts soil) dramatically improves drainage. You'll notice the difference when your hostas don't develop those telltale yellow patches from waterlogged roots.
Planting Depth Matters: The crown sitting just below soil level in Step 2 is non-negotiable—this prevents rot while allowing new shoots to emerge. I've made the mistake of planting too deep, and my hostas took forever to recover. When in doubt, remember: the crown should be at soil level, with roots below and stems above.
Mulch Like a Pro: The 2-3 inches of mulch in Step 3 isn't just decoration—it's insulation. I've seen hostas in unmulched beds develop frost damage in winter and dry out faster in summer. Keep that mulch 2 inches away from stems to prevent rot, and always water at the base (never overhead) to keep leaves dry and disease-free.
Pro Tips for Mini Hosta Garden
- Creating a stunning mini hosta garden comes down to a few key details that make all the difference between a garden that thrives and one that struggles.
- Location is Everything: The 2-6 hours of morning sun mentioned in Step 1 is crucial—hostas can handle shade, but they need that gentle morning light to prevent leggy growth.
- Soil Prep Makes the Difference: Don't skip the 6-8 inch soil loosening in Step 1—this creates room for roots to spread without competing with compacted soil.
Frequently asked questions
Got questions about creating your dream mini hosta garden? We’ve got answers!
Whether you're a beginner or a seasoned green thumb, these FAQs will help you grow a thriving, low-maintenance shade garden with ease.
What’s the best time of year to plant hostas in a mini garden?
Plant hostas in early spring or early fall for the best results. This gives roots time to establish before extreme heat or cold. Avoid planting in summer—hostas hate drought stress! If you’re adding to an existing garden, spring is ideal for quick color.
How often should I water my mini hosta garden?
Hostas love moisture but hate soggy soil. Water deeply 1–2 times per week, adjusting for rain. In containers, check soil moisture daily—small pots dry out faster. Mulch with shredded bark to retain moisture and suppress weeds. Pro tip: Morning watering prevents fungal issues!
Can I grow hostas in containers instead of a ground garden?
Containers are perfect for mini hosta gardens. Use well-draining pots (12+ inches deep) with a mix of potting soil and compost. Dwarf varieties like ‘Blue Mouse Ears’ or ‘Halcyon’ thrive in pots. Just ensure they get partial to full shade and consistent moisture.
What pests should I watch for in a mini hosta garden?
Hostas attract slugs, snails, and deer. Prevent pests with:
- Copper barriers or beer traps for slugs.
- Row covers or fencing to deter deer.
- Neem oil spray for early signs of damage.
Quick fix: Handpick slugs at night with a flashlight!
Do hostas survive winter in a mini garden?
Most hostas are hardy to USDA Zones 3–9. In colder climates, mulch heavily with straw or leaves to protect roots. Containers may need winter wrapping (bubble wrap or insulation) to prevent freezing. Evergreen varieties like ‘Francee’ add winter interest!
Wrapping up and next steps
A mini hosta garden is the perfect way to bring lush, low-maintenance beauty to shady spots in your yard—no green thumb required! 🌿 With the right selection of hostas, soil prep, and a little creativity, you’ll enjoy vibrant foliage that thrives year-round.
Whether you’re a beginner or a seasoned gardener, this project is rewarding and adaptable to any space.
Ready to transform your shady corner? Start small—pick your favorite hosta varieties, gather your supplies, and dive in! Soon, you’ll be basking in the serene, layered charm of your very own mini hosta haven. Happy gardening! 🌱