Lawn
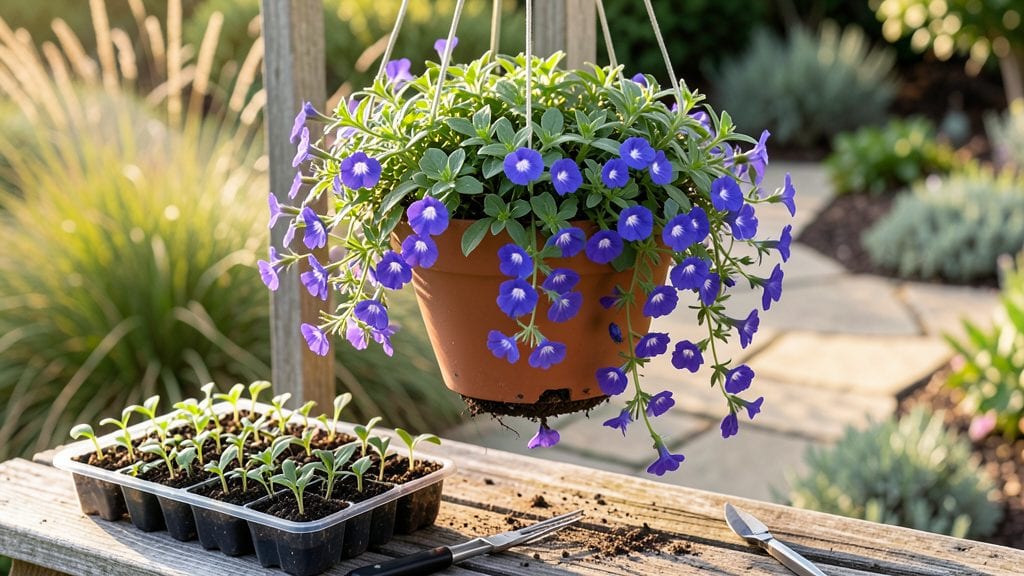
Growing a thriving garden from seed sheets lets you pack more plants into less space than ever before. 🌱 I discovered this method after struggling with finicky seedlings in my tiny urban patio, and it changed how I garden forever.
These thin, paper-like sheets are pre-sown with seeds and nutrients—just lay them down, water, and watch growth happen.
The beauty of seed sheets is how foolproof they are for beginners. You don’t need fancy trays or precise lighting—just a flat surface, a spray bottle, and a sunny window.
My first batch of basil sprouted in just 5 days, and I’ve since grown everything from lettuce to marigolds this way. The roots stay intact, so transplant shock disappears completely.
By the time your seedlings are ready to move outdoors, they’ll be sturdy and ready to thrive. The paper dissolves in soil, leaving no waste behind, and you’ll save money by growing from seed instead of buying transplants.
Plus, the layered growth means you can fit more plants in smaller spaces—perfect for balconies, windowsills, or even hanging gardens.
This method works year-round indoors or as a cold-hardy early spring option. Once you try it, you’ll wonder how you ever grew plants any other way. Let’s get those sheets growing!
📚 In This Guide
- What you need
- Instructions
- Tips and common mistakes
- Wrapping up and next steps
What you need
- ● Seed sheets – 1–5 sheets (depending on space; opt for biodegradable or hydroponic varieties for best results).
- ● Growing tray or shallow container – 1 (10"x20" or larger; ensure drainage holes).
- ● Growing medium – 1–2 cups of coco coir, peat moss, or seed-starting mix (sterilized).
- ● Water spray bottle – 1 (fine mist setting for gentle hydration).
- ○ Clear plastic dome or plastic wrap – 1 (to retain humidity; optional but helpful for germination).
- ● Scissors or craft knife – 1 (for cutting seed sheets to fit trays).
- ● Ruler or measuring tape – 1 (for spacing seeds evenly).
- ○ LED grow light (optional) – 1 (12–16 hours/day if natural light is <5 hours).
- ● Fertilizer (balanced or organic) – Small bottle (diluted to half-strength for seedlings).
- ● Plant labels or toothpicks – 5–10 (to track varieties).
- ● A sunny windowsill, balcony, or indoor grow setup (6+ hours of light daily).
- ● Patience – Seed sheets germinate in 3–14 days (varies by plant type!).
- ● Consistency – Daily checks for moisture and light exposure.
How to create a seed sheet garden for compact spaces
This layered growing method turns flat surfaces into thriving gardens—perfect for small apartments or urban balconies.
🌱 Step 1: Gather Your Materials and Prep the Base Layer
Start with a 4-6 inch deep tray (like a shallow plastic container) and line the bottom with 1 inch of coarse gravel. This ensures proper drainage—critical for preventing root rot in layered systems. I like to use 1 square foot of landscape fabric over the gravel to block soil from washing through while still allowing water to drain freely.
Next, add 2 inches of high-quality potting mix across the entire tray. Press it down lightly so it's firm but not compacted. The goal is a stable base where roots can anchor without sinking into loose material. If your mix feels dry, mist it evenly with water until the surface is damp but not soggy.
🪴 Step 2: Plant Deep-Rooted Annuals in the Bottom Layer
For your 4 seed sheet gardens, divide the bottom layer into sections. Plant carrot seeds and radish seeds—both grow well in deeper layers and tolerate being buried. Space them ½ inch apart in rows 1 inch apart to allow room for expansion. These will form the foundation of your layered system.
Cover the seeds with ¼ inch of fine potting mix, then water gently with a spray bottle until the soil looks evenly moist. Avoid soaking—you want the top layer to stay light and airy for germination. Place the tray in a warm spot (65-75°F) with bright indirect light until sprouts appear in 7-10 days.
☀️ Step 3: Add Mid-Layer Plants for Vertical Growth
Once your bottom layer shows first true leaves, it's time to add the middle tier. Sprinkle lettuce seeds and spinach seeds directly on top of the existing layer—no need to disturb the roots below. These shallow-rooted greens will grow upward between the deeper plants, creating a lush, layered effect.
Lightly press the seeds into the soil surface (just enough to make contact) and water again with a fine mist. Keep the tray in full sun now—these greens need 6+ hours daily to stay vibrant. You'll see tiny sprouts in 5-7 days, and within 3 weeks, they'll form a dense mat above your carrots and radishes.
🌿 Step 4: Top With Fast-Growing Herbs for Instant Harvests
For the final layer, scatter basil seeds and microgreens (like sunflower or pea shoots) across the top. These grow quickly and provide instant harvests while shading the soil to retain moisture. Press them lightly into the surface—no deeper than ⅛ inch—then water thoroughly until water runs out the drainage holes.
Place the tray in a sunny windowsill or under grow lights for 12-14 hours daily. You'll notice basil leaves appear in 10-14 days, while microgreens are ready to harvest in just 7-10 days. This top layer also helps regulate temperature for the slower-growing roots below.
⏰ Step 5: Maintain With Consistent Care
Water the seed sheet every 2-3 days, checking when the top inch feels dry. Use room-temperature water to avoid shocking the roots. Fertilize lightly with diluted fish emulsion every 2 weeks—just enough to feed the top layer without overwhelming the deeper plants.
Rotate the tray quarter-turn daily to ensure even light exposure. You'll know it's working when all layers thrive: carrots grow downward, greens fill the middle, and herbs top the sheet. Harvest greens first, then radishes, leaving carrots to mature last—this staggered approach keeps your garden productive for 8-12 weeks.
Tips & tricks for perfect seed sheet gardens
Here's what I've learned after growing these layered gardens for years—small details make all the difference.
Layering Secret: The key to this system working is maintaining the exact depth ratios between layers. In Step 1, when you add your 2 inches of potting mix, make sure it's evenly distributed—uneven bases cause drainage issues later. I like to use a straight edge to level it off perfectly. For the gravel layer, don't skimp—1 inch is minimum, but 1.5 inches gives better drainage for deep-rooted carrots.
Germination Timing: In Step 2, when planting your carrot and radish seeds, don't be tempted to cover them with more than the specified ¼ inch of soil. These seeds need light to germinate properly. I've found that using a fine mesh strainer to sift the soil creates the perfect even coverage. Place the tray in a warm spot (75°F is ideal) with bright indirect light—this combination gives you those sprouts in exactly 7-10 days as specified.
Light Transition Tip: The shift from indirect to full sun in Step 3 is crucial. When your bottom layer shows first true leaves, move the tray to full sun gradually over 2-3 days. I start by placing it near a south-facing window for just 2 hours the first day, then increase by 1 hour daily. This prevents shock to the tender seedlings that could stunt their growth.
Harvest Strategy: The staggered harvest approach in Step 5 works best when you follow this order: harvest basil and microgreens first (they're ready in 7-10 days), then spinach and lettuce (3 weeks), and finally radishes (4-6 weeks), leaving carrots until week 8-12. This prevents overcrowding and ensures each plant gets the nutrients it needs at its growth stage. Use clean scissors to snip herbs just above a leaf node to encourage regrowth.
Pro Tips for Seed Sheet Garden
- Here's what I've learned after growing these layered gardens for years—small details make all the difference.
- Layering Secret: The key to this system working is maintaining the exact depth ratios between layers.
- Germination Timing: In Step 2, when planting your carrot and radish seeds, don't be tempted to cover them with more than the specified ¼ inch of soil.
Frequently asked questions
Got questions about seed sheet gardens? You’re not alone!
Here’s a quick rundown of the most common queries—plus straightforward answers to help you grow with confidence.
What’s the best time of year to start a seed sheet garden?
Seed sheets thrive in spring or early summer when temperatures are mild (50–75°F). Avoid planting in extreme heat or frost—most seeds germinate best with consistent moisture and warmth. For fall crops (like lettuce or spinach), start 8–10 weeks before your first frost date. Pro tip: Check your seed packet for specific timing!
How often should I water my seed sheet garden?
Keep the sheets consistently moist (not soggy!) by misting lightly 2–3 times daily until germination (usually 7–14 days). After sprouts appear, water every 1–2 days, ensuring the soil layer stays damp. A spray bottle or gentle watering can works best—avoid over-saturating to prevent mold. Place your garden in a shallow tray to catch runoff!
Can I use seed sheets indoors without sunlight?
Yes! Seed sheets grow well under grow lights (12–16 hours/day) or near a sunny window. Place them on a south-facing sill or use a LED bulb 6–12 inches above the sheets. Monitor growth closely—if leaves stretch (called "etiolation"), it’s a sign of insufficient light. Rotate sheets weekly for even exposure!
What do I do if my seed sheet mold grows?
Mold (fuzzy gray/green spots) usually means too much moisture or poor airflow. Remove moldy sections immediately, then adjust care: water less frequently, ensure good ventilation (like placing near an open window or fan), and avoid overcrowding. Prevent future issues by using sterilized water and spacing sheets 1–2 inches apart.
Are seed sheets reusable after harvest?
Most seed sheets are single-use—once plants are harvested, the paper breaks down. However, you can repurpose the tray or compost the sheets! For a second crop, plant new seeds directly into the soil layer or start fresh sheets. Extend use by adding a thin layer of potting mix and replanting fast-germinating seeds like microgreens.
Wrapping up and next steps
A seed sheet garden is your ticket to lush greenery—no sprawling yard required! 🌱 Whether you're a beginner or a seasoned green thumb, these layered, space-saving sheets make growing herbs, veggies, or flowers effortless.
With minimal tools and a dash of creativity, you can transform tiny balconies or windowsills into thriving oases.
Ready to dive in? Start small—grab a seed sheet, pick your plants, and let nature do the rest. Your future harvest (or just a happier windowsill) is waiting! 🌿